All Occasion Cards, Designer Series Paper Cards, Die Cut Cards, Interactive Cards, Stampin' Blends, Stampin' Up!

Bird Ballad Cards with Stampin’ Blends

Hello! I’ve had a wonderful time coming up with these cards using product from the Bird Ballad Suite. It’s such a sweet, elegant group of products. I really love that Stampin’ Up! has created an ordering number for the entire suite (for those of you who are like me and want everything in the suites we like). They also still have ordering number for individual products in each suite.

Check the end of this post for a YouTube video showing how to color and assemble these three cards. Thanks for taking a look! I invite you to leave me a comment on this post letting me know what you think of my cards. I love your feedback!

These delicate laser-cut notecards come with beautiful envelopes with scalloped flaps. The notecards are sold in a pack of 12 and come in a gorgeous petal pink tin with copper decoration. Check that out in the product link at the end of this post.

I hold about three classes a month in my home in Racine, WI and I always make sure that one of them is a Stampin’ Blends class. I really love coloring with these alcohol-based blending markers. I am always on the lookout for stamp sets that work well with coloring and the Blends markers. The “Free as a Bird” stamp set from this suite is one of those great for coloring sets.

The Designer Series Paper is usually what grabs my eye first from each suite and this Bird Ballad DSP was no exception. These charming designs and soft colors really spoke to me. Check out the video for another version of this card featuring a different DSP design.

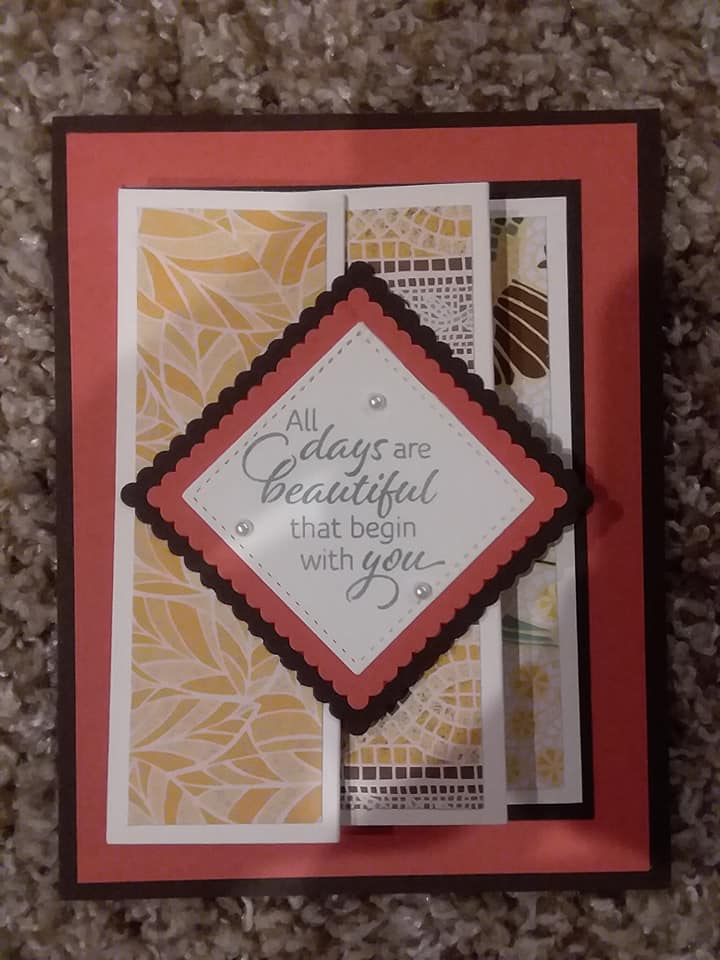
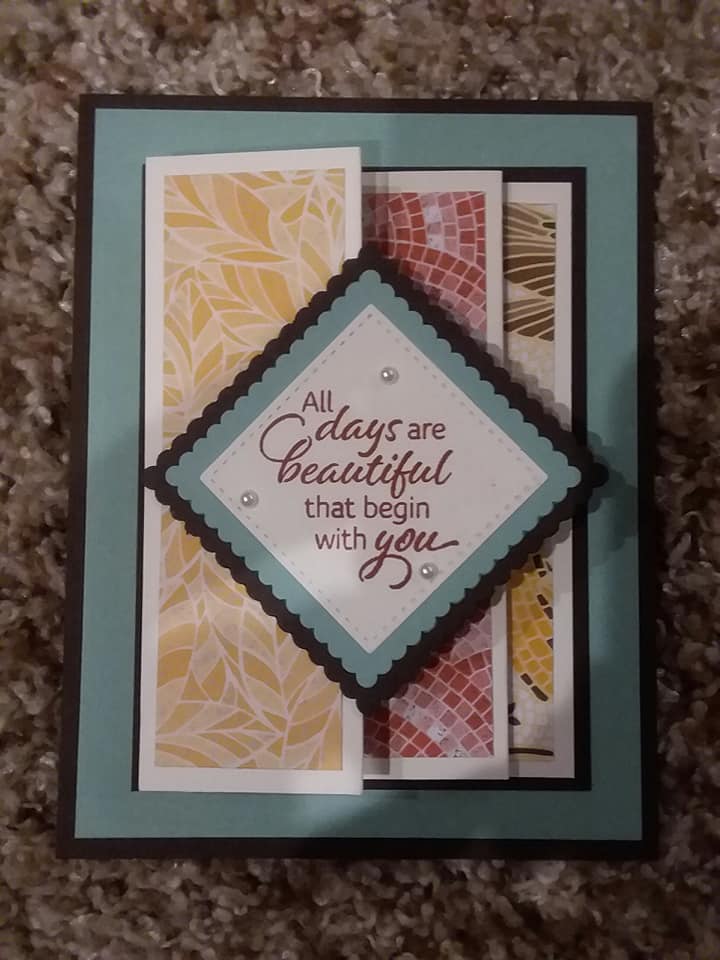
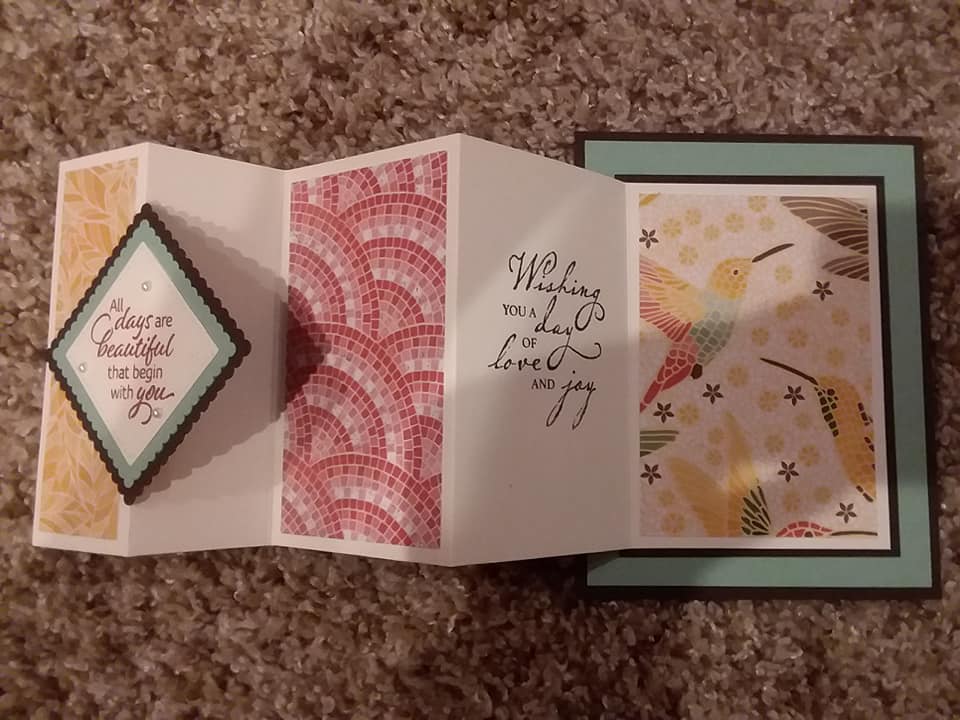
Stampin’ Up! added another die set with stitching to their die set line up with the Stitched Nested Labels dies from this suite. The Free as a Bird Stamp Set and the Stitched Nested Labels dies are available in a bundle for a 10% discount. I used the largest and third largest dies to make the frame for this second card. To do this you run them through a die cutting machine at the same time.

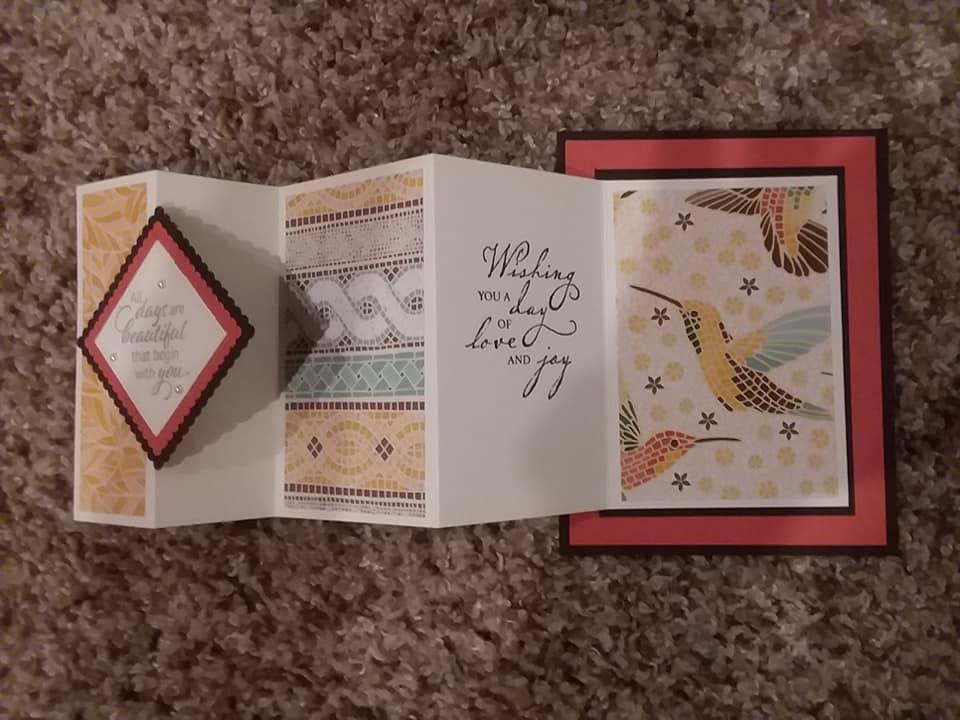
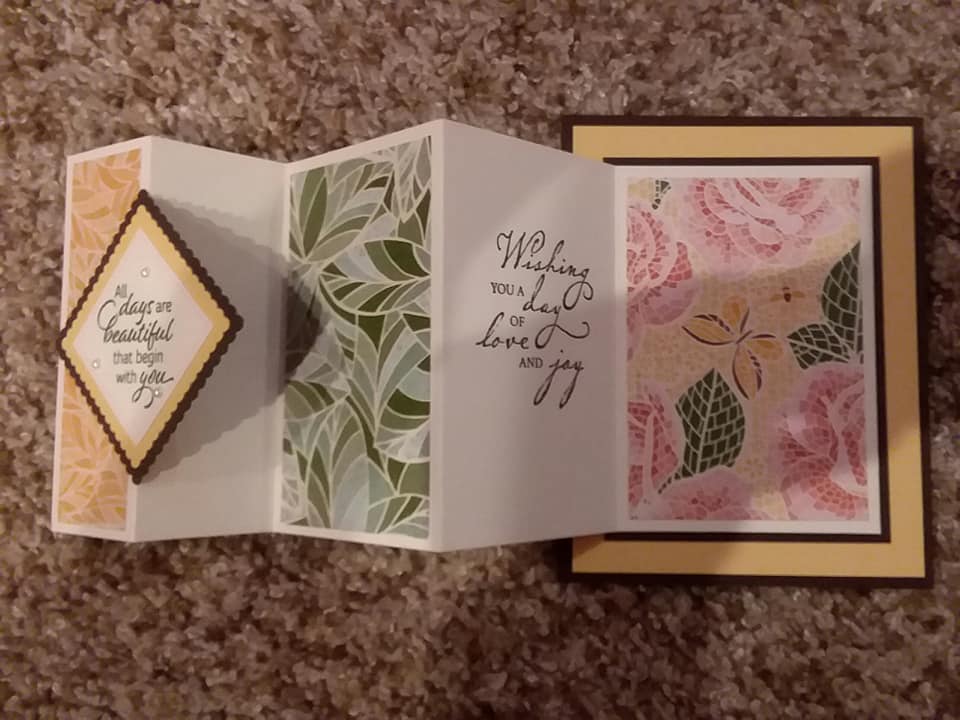
The above photo shows one of the four designs from the delightful Bird Ballad Trinkets.  Below you can see that I decided to change things up on the inside of my card and add what was left when I cut out my frame.

When I cut out white piece of cardstock for the sentiment in the card above I was left with a really cool negative image that cried out “sponge with me!” I was inspired to create this card below. You can see how I did that in the video.

I’m not sure how well you can see in the picture above but I did color the birds with my Seaside Spray Blends even with the Petal Pink sponging below the image, and it looks really neat. I also colored over the bird image with my Clear Wink of Stella Glitter Brush. Really adds a WOW factor to the simpler design of this card. I must have added these later, but I did put a few Rhinestones on this card too. It seems I thought of that at the end of the video. lol

Here’s the video I made that shows how to color and assemble these three cards. You will also get a more complete look at the products in the Bird Ballad Suite. Check it out and leave me a comment. I love to hear your thoughts! Be sure to “like” the video if you enjoyed the cards. 🙂

Related image

If you don’t already have a Stampin’ Up! demonstrator, I would love to be your go-to girl for all your stamping needs. 🙂  You can shop my Online Store 24/7.  Please let me know if there’s anything I can do to aid in your crafting experience. I am more than happy to do what I can to help!

If you are local to Racine, WI I invite you to join my Stampin’ Up! Facebook page, Joyfully Inked Cards with Stephanie Mackey. You can find info about classes, card ideas, crafting tips, and SU! news and promotions. I am able to share a little more often on Facebook than I am in my blog or on YouTube.

If you have thought about being a Stampin’ Up! demonstrator or are interested in a 20% discount, among other perks, I’d love to have you on my team, The Joyful Inkers. You can sign up here or contact me if you have questions or would like to talk more about this.

Joyful stamping!

~Stephanie

Product List

All Occasion Cards, Designer Series Paper Cards, Stampin' Up!, Techniques, Tutorials

Embossed Vellum Flower Card with Products from the Perennial Essence Suite

Hello everyone! I’m back (with much less time between posts this time!) with two fun and colorful versions of this card layout. It took me a long time to get comfortable designing my own cards, but the accomplishment and happiness I feel after I do create my own card is definitely worth the effort! Scroll down to the bottom of this post (after all the pictures) and you’ll find my YouTube video for these cards.

I really love both versions of this card. The card with the yellow (So Saffron) flower is so bright and cheery and the card with the pink (Petal Pink) flower on the right is so elegant and soothing. Besides the difference in color scheme there is also a slight variation in the dimensions. This is due to a cutting error at first, but I actually like the wider border on the card with the pink flower.

**Note**: I don’t think it’s visible in the pictures, but I popped up the cardstock layers (So Saffron on the left, Whisper White on the Left) with Stampin’ Dimensionals and Mini Stampin’ Dimensionals. The video shows this much more clearly.


Although the Floral Essence Stamp Set is the core of this suite, I really feel the Perennial Essence Designer Series Paper is the star of the Perennial Essence Suite. You can check out all the amazing designs at this link.


I wanted to make sure there was a picture that really showed the shine of the gold embossing powder on this version. I love the simple stamping on the inside of the card. Just a little something to pretty it up. 🙂 The stamp pads I used on this card were Versamark (for the embossing, So Saffron (flowers), Soft Suede (flower centers and sentiment).


Dimensions (Card with Soft Suede Base)

  • Base = 8 1/2 x 5 1/2″ (Scored on the long side at 4 1/4″)
  • So Saffron cardstock layer = 4 x 5 1/4″
  • DSP Layer = 3 7/8 x 5 1/8″
  • Sentiment Banner = 3 x 3/4″ (Trim left end as needed)
  • Inside cardstock layer = 4 x 5 1/4″


I love how the silver embossing powder really softened the look of this version. It goes so well with the blues and purples in the DSP. The stamp pads I used on this card were Versamark (for embossing), Petal Pink (flowers) and Mossy Meadow (flower centers and sentiment).


Dimensions (Card with Mossy Meadow Base)

  • Base = 8 1/2 x 5 1/2″ (Scored on the long side at 4 1/4″)
  • Whisper White cardstock layer = 3 7/8 x 5 1/8″
  • DSP Layer = 3 3/4 x 5″
  • Sentiment Banner = 3 x 3/4″ (Trim left end as needed- this sentiment is shorter than above so you could probably do 2 1/2 x 3/4″)
  • Inside cardstock layer = 3 3/4 x 5″

I really hope you have been inspired by this card. There are so many possibilities with this suite! I’d love to hear what you think of my cards. Which one is your favorite? Please leave me a comment and let me know your thoughts. I truly appreciate your feedback. Just be kind please! 🙂

Related image

If you don’t already have a Stampin’ Up! demonstrator, I would love to be your go-to gor; for all your stamping needs. 🙂  You can shop my Online Store 24/7 . Please let me know if there’s anything I can do to aid in your crafting experience. I am more than happy to do what I can to help!

If you are local to Racine, WI I invite you to join my Stampin’ Up! Facebook page, Joyfully Inked Cards with Stephanie Mackey. You can find info about classes, card ideas, crafting tips, and SU! news and promotions. I am able to share a little more often on Facebook than I am in my blog or on YouTube.

Joyful stamping!

~Stephanie

Product List

Paper Snips

$10.00
Designer Series Paper Cards, Fun Fold Cards, Stampin' Up!, Tutorials

Multi-Panel Pullout Card with Woven Threads & Mosaic Mood DSP

Hello everyone! I’m jumping back into blogging after quite a break.  I’m going to try to blog whenever the Brewers have day games and it lines up with my daughters’ naps. 🙂

I have lots of new ideas to share with you since the recent release of the new 2019-2020 Stampin’ Up! Annual Catalog.  Check out these beautiful cards featuring the brand new Woven Threads Designer Series Paper (DSP) and Mosaic Mood Specialty DSP. I can’t get enough of this card design. I just saw it a few weeks ago on fellow SU! demo, LeeAnn Greff’s, blog.  Is it new to you as well? Leave me a comment on this post and let me know. I’m curious which of these 4 designs is your favorite as well.

You can find my YouTube video for this card at the end of this post.


The Woven Threads Designer Series Paper features all 5 of the new In Colors: Pretty Peacock, Terracotta Tile, Seaside Spray, Purple Posy, and Rococo Rose.  These In Colors will only be around for the next two years so you’ll want to snatch them up now to have the most time to create with them. I love that this catalog has a suite of products dedicated just to the new 2019-2021 In Colors. The Woven Threads DSP is part of that suite. Click here to check out that In Color Suite. 


It doesn’t show up very well in the pictures but several of the Mosaic Mood Specialty DSP designs have clear embossing. The shine is so pretty! Like all of the 12 x 12 DSP packs, the Mosaic Mood Specialty pack comes with 12 sheets of paper, 2 each of 6 double-sided designs. One of each side has the shiny, clear embossing over the designs.


Measurements

-Back panel & 3rd from back layer= 4 1/4″ X 5 1/2″ & 3 1/4″ X 4 1/2″ (also scrap for die cutting biggest scalloped square)

-2nd from back layer = 4″ X 5 1/4″ & 2 1/2″  (also scrap for die cutting second biggest scalloped square)

-Whisper White 4 1/4″ X 11″,  scored at 1 1/2″, 3″, 5 1/2″ & 8″,  2 1/4″ (also scrap for die cutting the sentiment square)

-DSP (from left to right) = 1 1/4″ X 4″,  2 1/4″ X 4″ & 2 3/4″ X 4″

*Note: All cards with the Mosaic Mood Specialty DSP have the inside sentiment stamped in Early Espresso Ink. The card with the So Saffron layer has Garden Green Ink for the front sentiment.  The card with the Mint Macaron layer has Cajun Craze for the front sentiment. The card with the Calypso Coral layer has Mint Macaron for the front sentiment.


A few weeks ago I made a video showing how to make this card. I would be honored if you would “like” this video and leave me a comment letting me know what you think of it. I also invite you to subscribe to my channel to be notified of future videos. I am just starting out with making card videos and am having a lot of fun. Thanks for checking that out!

Thanks so much for checking out this post. I hope you are inspired to make a multi-panel pullout card like this with your favorite new Designer Series Paper from the new catalog. You can check out all of the new DSP packs here.

Related image

If you don’t already have a Stampin’ Up! demonstrator, I would love to be your go-to girl for all your stamping needs. 🙂  You can shop my Online Store 24/7 . Please let me know if there’s anything I can do to aid in your crafting experience. I am more than happy to do what I can to help!

If you are local to Racine, WI I invite you to join my Stampin’ Up! Facebook page, Joyfully Inked Cards with Stephanie Mackey. You can find info about classes, card ideas, crafting tips, and SU! news and promotions. I am able to share a little more often on Facebook than I am in my blog or on YouTube.

Joyful stamping!

~Stephanie

Product List

Designer Series Paper Cards, Die Cut Cards, Halloween Cards

3 Days of Halloween – Day 3

Hello everyone! For Day 3 of my 3 Days of Halloween blog post series I have a 3D project for you. lol I didn’t even plan that, but I like the connection.  3D for Day 3. 🙂

I haven’t used my Gift Box Punch Board for awhile, but it was still super fun. This is the largest box the punch board can make, 4 x 4″. You need a 12 x 12″ piece of cardstock or DSP (Designer Series Paper) to make this box. It really is a big box – I fit lots of candy inside!

witches-and-trees

This striped pattern is my favorite from the Halloween Night Specialty Designer Series Paper pack. There are lots of great designs, as you can see below.

halloween-night-dsp

Here are the other two sides of my box. There really are some adorable little dies in the Halloween Scenes Edgelits die set.

tombstones-and-bats

halloween-scenes

It was a little tricky coming up with the topper for the box. I knew I wanted something though so I experimented. The circles are Pumpkin Pie and Basic Gray. I die cut them with circle dies from the new Layering Circles Framelits Dies. Sadly, I don’t remember which ones I used – you’ll have to experiment to find the right size. 🙂 Feel free to post a comment if you do find out which sizes work well.

top
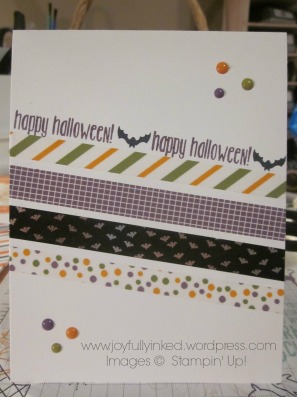
I adhered a length of the black and grey baker’s twine from the Halloween Night Baker’s Twine pack (the other twine in the pack is Pumpkin Pie and Black) between the two cardstock circles and added a sprinkling of Halloween Night Enamel Dots.

tree

I wanted to give a close up of my favorite side of the box – I really can’t get enough of this spooky tree! Hopefully I will be able to find a way to use this year round – maybe add some flowers and make it a spring-time tree? We’ll see. 🙂

I hope you have been inspired – maybe to do some Halloween crafting and get a head start for next year 🙂 – or to create a different box with a Thankful theme or a Christmas theme.

Joyful stamping!

~Stephanie

Supplies**: Halloween Night Specialty DSP, Gift Box Punch Board, Halloween Scenes Edgelits Dies, Spooky Fun Stamp Set, Basic Black Cardstock, Pumpkin Pie Cardstock, Basic Gray Cardstock, Versamark Ink, Whisper White Stampin’ Emboss Powder, Heat Tool, Big Shot Machine, Halloween Night Enamel Dots, Halloween Night Baker’s Twine, Layering Circles Framelits Dies, Glue Dots, Snail Adhesive, & 1 ” Circle Punch (for the moon).

** All supplies can be purchased from my online store. Thanks for your support!

Designer Series Paper Cards, Halloween Cards, Washi Tape Cards

3 Days of Halloween – Day 2

Today I have two more projects for you – both with coordinating envelopes.  It has been so much fun creating my own Halloween projects. Pinterest is awesome and I love getting inspiration from other crafters’ blogs, but there is something very satisfying about coming up with the idea yourself and watching it take shape below your fingertips. 🙂 Click the following link to check out the projects from 3 Days of Halloween – Day 1.

striped-mini-treat-bag-card

This first project showcases the mini treat bag thinlits dies, available in the Annual Catalog. I love tying in “old” product from the Annual Catalog with new product from the Holiday catalog.  I heat embossed “happy halloween!” from the Spooky Fun stamp set and then die cut it with the banner diecut from the Mini Treat Bag Thinlits die set. I added a vellum rectangle behind it for a little extra interest. A few enamel dots and the mini treat bag was complete!

The Halloween Night Specialty DSP is so bold on the mini treat bag that I decided to keep it simple on the card insert. I think the spooky tree is plenty of interest. The tree edgelit might be my absolute favorite part of all of the Halloween products.  The card insert measures 3 1/2 x 5″.

Supplies for this card: Halloween Night Specialty Designer Series Paper, Spooky Fun Stamp Set, Halloween Scenes Edglits Dies, Halloween Night Enamel Dots, Big Shot Die Cut Machine, Whisper White Cardstock, Basic Black Cardstock, Vellum Cardstock, Pumpkin Pie Stampin’ Write Marker, Heat Tool, Versamark Ink, Whisper White Stampin’ Emboss Powder, Mini Treat Bag Thinlits Dies, Basic Grey Classic Stampin’ Pad (for gravestones image), Memento Tuxedo Black Ink Pad (for witch image), & Stampin’ Trimmer.


I really do love the Halloween Night Designer Washi Tape. I just had to make it the focal point of one of my Halloween projects for my 3 Days of Halloween blog posts. There is a 5th design (black background with Pumpkin Pie, Perfect Plum, and Old Olive dots) that I didn’t use on this card. It is also great! Check it out here.

washi-tape-halloween

I have been on a washi tape card kick for awhile. I love running the sentiment parallel with the washi tape, as I did on this card. I also love covering the envelope flap with washi tape to coordinate it with the card.

You might not notice at first glance, but the bats are actually stamped upside down. Oops! I didn’t notice on the first one and then I figured I had to make the second bat the same or my mistake would really stand out. 🙂 I finished off the card with a few Halloween Night Enamel Dots. Perfect touch!

washi-tape-card-and-envelopes

Supplies for this card: Spooky Fun Stamp Set, Halloween Night Designer Washi Tape, Halloween Night Enamel Dots, Whisper White Thick Cardstock, Perfect Plum Classic Stampin’ Pad, Memento Tuxedo Black Ink Pad, Whisper White Medium Envelopes, Paper Snips, & Stampin’ Trimmer.

I hope you enjoyed Day 2 of my 3 Days of Halloween blog post series. You still have time to create a few last minute Halloween projects yourself! If you would like to stock up on Halloween supplies for next year check out my online store. These products will be available until the beginning of January.

Joyful stamping!

~Stephanie

Birthday Cards, Congratulations Cards, Designer Series Paper Cards, Stampin' Up!

DSP Strips with Affectionately Yours Paper

Hello everyone! Today’s card is a bright one. It features the Affectionately Yours Specialty Designer Series Paper (DSP) and comes with a picture tutorial.  This layout is awesome for showcasing all of the beautiful designs of a DSP pack. I am excited to try it with some of the other awesome DSP packs in the 2016-2017 Stampin’ Up! Annual Catalog. 

Stripes Angle


  1. Begin by cutting some strips of DSP, or use scraps. Make sure that they are long enough to fit across the cardstock base you will be adhering them to. For this card the cardstock base is 3 3/4 x 5″. I cut some DSP strips to a 1/2″ width and a few to 3/4″ width for variety. Lay down some Snail Adhesive on your cardstock piece to keep the DSP strips in place. IMG_4133

2. As you lay down your strips be sure to place them tightly together, leaving no cardstock showing through. It will be very obvious at the end. Also, be sure that the DSP strips hang off both sides of the cardstock base to ensure your entire base is covered.  If you want to go the easy route, just use 12″ strips. Then you’ll be sure to have long enough strips. You could probably get away with 7 or 8″ strips too. Obviously, as you get closer to the ends you don’t need as long of strips.

IMG_4134

3. When you have covered your cardstock base with DSP strips, turn it over and use Paper Snips to trim off the DSP that hangs over the sides.

IMG_4138

4. Behold your breathtaking creation!

IMG_4139


Here are a few more shots of the card. I thought the yellow flower from the Botanical Blooms Thinlits Dies set worked really well to bring out the little bits of yellow in the DSP designs. Strips

I adhered the flower with a glue dot and the sentiment piece with Stampin’ Dimensionals.

Stripes Flat

I hope you are inspired to try this layout and have fun with some DSP. 🙂

Joyful stamping!

~Stephanie

Supplies**: Affectionately Yours Specialty Designer Series Paper, Botanical Blooms Thinlits Dies, Butterfly Basics Stamp Set, Decorative Label Punch, Cucumber Crush Classic Stampin’ Pad, Crumb Cake Cardstock, Night of Navy Cardstock, Daffodil Delight Cardstock, Whisper White Cardstock, Paper Snips, Glue Dots, Stampin’ Dimensionals, Snail Adhesive, Pearls Basic Jewels.

**All supplies can be purchased from my online store. If you would like to place an order (and it is under $150) I invite you to enter 4ZN3MB4Z in the Hostess Code box. Thank you for your support!

2016-2018 In Color Cards, All Occasion Cards, Designer Series Paper Cards, Just Because Cards, Stampin' Up!

In Color Paper Weaving

Hello everyone! Here is the 4th and last card in my current Designer Series Paper (DSP) series. This is not the first time I’ve done a card with paper weaving on my blog (see Paper Weaving with DSP). However, it is an excellent way to use up DSP scraps and I wanted to include that idea with these DSP cards.

Dimensions: The cardbase is 8 1/2 x 5 1/2″ (scored in half at 4 1/4″). The Flirty Flamingo Layer is 3 3/4 x 5″. The Crumbcake layer is 3 1/2 x 4 3/4″. The DSP strips are 1/2 x 4 3/4″. The cardstock strips are 1/2 x 3 1/2″.

Weaving

The biggest hint I can give for weaving the DSP strips is to adhere one end of all the strips in place with a glue dot. This gives just enough adhesive to keep the strips where you want them and still allows you to maneuver the strips into the woven pattern. I also used a few glue dots to adhere the rest of the strips into place after weaving.

The second hint is to keep the strips pretty close together. This is actually the second card I made because the first card had a looser weave that just didn’t look as striking. Speaking of striking, how awesome are those adorable little white hearts? I think they are what pulls the card together.

Weaving Side

I hope you are inspired to play with paper weaving and to create with some of the new 2016-2018 In Colors as well. Aren’t they lovely?

Joyful stamping!

~Stephanie

**Supplies**: Sweet Sugarplum Cardstock, Flirty Flamingo Cardstock, Crumb Cake Cardstock, 2016-2018 In Color Envelope Paper, Hearts Border Punch, Crumb Cake Classic Stampin’ Pad, Love You Lots Stamp Set, Glue Dots, Snail Adhesive, Stampin’ Trimmer.

**All supplies can be purchased from my online store. If you would like to place an order (and it is under $150) I invite you to enter 4ZN3MB4Z in the Hostess Code box. Thank you for your support!


All Occasion Cards, Birthday Cards, Designer Series Paper Cards, Just Because Cards, Stampin' Up!

Double Vision

Hello everyone! Today’s post is a double feature. Both cards have the same design and basic color scheme, but one is subdued while the other is bold.

IMG_4123

Both cards feature the Affectionately Yours Specialty Designer Series Paper (DSP). One neat thing about Stampin’ Up!’s DSP packs is that all the colors used in each individual pack coordinate with the other colors used in that pack. That way, even if you use a one color design like I did on both cards, you don’t have to think too long about what colors to use with it.IMG_4121

I love how the large chunks of Watermelon Wonder contrast with the pops of Night of Navy in the bold card. I also love the softness of the light contrast between the little dots of Watermelon Wonder and the Crumb Cake in the subdued card. Which one is your favorite? Leave me a comment below and let me know. 🙂

IMG_4124

Instructions: Cut a piece of DSP to 3 3/4 x 4 1/4″.  If you want a larger gap between your pieces simply make your DSP starting piece shorter than 4 1/4″.  To create the gap between the pieces of DSP you will need to use your Stampin’ Trimmer.  It looks strange at first, but when cutting you need to make sure the top left hand corner of the DSP is on the right side of your cutting blade.  The ruler extends to 1 1/4 on the right side of the blades. This is important for creating the slant that you want.  I wanted a gentle slant so I placed the top left hand corner of the DSP at the 1 1/4″ mark on the right hand side of the blade and I lined up the bottom right hand corner with the 1 1/4″ line on the left hand side of the blades. If you want steeper slant, simply line those same corners up with lines closer to the cutting blade.

IMG_4125

This layout is great if you really want your DSP to shine. With so much of the pattern showing, your DSP is sure to get lots of attention! The “HAPPY” sentiment is from the “Celebrate Today” stamp set. I stamped the “birthday” image on the inside of the cards in Watermelon Wonder ink. I punched the flower out with the Flower Medallion punch and popped it up with Stampin’ Dimensionals.

I hope you are inspired to try this layout with your favorite DSP. I’d love to see what you come up with. If you send me your creations at stephaniemackey2012@gmail.com, I might include them in a future blog post. 🙂

Joyful stamping!

~Stephanie

**Supplies** used on both cards: Affectionately Yours Specialty DSP, Stampin’ Trimmer, Celebrate Today Stamp Set, Watermelon Wonder Classic Stampin’ Pad, Flower Medallion Punch, Whisper White Cardstock, Stampin’ Dimensionals, Snail Adhesive.

Bold card only: Watermelon Wonder cardstock

Subdued Card only: Crumb Cake Cardstock.

**All supplies can be purchased from my online store. If you would like to place an order (and it is under $150) I invite you to enter 4ZN3MB4Z in the Hostess Code box. Thank you for your support!


Designer Series Paper Cards, Stampin' Up!, Thank You Cards

Cut & Flipped Hearts

Hello everyone! Here is the second card in my Designer Series Paper (DSP) blog post series.  Stampin’ Up!’s DSP is known for being two sided. Unfortunately, when we use one beautiful side of the DSP, we have to (usually) hide the other side.  I thought this cut & flipped hearts layout was a fun way to showcase both sides of each of these gorgeous DSP sheets.

Hearts Front

The DSP featured on this card is from the Affectionately Yours Specialty DSP pack. I used the Sweetheart Punch to punch out 3 hearts each from 2 different DSP sheets. I then cut them in half, flipped one half of each heart over, and re-matched them up with their other halves. It can’t be the original one because when you flip it over you have two of the same side.

Hearts Angle

I used the Multipurpose liquid glue to adhere the hearts. This glue doesn’t dry immediately so it gave me some time to wiggle the halves of the hearts into the right place before the glue dried. I used the Fine Tip Glue Pen on the “Thanks” thinlit die from the Hello You Thinlits die cut set.

I hope you are inspired to try this layout or another that lets you showcase both awesome sides of DSP sheets!

Joyful stamping!

~Stephanie

Supplies**: Hello You Thinlits, Sweetheart Punch, Affectionately Yours Specialty Designer Series Paper, Crumb Cake Cardstock, Whisper White Cardstock, Cucumber Crush Cardstock, Stampin’ Trimmer, Fine Tip Glue Pen, Snail Adhesive, Multipurpose Liquid Glue.

** All supplies are available for purchase from my Online Store. If you would like to place an order (and it is under $150) I invite you to enter 4ZN3MB4Z in the Hostess Code box. Thank you for your support!

All Occasion Cards, Designer Series Paper Cards, Just Because Cards, Stampin' Up!, Sympathy Cards

Butterfly Boutique

Hello everyone! I recently taught a class based on Designer Series Paper (DSP). When I was designing cards for this class I was thinking of layouts that showcase many designs of DSP packs as well as use up scraps of DSP so they don’t have to go to waste. My next few posts will be cards from this DSP class. I hope you enjoy them!

Navy Front

The DSP showcased in this first card is the Floral Boutique DSP. My favorite design of the 12 different designs in this pack is the one with the differently shades of blue lines (upper right hand corner). I love things with shades of the same color.

Navy Side

The rectangles measure 2 x 1 1/2″. The crumb cake banner measures 3 1/2 x 3/4″. The whisper white banner measures 3 1/4 x 1/2″.

Navy Top Angle

I borrowed my friend’s precision base plate to use with this detailed die cut from the Butterfly Thinlits die set. I wanted to see if it really made a difference in getting a cleaner cut for all the little pieces and I am happy to report that it did. It was also very helpful in getting a clean cut with the largest die cut of the Flourish Thinlits (see my recent post, Flowering Flourishes) and also for the two larger dies in the Detailed Floral Thinlits die set.

Navy Inside

I couldn’t resist adding a little interest to the inside of the card with this gorgeous little butterfly from the Papillon Potpourri stamp set. This more realistic butterfly image is my favorite from this set.

I hope you are inspired to be creative with some DSP and maybe to give this layout a try. 🙂

Joyful stamping!

~Stephanie