Die Cut Cards, Stampin' Up!, Techniques, Tutorials

“To a Wild Rose” Peek Through Card

Hello everyone! I am happy to finally share my favorite card that features my favorite bundle: “To a Wild Rose”.  I copied this card from a demonstrator inspiration/training email.  There was only a picture in the email;  I had to figure out the supplies, peek through technique, and assembling on my own.  Took a little bit of work but I love the layout and colors so much it was worth it. Plus, now I can share it with all of you. 🙂

Scroll down past the pictures of the card to find a video walking you through how to create this card.

I love the white on white of the die cuts on the card base and how that contrasts with the pops of color from the leaves and flower. I adhered the three background die cuts with liquid glue. Then I die cut a circle off to the right hand side using the second largest regular (non-scalloped) circle die cut from the Layering Circle Die set. I cut the frame with the first and third largest circle dies from the same set and adhered the frame with glue dots. The basic black banner is 3/8″ x 3 1/2″. I flagged the right end, embossed with White Stampin’ Emboss Powder, and adhered the banner with glue dots to the frame.

The peek through element even looks sharp from the inside. 🙂 I decided to include a frame on the inside to keep the clean, minimalist look. Remind me of a ship’s porthole. lol

The flower uses two of three flower stamps from the To a Wild Rose Set.  There is an base layer, an accent layer, and an outline layer. I used Grapefruit Grove for my base layer and Calypso Coral for the accent layer.  I skipped the outline on this flower.  I stamped the center of the flower in Memento Tuxedo Black ink.  I popped the flower up with Stampin’ Dimensionals and arranged the leaves and black accent pieces around the flower, adhering them with glue dots.

Here’s the video I filmed that walks you through how to create this card. Please leave me a comment letting me know what you think.  I welcome your feedback. If you like what you see please also “like” this video on YouTube. I appreciate your support!

Related image

If you don’t already have a Stampin’ Up! demonstrator, I would love to be your go-to girl for all your stamping needs. 🙂  You can shop my Online Store 24/7.  Please let me know if there’s anything I can do to aid in your crafting experience.  I am more than happy to do what I can to help!

If you are local to Racine, WI I invite you to join my Stampin’ Up! Facebook page, Joyfully Inked Cards with Stephanie Mackey. You can find info about classes, card ideas, crafting tips, and SU! news and promotions. I am able to share a little more often on Facebook than I am in my blog or on YouTube.

If you have thought about being a Stampin’ Up! demonstrator or are interested in a 20% discount, among other perks, I’d love to have you on my team, The Joyful Inkers. You can sign up here or contact me if you have questions or would like to talk more about this.

Joyful stamping!

~Stephanie

                                                     Product List

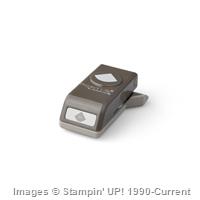
Paper Snips

$10.00
All Occasion Cards, Designer Series Paper Cards, Stampin' Up!, Techniques, Tutorials

Embossed Vellum Flower Card with Products from the Perennial Essence Suite

Hello everyone! I’m back (with much less time between posts this time!) with two fun and colorful versions of this card layout. It took me a long time to get comfortable designing my own cards, but the accomplishment and happiness I feel after I do create my own card is definitely worth the effort! Scroll down to the bottom of this post (after all the pictures) and you’ll find my YouTube video for these cards.

I really love both versions of this card. The card with the yellow (So Saffron) flower is so bright and cheery and the card with the pink (Petal Pink) flower on the right is so elegant and soothing. Besides the difference in color scheme there is also a slight variation in the dimensions. This is due to a cutting error at first, but I actually like the wider border on the card with the pink flower.

**Note**: I don’t think it’s visible in the pictures, but I popped up the cardstock layers (So Saffron on the left, Whisper White on the Left) with Stampin’ Dimensionals and Mini Stampin’ Dimensionals. The video shows this much more clearly.


Although the Floral Essence Stamp Set is the core of this suite, I really feel the Perennial Essence Designer Series Paper is the star of the Perennial Essence Suite. You can check out all the amazing designs at this link.


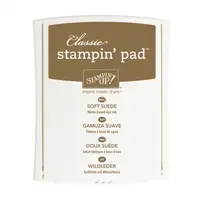
I wanted to make sure there was a picture that really showed the shine of the gold embossing powder on this version. I love the simple stamping on the inside of the card. Just a little something to pretty it up. 🙂 The stamp pads I used on this card were Versamark (for the embossing, So Saffron (flowers), Soft Suede (flower centers and sentiment).


Dimensions (Card with Soft Suede Base)

  • Base = 8 1/2 x 5 1/2″ (Scored on the long side at 4 1/4″)
  • So Saffron cardstock layer = 4 x 5 1/4″
  • DSP Layer = 3 7/8 x 5 1/8″
  • Sentiment Banner = 3 x 3/4″ (Trim left end as needed)
  • Inside cardstock layer = 4 x 5 1/4″


I love how the silver embossing powder really softened the look of this version. It goes so well with the blues and purples in the DSP. The stamp pads I used on this card were Versamark (for embossing), Petal Pink (flowers) and Mossy Meadow (flower centers and sentiment).


Dimensions (Card with Mossy Meadow Base)

  • Base = 8 1/2 x 5 1/2″ (Scored on the long side at 4 1/4″)
  • Whisper White cardstock layer = 3 7/8 x 5 1/8″
  • DSP Layer = 3 3/4 x 5″
  • Sentiment Banner = 3 x 3/4″ (Trim left end as needed- this sentiment is shorter than above so you could probably do 2 1/2 x 3/4″)
  • Inside cardstock layer = 3 3/4 x 5″

I really hope you have been inspired by this card. There are so many possibilities with this suite! I’d love to hear what you think of my cards. Which one is your favorite? Please leave me a comment and let me know your thoughts. I truly appreciate your feedback. Just be kind please! 🙂

Related image

If you don’t already have a Stampin’ Up! demonstrator, I would love to be your go-to gor; for all your stamping needs. 🙂  You can shop my Online Store 24/7 . Please let me know if there’s anything I can do to aid in your crafting experience. I am more than happy to do what I can to help!

If you are local to Racine, WI I invite you to join my Stampin’ Up! Facebook page, Joyfully Inked Cards with Stephanie Mackey. You can find info about classes, card ideas, crafting tips, and SU! news and promotions. I am able to share a little more often on Facebook than I am in my blog or on YouTube.

Joyful stamping!

~Stephanie

Product List

Paper Snips

$10.00
All Occasion Cards, Just Because Cards, Stampin' Up!, Sympathy Cards, Techniques

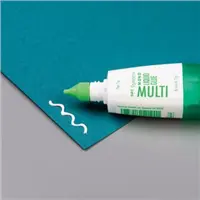
Flowering Flourishes

I have had a blast these last few days creating with the Flourish Thinlits Dies. I earned this die cut set as a reward for meeting a sales goal for Stampin’ Up! demonstrators. That’s right, I got this $29 set for free! Stampin’ Up! treats its demonstrators so well. If you’re interested in hearing more about the benefits of being a SU! demo, contact me for more information. I’d love to have you on my team!

In Laid Front

I love CASEing beautiful cards that I find on Pinterest, but there is something very rewarding about creating a card myself. Thinking through design and layout, planning color combinations, going outside of my comfort zone, maybe tossing out an idea or two when it just isn’t working, and then the happy feeling of holding a card in my hand that I designed and being proud of it. 🙂 I hope you have that feeling every once in awhile too. Below is the Flourish Thinlits set that has been inspiring me to come up with my own cards the last few days.I posted a card not too long ago in my post “Fluttering Flowers – Inlaid Die Cut Technique” that featured the same technique I used on today’s card. I think this technique works amazingly well with intricate dies. I was inspired to try some mixing and matching with the colors of the positive and negative images. I think I will try this card again but switch the background (negative image) to Rich Razzleberry and change the positive image (the flower die cut) to Pool Party. How fun would it be to see those two cards side by side? Maybe in a future post? 🙂

In Laid Close Up

Here are the dimensions for this card: Base- 8 1/2 x 5 1/2″ (scored at 4 1/4″), Pool Party Background Piece- 3 1/4 x 4 1/2″ (I took an inch off the measurements for the height and length to leave a 1/2″ border all around), Whisper White Sentiment Layer-1/2 x 3″, Pool Party Sentiment Layer- 3/4 x 3″, Rich Razzleberry Sentiment Layer- 1 x 3″.

In Laid Inside

Tips & Tricks: I thought it was a little something different to leave the ends straight and not flag them. I used the Fine Tip Glue Pen to adhere the die cut flowers. I stamped off once before stamping the sentiment in Rich Razzleberry Ink. I thought it was a fun embellishment to add the die cut border image on the inside of the card.

I hope you too are inspired to create your own cards – maybe with the Flourish Thinlits set! 🙂

Joyful stamping!

~Stephanie

**Supplies**: Flourish Thinlits Die Set, Big Shot, Sheltering Tree Stamp Set, Rich Razzleberry Classic Stampin’ Pad (stamped off), Whisper White Thick Cardstock, Pool Party Cardstock, Rich Razzleberry Cardstock, Rhinestone Basic Jewels, Snail Adhesive, Fine Tip Glue Pen, & Stampin’ Trimmer.

**All supplies can be purchased from my online store.

All Occasion Cards, Stampin' Up!, Techniques

Ink Smooshing Take Two

Hello everyone! When I was working on the card for my last post, My Ink Smooshing “Adventure”, I made two background pieces. I thought it would be fun to try this card again and put a different spin on it.

Ink Smooshing Black Background

I really like how the rainbow of inks contrasts against the black background and heart accents. I didn’t want to go too dark though, so I went with white for the butterfly focal point.

Ink Smooshing Black Background Close Up

I love the splotches of white along the right side of the technique piece. I think it adds a lot of interest to the card, gives it a little bit of a grungy chic look. That’s the magic of ink smooshing: you know every project will be unique!

Ink Smooshing Black Background Side

I wanted to keep with the multi color theme on the inside of the card, so I used the corresponding Stampin’ Write Markers to color on the sentiment stamp. I am still loving the combo of the black with the rainbow.

IMG_3931

I hope you are inspired to try some ink smooshing and see what unique results YOU get. 🙂  See my last post, My Ink Smooshing “Adventure” , for directions on the ink smooshing technique.

Joyful stamping!

~Stephanie

Supplies**: Happy Birthday Everyone stamp set,  Whisper White cardstock, Basic Black cardstock, Tempting Turquoise Classic Stampin’ Pad, Real Red Classic Stampin’ Pad, Pumpkin Pie Classic Stampin’ Pad, Temping Turquoise Stampin’ Write Marker, Real Red Stampin’ Write Marker, Pumpkin Pie Stampin’ Write Marker, Clear Block E, Hearts Border Punch, Big Shot, Butterflies Thinlits Dies, Happy Birthday Everyone stamp set, Glue Dots, Snail, Stampin’ Trimmer.

**All supplies can be purchased at my Online Store. I would be honored to have you as a customer and I invite you to use the Hostess Code RBTK9C7N when you place your order.

All Occasion Cards, Just Because Cards, Stampin' Up!, Techniques

My Ink Smooshing “Adventure”

Hello everyone! I’ve got another watercolor technique for today’s card. The technique I used is called “ink smooshing”. It’s a great one for watercoloring large areas and backgrounds as well as die cuts (featured in my previous post.)

Ink Smooshing

This color combination of Tempting Turquoise, Real Red, and Pumpkin Pie made me think of sunsets, California, and vacation. 🙂 I was inspired to choose this adorable sentiment from the “Go Global” stamp set (see below).

Steps for “Ink Smooshing”:

  1. Apply ink pads directly to large clear block (Block E in this example).
  2. Spray with water using a spray bottle from a distance of about 12 inches.
  3. Place wetted block, ink side down, on your cardstock (this layer is 4″ x 5 1/4″). Press firmly.
  4. Remove block and use the Heat Tool to dry both sides.

Ink Smooshing Close Up

I love the little black accent hearts against the watercolor background. They were punched out with the Hearts Border Punch. It makes great borders AND great confetti!

I hope you are inspired to do some “ink smooshing”. It makes for some WOW cards, for sure! If you like this “Go Global” stamp set, be sure to get it now before it retires on May 31st. I would be honored to have you as a customer. If you choose to purchase from my Online Store, I invite you to use the Hostess Code RBTK9C7N when placing your order.

Joyful stamping!

~Stephanie

Supplies*: Whisper White Thick Cardstock, Basic Black Cardstock, Tempting Turquoise Classic Stampin’ Pad, Real Red Classic Stampin’ Pad, Pumpkin Pie Classic Stampin’ Pad, Memento Tuxedo Black Ink Pad, Hearts Border Punch, Go Global Stamp Set, Clear Block E, Heat Tool, Glue Dots, Snail, Stampin’ Trimmer.

*All supplies can be purchased from my Online Store.

Birthday Cards, Masculine Cards, Techniques

A “Lovely” Masculine Birthday Card

Hello everyone! As I was making this card it struck me that I was making a masculine card with a stamp set that has the word “lovely” in its title. 🙂

Masculine

This gorgeous stamp set is called “Lovely as a Tree”. It makes for some great masculine cards as well as beautiful Christmas Cards.

This tree stamp is my favorite image in this set. I absolutely love using markers to color the tree and trunk so the image looks more realistic.

Tree

I thought it would be a fun touch to stamp the envelope flap to match the card. The stamp I used for the card background and envelope flap is called “Hardwood” (more masucline, eh? 🙂 ) Be warned, it is a very large stamp. I recommend laying the stamp face up on your work surface, inking it up, and then laying the cardstock on the stamp. The last step is to lay a scrap piece of copy paper over the top so you can rub well over the entire cardstock to get an evenly inked image.

Envelope

I hope you are inspired to create with the “Lovely as a Tree” & “Hardwood” stamp sets. I know you’ll create some awesome Masculine cards!

Joyful stamping!

~Stephanie

*Stamping supplies/info: Lovely as a Tree stamp set, Hardwood stamp set, Balloon Builders stamp set (sentiment), Early Espresso Stampin’ Write Marker, Mossy Meadow Stampin’ Write Marker, Crumb Cake Classic Stampin’ Pad, Early Espresso Classic Stampin’ Pad, Mossy Meadow cardstock, Crumb Cake cardstock, Whisper White cardstock, Circles Collection Framelits Dies (5th smallest for Mossy Meadow circle), 2 1/2″ Circle Punch (to punch out the tree), Snail Adhesive, Stampin’ Trimmer, Crumb Cake Medium Envelope.

*All supplies are available in my online store (see link in the menu bar to the right).

Designer Series Paper Cards, Just Because Cards, Stampin' Up!, Techniques, Valentine's Cards

My Greatest Adventure: “Going Global”

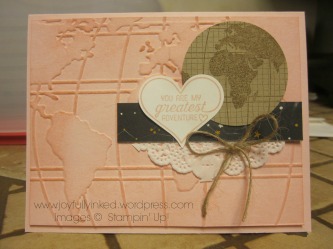
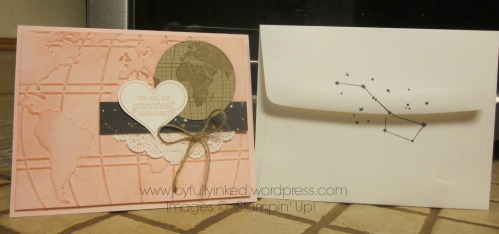
Today’s card showcases the Going Global stamp set. I think it is my favorite set from the new Occasions Catalog.  I love that this set can work for Valentine’s cards, what with Valentine’s Day quickly approaching, but also as thank you, appreciation, just because, masculine, and Father’s Day cards.

Greatest Adventure front

The sentiments in this sweet set pair so well with the images. I just adore them. 🙂 I love that the “You are my greatest adventure” sentiment stamp pairs so well with the Sweetheart Punch (see supplies at end of post).

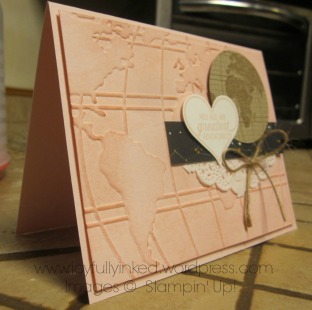
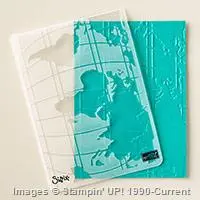
Here is a side view of the card. The embossing was done with the coordinating World Traveler Embossing Folder (see supplies at end of post). I sponged the Pink Pirouette cardstock with Blushing Bride ink. I popped the embossed layer up on Stampin’ Dimensionals.  That cute little strip of Designer Series Paper is a constellation design from the coordinating Going Places Designer Series Paper Stack. Lots of really neat designs in this DSP Stack.GA Left Angle

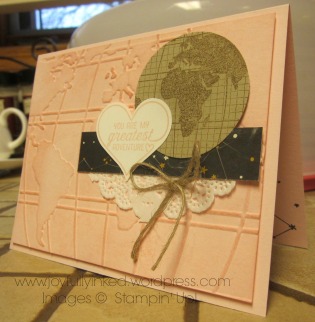
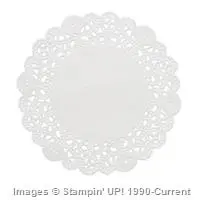
From the other side view you get a good look at the cute little globe. I stamped in Soft Suede ink on Crumb Cake cardstock and punched it out with the 2″ Circle Punch.  In browsing Pinterest for inspiration before before making this card, I was inspired to break out my Tea Lace Paper Doilies. I don’t use them very much, but I like the elegance this little bit brings to the card.

GA Right Anglew

I finished the card off with a cute little bow made from some thick linen thread. I think it was a from some leftover Paper Pumpkin supplies. Click the orange Paper Pumpkin image to the right for more information about these monthly crafting kits.

IMG_3751

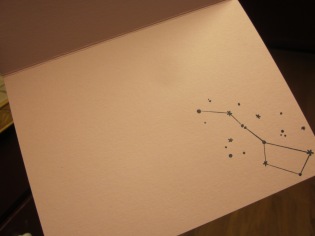
I just had to use the little (big?”) dipper constellation on the inside of my card to tie it together with that DSP scrap from the card front. I also stamped it on the envelope for some more fun coordination.

GA Card and Envelope

I hope you too are inspired to do some crafting with the Going Global stamp set and coordinating projects. It’s an adventure!

Joyful stamping!

~Stephanie

Price: $110.00

Price: $5.25

Supply List

Built for Free Using: My Stampin Blog

Birthday Cards, Designer Series Paper Cards, Fab Friday Cards, Punch Art, Stampin' Up!, Techniques

Out on a Limb for FabFri73

Hello all!  I am pleased to introduce you to another challenge blog that I have discovered. It is called Fab Friday and is another challenge blog run by Stampin’ Up! demonstrators.

One of the design team members for Fab Friday  is Brian King, who is also on the design teams for two other challenge blogs I follow: the Global Design Project & Pals Paper Arts. The interesting thing about the Fab Friday challenges is that they run for two weeks, rather than one week like all other challenge blogs I’ve seen.

Here is the most recent challenge:

Fab Friday Logos-003

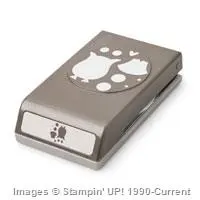
Here’s the card I came up with based on this color challenge. I am still having fun creating with my Owl Builder Punch. 🙂

Owl

I also brought out my Color Me Irresistible Specialty Designer Series Paper. This DSP is unique because it is pre-embossed. Some sheets are white images embosssed on white sheets, while others are colored sheets embossed with clear images. I used a brayer to add the Rich Razzleberry ink to the a portion of white DSP with white embossed dots. I wiped off the excess ink with a tissue. Color Me Irresistible Specialty Designer Series Paper

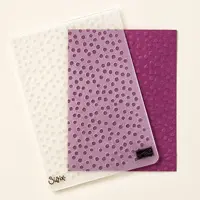
Here’s a close up of this adorable owl. I embossed his green front with the Decorative Dots embossing folder for a little something extra.

Owl Close Up

The cute little branch comes from the Tree Builder Punch; also a very versatile punch.

tree punch

I hope you were inspired by today’s post. Please leave me a comment and let me know what you think about this card and if you would have done anything differently.

Joyful stamping!

~Stephanie

Price: $12.50

Price: $110.00

Price: $5.25

Supply List

Built for Free Using:  My Stampin Blog

All Occasion Cards, Punch Art, Stampin' Up!, Techniques

Sparkles & Owls for PPA268

I’ve been wanting to play around with my Owl Builder Punch since I got it several months ago. I’ve used the eye parts of the punch for other punch art cards, but I had yet to use the Owl Builder Punch to actually build an owl.  That is until yesterday!

Owl Builder Punch

This sketch (PPA268) from the Pals Paper Arts inspired me to put my Owl Builder Punch into action.

PPA2681

As you can see, I deviated slightly from the original sketch. That’s the fun of sketches though – you don’t have to do EXACTLY what the sketch says. The purpose of sketches are for inspiration. I obviously couldn’t put two owls together, so I thought for awhile and decided a cute sparkly heart would be a complimentary shape.

Owl Card for PPA268

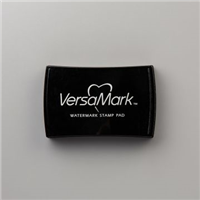
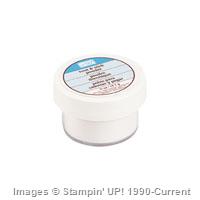
This close up almost does the sparkly heart justice. It’s so easy to make too! Here are the directions: 1) punch out the heart 2) press it into your Versamark pad 3) sprinkle on some Heat & Stick powder 4) heat the powder with your Heat Tool just until it turns shiny (it IS possible to overheat this Heat & Stick powder) 5) sprinkle on the Dazzling Diamonds glitter, and briefly heat set the glitter.

Owl Card Close Up

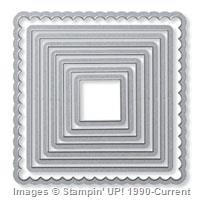
I used the 3rd and 4th smallest framelits from the Squares Collection Framelits for the two squares. I hadn’t done this for a long time, but I was inspired to emboss the envelope flap to match the background on my card.  Our Stampin’ Up! envelopes are awesome for embossing and stamping on. Owl Card with Envelope

I think this is my favorite card I’ve made in awhile. I want to keep it for decoration in my craft room and never give it away! I am also really starting to think about making this card again in different colors. A minty green? A lavender-like purple? A sweet pea pink? 🙂 What a cute birth announcement card!

I hope you are inspired to play around with papercrafting supplies you’ve had for awhile but haven’t gotten around to using yet. It is worth it!

Joyful stamping!

~Stephanie

Price: $110.00

Supply List

Built for Free Using:  My Stampin Blog

Fall Cards, Stampin' Up!, Techniques, Thank You Cards

Grateful for You for PPA266

Hello all! Here’s another color challenge from the Pals Paper Arts group. Definitely a fall inspired color combo. Here’s the card I created for this challenge:

IMG_3323

I used the masking technique on this card.  Check out one of my past posts, Embossing Paste with Reverse Masking, for a comparison of the masking & reverse masking techniques. Below is a brief photo tutorial of how I stamped the leaves and acorns on this card with the masking technique.


First, cover the area you don’t want any stamping on. I used Post-It tape, but you could also just use a paper mask.

IMG_3318

Second, stamp away! If your stamps are bigger than the masked area, be careful where you are stamping so you don’t get part of your stamp on the other side of the mask- unless that is what you are going for.

IMG_3319

Third, carefully remove the mask.

IMG_3320

Fourth, enjoy your crisp clean edges!

IMG_3321


I hope you are inspired to make some Fall themed cards this season.  I’m definitely looking forward to apple cider, pumpkins, and sweaters! On a personal note, what I am most looking forward to this fall is meeting my first child, who is due to arrive in about two weeks! My husband and I can’t wait! 🙂

Joyful stamping!

~Stephanie