Birthday Cards, Masculine Cards, Techniques

A “Lovely” Masculine Birthday Card

Hello everyone! As I was making this card it struck me that I was making a masculine card with a stamp set that has the word “lovely” in its title. 🙂

Masculine

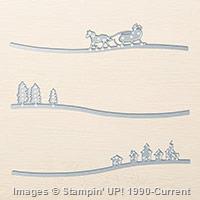
This gorgeous stamp set is called “Lovely as a Tree”. It makes for some great masculine cards as well as beautiful Christmas Cards.

This tree stamp is my favorite image in this set. I absolutely love using markers to color the tree and trunk so the image looks more realistic.

Tree

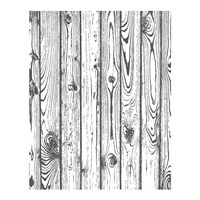
I thought it would be a fun touch to stamp the envelope flap to match the card. The stamp I used for the card background and envelope flap is called “Hardwood” (more masucline, eh? 🙂 ) Be warned, it is a very large stamp. I recommend laying the stamp face up on your work surface, inking it up, and then laying the cardstock on the stamp. The last step is to lay a scrap piece of copy paper over the top so you can rub well over the entire cardstock to get an evenly inked image.

Envelope

I hope you are inspired to create with the “Lovely as a Tree” & “Hardwood” stamp sets. I know you’ll create some awesome Masculine cards!

Joyful stamping!

~Stephanie

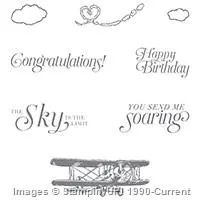
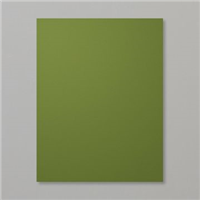
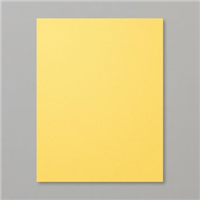
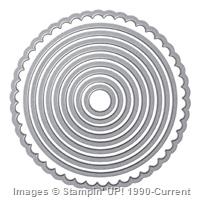
*Stamping supplies/info: Lovely as a Tree stamp set, Hardwood stamp set, Balloon Builders stamp set (sentiment), Early Espresso Stampin’ Write Marker, Mossy Meadow Stampin’ Write Marker, Crumb Cake Classic Stampin’ Pad, Early Espresso Classic Stampin’ Pad, Mossy Meadow cardstock, Crumb Cake cardstock, Whisper White cardstock, Circles Collection Framelits Dies (5th smallest for Mossy Meadow circle), 2 1/2″ Circle Punch (to punch out the tree), Snail Adhesive, Stampin’ Trimmer, Crumb Cake Medium Envelope.

*All supplies are available in my online store (see link in the menu bar to the right).

All Occasion Cards, Just Because Cards, Masculine Cards, Stampin' Up!, Thank You Cards

“You Send Me Soaring” & Paper Pumpkin Sale

Hello everyone! Today I have a card for you using one of the Sale-A-Bration stamp sets that you can earn for FREE with a $50 purchase. This set is called “Sky is the Limit” and will be my go-to set for Masculine cards for the next few months of Sale-A-Bration.  Here are the links for PDFs of the Sale-A-Bration Brochure and the new 2016 Occasions Catalog.
Soaring Front

I knew I wanted to use Old Olive with this set, and when I started to think about what color to stamp the airplane in it hit me: make it gold! I really like how embossing it with gold embossing powder really makes the airplane the focal point of the card.

Soaring Close Up

I was pleasantly surprised at how cool the Old Olive cardstock looked with the Mint Macaron clouds. I think this card would have looked pretty cool with a Whisper White background, but I think the Very Vanilla really helps give this card the Old Timey look I was going for 🙂

Soaring Side


As I look at my calendar and see that it is almost the 10th (last day to order this month’s Paper Pumpkin kit) I’m realizing that I should tell you about the Paper Pumpkin Sale-A-Bration sale so you can take advantage of it for January’s kit, if you’d like.

If you are unfamiliar with Stampin’ Up!’s Paper Pumpkin kits here is some basic info. Paper Pumpkin is a subscription kit program. A fully designed project kit will arrive each month with stamps, ink, and paper–everything ready to go so you can skip to the fun part of crafting.3 Month Paper Pumpkin

From now until March 31st, you can get a 3 Month Pre-Paid Paper Pumpkin Subscription for $55.00. This includes shipping. The original price for a 3 Month Pre-paid Subscription is $59.00. Click here or the picture below to see a video of December’s kit. I have this adorable little calendar displayed on my desk to help me keep track of the date in style!


If you would like a fun surprise every month, use item code 137859 to order this 3-Month Subscription. You can do so in my online store. After you order, you’ll receive a code via e-mail to redeem your subscription at PaperPumpkin.com.  If prompted, I’d be honored if you would select me as your demonstrator. If you click the link in the previous line, that should happen automatically.

I hope you decide to give Paper Pumpkin a try. I am never disappointed. I have a customer who liked Paper Pumpkin so much that during last year’s Sale-A-Bration she stocked up on enough 3-Month subscriptions to last her until this year’s sale!

Joyful stamping!

~Stephanie

Birthday Cards, Masculine Cards, Stampin' Up!

Not a Christmas Card :)

Hello all! Even though I’ve only posted two Christmas cards to my blog, I’ve made several more recently. I feel like that’s all I’ve been thinking of lately, what with the release of Stampin’ Up’s Holiday Catalog. This catalog really does have a lot more than Christmas, but that’s my favorite section. 🙂

Anyway, today I have a card for you made with Christmas products from the new Holiday Catalog, that is NOT a Christmas card. Versatility is something I really look for in the papercrafting products I purchase, and Christmas products are no exception. I want to be able to use these products all year round, not just September -December.

IMG_3309

When I first saw this card it made me think of The Wizard of Oz, when Dorothy is traveling to Oz with the Tin Man, the Cowardly Lion, and the Scarecrow. When I told the ladies at my Holiday Catalog Launch Party about that they all looked at me funny. 🙂

Here is a close up of the lovely little hills.

IMG_3310

Once again, I must thank Pinterest for the inspiration for this card. I love that site!  This card was originally pinned by Amy Koenders (see the blog post here).  I invite you to follow me on Pinterest and check out my board “My Stampin’ Up! Creations” so that maybe you can find some inspiration from cards that I design. 🙂

Amy used Into the Woods Designer Series Paper for her wood background. I don’t have that yet, so I used the Hardwood Background Stamp and embossed with White Embossing Powder. The other difference between our cards is the sentiment. Amy’s sentiment is from the Cottage Greetings Stamp Set, while my sentiment is from the Happy Birthday Everyone Stamp.

To assemble the edgelits layers, cut out all three, adhere them together as you see fit, and then place a circle from the Circles Collection Framelits over all three layers and run it through the Big Shot Machine. You’ll want to use a circle framelit one size bigger to cut out the soft suede layer behind the hill scene. I flagged the ends of my  sentiment banner with Paper Snips and popped it up with Stampin’ Dimensionals.

I’m not sure what I’ll be posting next. Could be more Christmas, could be Fall, could be cards with cool techniques I’ve been wanting to try and/or share. I invite you to subscribe to my blog by email (see spot in the sidebar on the right) so you don’t miss a post. Thanks for reading.

Joyful stamping!

~Stephanie

Price: $110.00

Supply List

Built for Free Using:  My Stampin Blog