Embossing Paste Cards, Just Because Cards, Stampin' Up!, Wedding Cards

Pearlescent Embossing Paste Cards

Hello all! When I started this embossing paste series I said I would post four cards in four days.  I got a little off of my schedule (we had a busy last two days), but here are two cards using pearlescent embossing paste.


This first card uses the 4th and last stencil in the Happy Patterns Decorative Masks pack. I really like how the word “happy” is part of the stencil. I wanted to go simple for the first card.  This card uses Basic Black cardstock with the pearlescent embossing paste. The embossing paste sort of looks silver against the black cardstock, but it is really pearlescent.
IMG_3284


I decided to make another card with the pearlescent embossing paste, but a little more stepped up. I thought I would showcase another set of Stampin’ Up! stencils as well. This pack of stencils is called the Dots and Stripes Decorative Masks.

IMG_3285

I looked on Pinterest for some inspiration for using pearlescent embossing paste and was inspired to go lighter for this second card. I think the pearlescent paste against the Whisper White cardstock looks so sophisticated. It inspired me to make this card a wedding card.

IMG_3282

I decided to add to the sophistication of this wedding card with a few gold accents. I used Whisper White cardstock for my card base. I then used the Gold Foil Sheets for a layer behind the technique piece. I also added some little gold hearts from the Metallic Sequin Assortment.  I used the Tin of Cards stamp set to stamp my sentiment with Versamark ink, and then embossed it with Gold Stampin’ Emboss Powder using the Heat Tool.

To finish off the card I used my Big Shot machine and Butterflies Thinlits dies to cut out some adorable little butterfly accents from vellum cardstock. I forgot how easy the vellum cardstock is to work with – very heavy duty. Our Fast Fuse adhesive is an awesome adhesive for vellum. The adhesive does not show through the vellum like most adhesives do. It’s fantastic! I popped up both the gold layer and the sentiment banners with Stampin’ Dimensionals and used Multipurpose Liquid glue to adhere the sequins.


I had so much fun playing with my different embossing pastes that I have a feeling I might have more cards to add to this series. I won’t commit to it though, just in case I feel inspired to make other types of cards for a little while. 🙂

I have a piece of exciting news to share with you: Stampin’ Up!’s 2015 Holiday Catalog went live today! You can view the Holiday Catalog here.  It is divided up into product suites for ease of viewing. Once my pre-order of Holiday Catalog products arrives (today!), I will start playing around with the new products and will post samples soon. I’m so excited to start creating! 🙂

Joyful stamping!

~Stephanie

Congratulations Cards, Embossing Paste Cards, Stampin' Up!

Embossing Paste with a Twist

Hello all! In my last post, I used gold embossing paste with one of the stencils from the Happy Patterns Decorative Masks pack. Today, I have another embossing paste card to share with you using a different stencil from the same stencil pack.

White Embossing Paste Card over sponging with Dazzling Diamonds- resized

On this card I used White Embossing Paste and sprinkled Dazzling Diamonds glitter on the paste before it dried. I love how the sparkliness looks against the sponging underneath.

Other Supplies used on this card: Tangerine Tango Ink, Bermuda Bay Ink, Whisper White Cardstock, Bermuda Bay Cardstock, Banner Triple Punch, Expressions Natural Elements, Stampin’ Sponges, Stampin’ Dimensionals (for adhering banner to cardstock), Snail Adhesive (for adhering cardstock to cardstock), & Multipurpose Liquid Glue (for adhering wooden element).

Be sure to stop back tomorrow and the day after for two more cards in my Embossing Paste series! I invite you to subscribe to my blog by email so you don’t miss a post.

Please leave me a comment and let me know if you prefer the Gold Embossing Paste on the Bohemian card from yesterday’s post, or if you like the White Embossing Paste with Dazzling Diamonds from today’s post. I love them both!

Joyful stamping!

~Stephanie

Birthday Cards, Embossing Paste Cards

Bohemian Style Embossing Paste Card

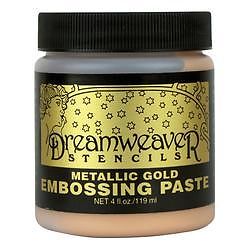
Embossing paste is a very cool crafting medium that adds a lot of interest to your cards & projects. The texture is kind of like a smooth frosting. It needs to harden up after application. The only drawback to embossing paste is that Stampin’ Up! does not currently carry it. However, to use embossing paste you need stencils, which Stampin’ Up! does carry. 🙂 When I was researching which embossing paste to purchase, I decided upon the Dreamweaver brand, which is the same thing as the Wendi Vecchi brand. Here is a link for the gold paste that I used on this card.

Metallic Gold Embossing Paste- Dreamweaver

The newest stencils from Stampin’ Up! are the four shown below. They come in a four pack called Happy Patterns Decorative Masks.  I have made a card using each one of these stencils/masks. I plan to share one project a day over the next few days. They work super well with embossing paste because of the tight patterns. I invite you to subscribe to my blog via email so you don’t miss a project (see sidebar on right).

IMG_3266

It is totally acceptable to apply the embossing paste directly to your cardstock, but I was inspired by a project I saw online to first sponge on my cardstock, and then emboss over top of it.

IMG_3255

Don’t worry too much about your sponging.  The embossing paste will catch the viewer’s attention and will cover up imperfections in the sponging.

IMG_3256

When you are done sponging and are ready to use your embossing paste, I recommend securing your stencil to your work surface so it doesn’t slip around. I use washi tape because it is sticky, but not too sticky that it will be difficult to lift up when you are done applying the paste.  The easiest way to apply the embossing paste is with the back of a pallette knife.

IMG_3258

Try to apply the embossing paste in an even layer over the stencil, unless you are going for a rough, edgy look. I was a little lighter with the paste in the lower right hand corner, but I eventually covered that with my sentiment. Try to brush the paste on lightly, in one direction, so you don’t get any underneath the stencil.

IMG_3259

Try to apply the paste quickly because you will need to wash off your stencil very soon after applying the paste. If you don’t, the paste will start to harden on your stencil and will be very difficult to wash off. I use dish soap when cleaning off my stencils and that seems to help.

IMG_3260

Above is what the embossing paste looks like immediately after removing the stencil. Below is what it looks like after drying over night. I have read that you can continue assembling your card after letting the paste dry for 20-40 minutes. I like to be extra careful. 🙂

IMG_3262

Here is my final card. I was inspired to go Bohemian with this card because of the stencil I chose. Take a look at Stampin’ Up!’s Bohemian Designer Series Paper (DSP) and you will see what I mean.  In my card I replaced the Hello Honey color with the gold embossing paste. I didn’t want those two colors to clash, being so close in tone to one another.

IMG_3263

The other supplies used on this card are: Island Indigo Cardstock, Blackberry Bliss Cardstock, Whisper White Cardstock. Bermuda Bay Ink (sentiment & background), Rich Razzleberry Ink (sentiment & background), Island Indigo Ink (sentiment only), Stampin’ SpongesBohemian Borders Stamp Set, 2 1/2″ Circle Punch, 2″ Circle Punch, Whisper White 3/8″ Stitched Satin Ribbon, Stampin’ Dimensionals (to pop up white circle), Snail Adhesive (to adhere card layers), & Multipurpose Liquid Glue (to adhere the Blackberry Bliss sentiment layer).

After I assembled the card I wished that I had also used Stampin’ Dimensionals to adhere the Blackberry Bliss sentiment layer. I used the Multipurpose Liquid Glue because I didn’t want TOO much dimension. As I look at the card now, I think the Stampin’ Dimensionals would have kept the top and bottom of the layer from sinking down. You could stick them in between the embossing paste diamonds to avoid adding too much more dimension.

I invite you to check back the next few days for 3 more projects showcasing embossing paste. Please leave me a comment below and let me know what you think about embossing paste and if you have ever tried it before.

Joyful stamping!

~Stephanie