Congratulations Cards, Stampin' Up!

Powder Pink Congrats Card with Flourish Thinlits Dies

Here is the first of the 5 new In Color Cards mentioned in my last post. Click here to see the coordinating card box. Scroll to the bottom of this post to see all five cards. I will post the other four in the next few days. I think this card has a few possibilities – Wedding Card, Baby Girl Card, general elegant congratulations card for a female.  Love that versatility. 🙂 

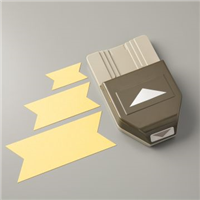
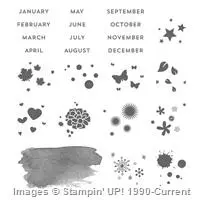
I have not used the “Banners for You” stamp set and coordinating “Bunch of Banners Framelits” dies as much as I thought I would since I bought them. They got pushed to the back of my supplies and I kind of forgot about them. I am so glad I remembered them.  I really love the simple “congrats” banner on this card.


I also have been neglecting my “Flourish Thinlits” dies. Glad I remembered them too. The die I use is the largest die in the set and probably my favorite (my second favorite is the large flower die cut in the top right corner of the picture below). 

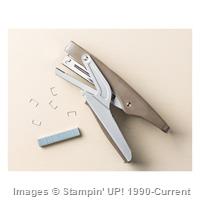
I love how this large die cut is the perfect statement piece on a card – it’s so beautiful on it’s own you don’t really need to do anything else to the card and it will still wow the recipient. Here is a close up/angled shot of the die cut and banner. This is the perfect kind of intricate die to use with the Multipurpose Adhesive Sheets – so nice to have the adhesive ready to go on your die cut – no more fiddling with the fine tip glue pen!) As you can see, I popped the banner up over the die cut (slightly lower the centered) using Stampin’ Dimensionals. I also used Stampin’ Dimensionals to pop up the large whisper white layer, which is more visible in the picture above.


Check back in a few days to see the next card from the 2017-2019 In Color Collection (I’m thinking it will be the Tranquil Tide card) or subscribe to my blog by email so as not to miss a post (see the “Follow My Blog by Email” section near the top right of my blog).

Below you will find information on two specials running this month. Click here to be redirected to a previous blog with more detailed information.


–> Bonus Days

For every $50 you spend in July, you earn a $5 coupon to spend in August.

Bonus Days are back!...Stampin’ Up!® - Stamp Your Art Out! www.stampyourartout.com

  • There is no limit to the number of coupons participants can receive per order or throughout the duration of the promotion.
  • An email address is required to participate; Bonus Days coupon codes can only be delivered via email.

–> Christmas in July for new demonstrators!

Purchase the Starter Kit in July for $99 ($175 value) to join my community of Stampin’ Up!® demonstrators and you will receive the Carols of Christmas stamp set AND Essentials Gift Pack of Tools for FREE (an extra $72 value)!It’s Christmas in July!...Stampin’ Up!® - Stamp Your Art Out! www.stampyourartout.com

Essentials Gift Pack:

  • 118485 – D Block (x2)
  • 130148 – Grid Paper
  • 103579 – Paper Snips
  • 104332 – SNAIL Adhesive
  • 102300 – Bone Folder


If you would like to buy any Stampin’ Up products, you can shop on line 24/7 in my online store HERE, or get in touch with me at stephaniemackey2012@gmail.com.  I would love to help you in whatever way I can.

I hope you are inspired to create with some stamps and die sets that you haven’t used for awhile – beautiful things can happen!- and maybe to try creating with banners stamp set and die sets or the Flourish Thinlits dies.

Joyful stamping!

~Stephanie

Dimensions: 

  • Card base – standard A2 size (5 1/2 x 8 1/2″, scored in half at 4 1/4″)
  • Whisper White layer – 5 1/4 x 4″

Supplies: 

  • Banners for You Stamp Set
  • Bunch of Banners Framelits Dies
  • Flourish Thinlits Dies
  • Big Shot Machine
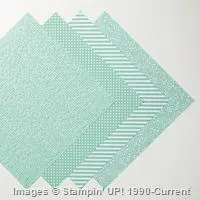
  • Cardstock: Powder Pink & Whisper White
  • Adhesives: Multipurpose Adhesive Sheets & Stampin’ Dimensionals
Congratulations Cards

Petal Burst Congrats Card

Hello everyone! I am so happy to be posting again!  I had a part time teaching job the last few months and spent my free time planning and correcting instead of crafting. I am not going to be teaching next semester and I look forward to posting more frequently. 🙂

congrats-banner-card

I used the Jar of Love Bundle and the Banners for You Bundle on this card. I’ve had both of these bundles for months and haven’t been able to make time to use them yet. I am so excited for all the possibilities. I think these bundles really work well together. Too bad we can’t get a discount on bundling bundles! We’ll have to settle for the 10% discount on each individual bundle. 🙂

Here is a closer look at the adorable banner, popped up over the leaves with Stampin’ Dimensionals.  congrats-card-close-up-top-angle

Below is the Petal Burst Textured Impressions Embossing Folder.I used for the background. I can’t wait to try using it as a stamp! Embossing folders aren’t just for embossing. 🙂petal-burst

I love using embossing folders on my envelope flaps to coordinate them with the card.

congrats-card-envelope

The last thing I want to highlight is the shimmery white cardstock. The light is a little harsh on the gold embossing, but you can see the awesome shimmeriness of the cardstock.

congrats-card-super-close-up

Below are the two bundles used on this card, “Jar of Love” & “Banners for You.”

jar-of-love-bundle
banners-for-you-bundle

I hope you have been inspired to sit down and do some crafting! Hopefully you haven’t been in as much of a dry spell as I have.

Joyful stamping,

~Stephanie

Supplies used: Jar of Love Photopolymer Bundle, Banners for You Bundle, Petal Burst Textured Impressions Embossing Folder, Big Shot, Calypso Coral Cardstock, Old Olive Cardstock,  Shimmery White Cardstock, Gold 1/8″ Ribbon, Stampin’ Dimensionals, Fine Tip Glue Pen, Calypso Coral Classic Stampin’ Pad, Old Olive Classic Stampin’ Pad, Versamark Pad, Gold Stampin’ Emboss Powder, Heat Tool.

All Occasion Cards, Birthday Cards, Congratulations Cards, Stampin' Up!

“What a Gem” Paper Pumpkin Kit Bonus Card

Hello everyone! Today’s card showcases the stamp set from the July Paper Pumpkin kit, “What a Gem”. I decided to show a Paper Pumpkin card because Stampin’ Up! recently introduced a Bogo Paper Pumpkin promotion. Below are the suggested projects for the kit contents. I plan to fill these little 3D geometric shaped containers with candy.and give them to the teachers at the high school I used to teach at on the first day of school.

A few months ago, I started offering a Paper Pumpkin class where we make cards using the past month’s Paper Pumpkin stamp set. I’ve really enjoyed being creative and getting even more bang for my buck out of the Paper Pumpkin kits. 🙂

Silver Gem Card

I love using glimmer paper, but I don’t usually pull it out. This kit’s name, “What a Gem” inspired me to think shiny and sparkly. I’m glad it did, because I just love shimmer it adds to this card. Silver Gem Card

I am a huge embossing powder fan. I was sad when Stampin’ Up! retired most of their colored embossing powders, but am glad they left us the metallic colors so we can add that gorgeous shine to our cards. 🙂

Silver Gem Card Angle

And now, all the information you need on the new Paper Pumpkin Bogo promotion!

BOGO for First Time Paper Pumpkin Subscribers August 11 – October 10, 2016…#stampyourartout - Stampin’ Up!® - Stamp Your Art Out! www.stampyourartout.com

Offer Dates: August 11–October 10, 2016

Offer Details: Use promo code “BOGO” at PaperPumpkin.com, pay the regular price of $19.95 USD/$26.95 CAD and get the second month for FREE! If you subscribe with the promo code between now and September 10, you will pay full price for the September kit and get the October kit free. If you subscribe between September 11 and October 10, your first kit will be the October kit and you will get the November kit free.

The Fine Print:

  • IMPORTANT: Offer invalid if subscription is suspended or cancelled during the first two months. In other words, subscribers cannot cancel or suspend their subscription during their first two months—if they do, the offer is void.
  • After the first two months, the subscription will continue for $19.95 USD/$26.95 CAD + tax per month (shipping included) unless cancelled or suspended.
  • This offer is open to first-time subscribers only.
  • Not valid on prepaid subscriptions.
  • Ends October 10, 2016 (the last day to subscribe and get the October kit)

CLICK HERE to see more past Paper Pumpkin kits of creativity (one of my MOST favorite Stampin’ Up! products) and click here to read some FAQ’s about Paper Pumpkin kits. Also, feel free to contact me at stephaniemackey2012@gmail.com if you have any questions.

Are you on Facebook? Join this great group to see what creative people are making with their kit contents. (Yep! You could change up your kit contents and create something completely “outside the Paper Pumpkin box”.)

I hope you are inspired to try Paper Pumpkin project kits and put your creative juices to work!

~Stephanie

Supplies for card**: “What a Gem” Paper Pumpkin stamp set, Whisper White Cardstock, Pool Party Cardstock, Pool Party ink, Silver Glimmer Paper, Versamark Stamp Pad, Silver Stampin’ Emboss Powder, Heat Tool, Stampin’ Trimmer.

**All supplies can be purchased from my online store. If you would like to place an order (and it is under $150) I invite you to enter P276RAN7 in the Hostess Code box. Thank you for your support!

Congratulations Cards, Stampin' Up!, Wedding Cards

Floral Boutique Washi Tape CASE

Hello everyone! I recently taught a class based on the Floral Boutique Suite (p. 76-77 of the Annual Catalog). I had a blast scouring Pinterest for awesome projects to CASE (Copy and Share Everything). Although my favorite product in this suite is the dice cut set, Detailed Floral Thinlits Dies, I did want to have one card in the class that did not involve die cutting. I decided to go with a card that put the Floral Boutique Washi Tape front and center. Here’s what I came up with. 🙂

CASE Angle

I need to give credit to Kay Kalthoff for the original on which my card is CASEd. Here is her lovely card. As you can see, I drew the washi tape, ribbon and sentiment inspiration from her card. 

I had a lot of fun adding in some color here. Night of Navy is really the only color of this suite and while it is beautiful and elegant, I thought the Rose Red helped give a little excitement to this “Congratulations” card.

CASE

I have been on a little bit of a kick with this angled washi tape look. I love off setting the sentiment on the top and then balancing it out on the bottom with a few little punched hearts or some lovely pearls. I like Kay’s idea of adding some baker’s twine in the mix. 🙂
CASE Flat

I hope you are inspired to create with some of Stampin’ Up!’s gorgeous washi tape. I’d love to see what you come up with. If you send me your creations at stephaniemackey2012@gmail.com, I might include them in a future blog post.:)

Joyful stamping!

~Stephanie

Supplies**: Floral Boutique Designer Washi Tape, Floral Phrases Stamp Set, Night of Navy Solid Baker’s Twine, Whisper White Cardstock, Whisper White Thick Cardstock, Rose Red Card Stock, Rose Red Classic Stampin’ Pad, Pearls Basic Jewels, Snail Adhesive, Paper Snips, & Stampin’ Trimmer.

**All supplies can be purchased from my online store. If you would like to place an order (and it is under $150) I invite you to enter 4SHN2EBW in the Hostess Code box. Thank you for your support!


Birthday Cards, Congratulations Cards, Designer Series Paper Cards, Stampin' Up!

DSP Strips with Affectionately Yours Paper

Hello everyone! Today’s card is a bright one. It features the Affectionately Yours Specialty Designer Series Paper (DSP) and comes with a picture tutorial.  This layout is awesome for showcasing all of the beautiful designs of a DSP pack. I am excited to try it with some of the other awesome DSP packs in the 2016-2017 Stampin’ Up! Annual Catalog. 

Stripes Angle


  1. Begin by cutting some strips of DSP, or use scraps. Make sure that they are long enough to fit across the cardstock base you will be adhering them to. For this card the cardstock base is 3 3/4 x 5″. I cut some DSP strips to a 1/2″ width and a few to 3/4″ width for variety. Lay down some Snail Adhesive on your cardstock piece to keep the DSP strips in place. IMG_4133

2. As you lay down your strips be sure to place them tightly together, leaving no cardstock showing through. It will be very obvious at the end. Also, be sure that the DSP strips hang off both sides of the cardstock base to ensure your entire base is covered.  If you want to go the easy route, just use 12″ strips. Then you’ll be sure to have long enough strips. You could probably get away with 7 or 8″ strips too. Obviously, as you get closer to the ends you don’t need as long of strips.

IMG_4134

3. When you have covered your cardstock base with DSP strips, turn it over and use Paper Snips to trim off the DSP that hangs over the sides.

IMG_4138

4. Behold your breathtaking creation!

IMG_4139


Here are a few more shots of the card. I thought the yellow flower from the Botanical Blooms Thinlits Dies set worked really well to bring out the little bits of yellow in the DSP designs. Strips

I adhered the flower with a glue dot and the sentiment piece with Stampin’ Dimensionals.

Stripes Flat

I hope you are inspired to try this layout and have fun with some DSP. 🙂

Joyful stamping!

~Stephanie

Supplies**: Affectionately Yours Specialty Designer Series Paper, Botanical Blooms Thinlits Dies, Butterfly Basics Stamp Set, Decorative Label Punch, Cucumber Crush Classic Stampin’ Pad, Crumb Cake Cardstock, Night of Navy Cardstock, Daffodil Delight Cardstock, Whisper White Cardstock, Paper Snips, Glue Dots, Stampin’ Dimensionals, Snail Adhesive, Pearls Basic Jewels.

**All supplies can be purchased from my online store. If you would like to place an order (and it is under $150) I invite you to enter 4ZN3MB4Z in the Hostess Code box. Thank you for your support!

2016-2018 In Color Cards, All Occasion Cards, Birthday Cards, Congratulations Cards, Die Cut Cards, Just Because Cards, Stampin' Up!, Thank You Cards

Color Blocking with In Colors

Hello everyone! A few weeks ago I held a New Catalog Launch party. One of the Make & Takes was a color blocking card with the new 2016-2018 In Colors. I had a few extra cards prepped and thought I would have some fun coming up with different ways to finish off this card using the color blocking with the In Colors as the starting point. The strips of cardstock are 3 3/4 x 5″.

Leave me a comment below and let me know which of the five versions is your favorite!

Die Cut

Card #1: Flourish Thinlits and Floral Phrases stamp set.

(For a little extra dimension and to make the spacing easier I glued the colored cardstock strips to a piece of 4 x 5 1/4″ piece of Whisper White carstock and then adhered it to the card base.)

Hip Hip Hooray

Card #2: Party Pop Ups Thinlits

Embossed

Card #3: Gold Embossed with Floral Phrases stamp set

Tone on Tone

Card #4: Tone-on-tone with Kinda Eclectic Stamp Set

(Sweet Sugarplum banner 3 5/8 x 1 3/4″, Whisper White banner 3 3/8 x 1″)

Mini Treat Bag

Card #5: Mini Treat Bag Thinlits Dies & Rhinestone Basic Jewels

(3 1/2 x 1/2″ banner, it is smaller than the die)

I hope you are inspired to try your hand at some color blocking, especially with the new 2016-2018 In Colors. They look awesome together!

Joyful stamping!

~Stephanie

Supplies**: Whisper White Thick Cardstock, Peekaboo Peach Cardstock, Emerald Envy Cardstock, Flirty Flamingo Cardstock, Sweet Sugarplum Cardstock, Dapper Denim Cardstock, Snail Adhesive, Stampin’ Trimmer.

**All supplies can be purchased from my online store. If you would like to place an order (and it is under $150) I invite you to enter 4ZN3MB4Z in the Hostess Code box. Thank you for your support!

Baby Cards, Congratulations Cards, Stampin' Up!

“Oh, Baby”!

Hello everyone! I had a lot of fun creating today’s card. I was playing around with my Gold Glitter Tape, left over from Sale-A-Bration, and my Paper Pumpkin stamps: this is what I came up with.

Front

If you don’t have the Gold Glitter Tape, or if you run out and still want to make this card, you could easily switch it out with Gold Glimmer Paper. You could also stick any sentiment you want in that scalloped oval – I think this would make a super cute Graduation card for a special young lady. 🙂  The sentiment I used on this card and the little hearts on the inside of the card are also from the March 2016 Paper Pumpkin kit, “Pocketful of Cheer.”

Inside

My black card base is 5 1/2″ x 8 1/2″, scored in half at 4 1/4″. The Pink Pirouette layer is 5 1/4″ x 4″. I spaced the Gold Glimmer Tape 1/2″ apart on the Pink Pirouette layer. The glimmer tape itself is slightly more than 1/2″, but it’s so close to the width of the Pink spaces that the difference isn’t really noticeable.

Left

I popped both balloons up on Stampin’ Dimensionals, taking care not to put a dimensional behind the front balloon where it overlapped the back balloon. I thought the Gold Sequin Trim put a fabulous finishing touch on this card. I love using the Sequin Trims as trim, rather than taking off sequins and using them individually. But that can be fun too!

Right

I hope you are inspired to do some creating with your Glitter Tapes, Glitter Papers, & Sequin Trims. If you are, I’d love to see them. If you would like to share them with me via email at stephaniemackey2012@gmail.com, I will post them to my blog. 🙂

Just three short weeks until the new Annual Catalog goes live! I plan to do my demonstrator pre-order in the next few days, so hopefully I will be able to share some fun new projects with you in the coming weeks. 🙂

Joyful stamping!

~Stephanie

Supplies**: Basic Black Cardstock, Pink Pirouette Cardstock, Whisper White Cardstock, Pocketful of Cheer Paper Pumpkin Kit, Versamark Ink, Gold Stampin’ Emboss Powder, Heat Tool, Balloon Bouquet Punch (Large Balloons), Gold Glimmer Paper, Gold Sequin Trim, XL Scallop Oval Punch, Glue Dots (for attaching Gold Sequin Trim), Stampin’ Dimensionals, Snail, Stampin’ Trimmer.

** All supplies can be purchased from my Online Store. I would love to be your Stampin’ Up! demonstrator. 🙂 If you order through me, I invite you to use the Hostess Code RBTK9C7N when you place your online order.

All Occasion Cards, Birthday Cards, Congratulations Cards, Washi Tape Cards

Happy Day to You

Hello everyone! Today’s card is pretty basic, but still packs a punch!  I am intending it to be a “birthday” card, but I think the sentiment is pretty versatile and could work as a “congratulations” card or “just because” card as well.

Happy Day Angled

I used the Perfect Pairings Sale-A-Bration Stamp Set on this card. This stamp set is one of the many awesome products that you can choose for free through the end of March with a $50 order. I would be honored if you would choose me as your demonstrator, if you don’t already have one. You can see all the Sale-A-Bration products in the SAB Brochure and SAB Flyer. Check out the new Occasions Catalog as well for some more birthday fun!STAMPIN UP PERFECT PAIRINGS 9 PC CLEAR MOUNT RUBBER STAMP SET-SAYINGS BIRTHDAY

I love washi tape, but find myself struggling to remember to use it. When I do remember, I usually want to showcase it and make it the focal point of my card, like I did today. Another fun way is to have little pieces popping out behind a banner like an accent. I love the bright colors in the Cherry on Top Washi Tape I used on today’s card.Happy Day

Do you struggle to find a use for the tiny Rhinestones that are connected? Rather than cutting them apart and using them individually, try using them as they come. One of my favorite ways to do that is on the body of a butterfly as shown below.

Happy Day Close Up

I hope you are inspired to create with some washi tape too!

Joyful stamping!

~Stephanie

Supplies*: Cherry on Top Washi Tape, Perfect Pairings Stamp Set, Watermelon Wonder Classic Stampin’ Pad, Bermuda Bay Classic Stampin’ Pad, Very Vanilla Cardstock, Crushed Curry Cardstock, Pool Party Cardstock, Bitty Butterfly Punch, Elegant Butterfly Punch, Corner Rounder Punch, Glue Dots, & Rhinsetones Basic Jewels.

*All supplies are Stampin’ Up!

Congratulations Cards, Stampin' Up!

“The Sky is the Limit” Congratulations

Hello everyone! Today’s card comes to you from p. 16 of the Sale-A-Bration Brochure. Sale-A-Bration, Stampin’ Up!’s biggest sale of the year, lasts until March 31st. During Sale-A-Bration (SAB) you get to choose one product for free from the SAB Brochure for every $50 you purchase of product from the new Occasions Catalog or the Annual Catalog. IMG_3716

I was looking for inspiration for a “Congratulations” card for a card class I am teaching later this month when I came across this adorable card. I knew I had found the card for my class. Below is the entire stamp set. This specific set is only available until February 15th, the midway point of SAB. Check out Pinterest for lots of awesome inspiration with this set.

I think my favorite part of this card is the linen thread bow stapled onto the sentiment banners with Stampin’ Up!’s handheld stapler. I think that takes the cuteness level up quite a few notches. 🙂 I popped the banners up on Stampin’ Dimensionals and colored in the little smoke heart with a Calypo Coral Stampin’ Write Marker.

IMG_3709

The inside of the card is my own design. I lined the little clouds with the same Calypo Coral Stampin’ Write Marker from the smoke heart on the front of the card.

Congrats INside

I hope you enjoyed this highlight from the SAB Brochure and are inspired to do some stamping with the Sky is the Limit stamp set. Get it before it’s gone!

Joyful stamping!

~Stephanie

All Occasion Cards, Birthday Cards, Congratulations Cards, Stampin' Up!

A Watermelon “Just for You”

Hello everyone! I didn’t set out to make a Watermelon card, but that’s what this one reminds me of. 🙂 I really like this color combo.  The bold Watermelon Wonder ink really shines when paired with the neutrals of Basic Black and Whisper White.  I created the faux watercolor wash using a stamp from the Perpetual Birthday Calendar stamp set. I stamped it four times, reinking each time, overlapping the images just slightly.

Watermelon Side

This card also features the main image from the “Botanicals for You” Sale-A-Bration stamp set. I featured this same set on a previous post.  Because this set is a Sale-A-Bration stamp set, it can’t be purchased. You can, however, get it for FREE with a $50 order.


Check out the Sale-A-Bration Brochure for a bunch of other products you can earn for FREE with $50 orders (1 FREE item per $50 order). If you would like to place an order, and earn this or one of the other Sale-A-Bration sets for FREE, you can do so in my online store. Check out the awesome new products from the newly released Occasions Catalog to help you with your order.

Watermelon

I really like how this set has the one big sentiment for the front but then offers three different sentiments for inside. This really makes for a versatile set. I had a birthday card in mind with the sentiment below, but it could also work for a graduation or celebration of an accomplishment. The other two sentiments are “Because you’re so nice” & “Because you’re awesome.” These sentiments make me think of Thank You cards or Just Because cards.Watermelon Inside

Sometimes it’s easy to get caught up in the excitement of new products and forget about the really neat products that have been around for awhile. I wanted to highlight the Envelope Liners Framelits Dies today. I still love them, but don’t use them as much as I should. I chose a pattern that matched my card color wise, but added a little more interest to the card opening experience with the tight flower pattern. What do you think of the patterned paper/card combo? Leave me a comment below and let me know. 🙂

IMG_3676 IMG_3677

I pray you are inspired to play around with some bold colors (you’ll have fun!) and to give this Sale-A-Bration set a try!

Joyful stamping!

~Stephanie

Supply List

Built for Free Using: My Stampin Blog