Designer Series Paper Cards, Die Cut Cards, Halloween Cards

3 Days of Halloween – Day 3

Hello everyone! For Day 3 of my 3 Days of Halloween blog post series I have a 3D project for you. lol I didn’t even plan that, but I like the connection.  3D for Day 3. 🙂

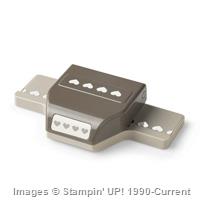
I haven’t used my Gift Box Punch Board for awhile, but it was still super fun. This is the largest box the punch board can make, 4 x 4″. You need a 12 x 12″ piece of cardstock or DSP (Designer Series Paper) to make this box. It really is a big box – I fit lots of candy inside!

witches-and-trees

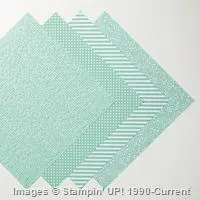
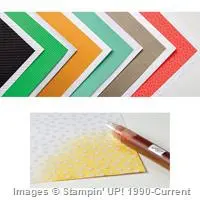
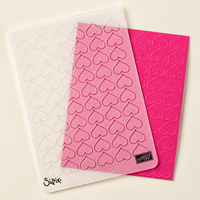
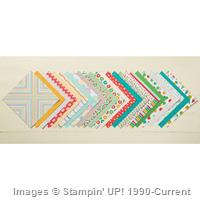
This striped pattern is my favorite from the Halloween Night Specialty Designer Series Paper pack. There are lots of great designs, as you can see below.

halloween-night-dsp

Here are the other two sides of my box. There really are some adorable little dies in the Halloween Scenes Edgelits die set.

tombstones-and-bats

halloween-scenes

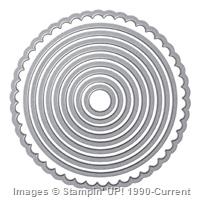
It was a little tricky coming up with the topper for the box. I knew I wanted something though so I experimented. The circles are Pumpkin Pie and Basic Gray. I die cut them with circle dies from the new Layering Circles Framelits Dies. Sadly, I don’t remember which ones I used – you’ll have to experiment to find the right size. 🙂 Feel free to post a comment if you do find out which sizes work well.

top
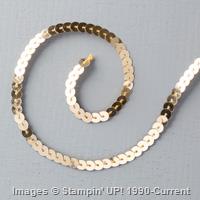
I adhered a length of the black and grey baker’s twine from the Halloween Night Baker’s Twine pack (the other twine in the pack is Pumpkin Pie and Black) between the two cardstock circles and added a sprinkling of Halloween Night Enamel Dots.

tree

I wanted to give a close up of my favorite side of the box – I really can’t get enough of this spooky tree! Hopefully I will be able to find a way to use this year round – maybe add some flowers and make it a spring-time tree? We’ll see. 🙂

I hope you have been inspired – maybe to do some Halloween crafting and get a head start for next year 🙂 – or to create a different box with a Thankful theme or a Christmas theme.

Joyful stamping!

~Stephanie

Supplies**: Halloween Night Specialty DSP, Gift Box Punch Board, Halloween Scenes Edgelits Dies, Spooky Fun Stamp Set, Basic Black Cardstock, Pumpkin Pie Cardstock, Basic Gray Cardstock, Versamark Ink, Whisper White Stampin’ Emboss Powder, Heat Tool, Big Shot Machine, Halloween Night Enamel Dots, Halloween Night Baker’s Twine, Layering Circles Framelits Dies, Glue Dots, Snail Adhesive, & 1 ” Circle Punch (for the moon).

** All supplies can be purchased from my online store. Thanks for your support!

Birthday Cards, Congratulations Cards, Designer Series Paper Cards, Stampin' Up!

DSP Strips with Affectionately Yours Paper

Hello everyone! Today’s card is a bright one. It features the Affectionately Yours Specialty Designer Series Paper (DSP) and comes with a picture tutorial.  This layout is awesome for showcasing all of the beautiful designs of a DSP pack. I am excited to try it with some of the other awesome DSP packs in the 2016-2017 Stampin’ Up! Annual Catalog. 

Stripes Angle


  1. Begin by cutting some strips of DSP, or use scraps. Make sure that they are long enough to fit across the cardstock base you will be adhering them to. For this card the cardstock base is 3 3/4 x 5″. I cut some DSP strips to a 1/2″ width and a few to 3/4″ width for variety. Lay down some Snail Adhesive on your cardstock piece to keep the DSP strips in place. IMG_4133

2. As you lay down your strips be sure to place them tightly together, leaving no cardstock showing through. It will be very obvious at the end. Also, be sure that the DSP strips hang off both sides of the cardstock base to ensure your entire base is covered.  If you want to go the easy route, just use 12″ strips. Then you’ll be sure to have long enough strips. You could probably get away with 7 or 8″ strips too. Obviously, as you get closer to the ends you don’t need as long of strips.

IMG_4134

3. When you have covered your cardstock base with DSP strips, turn it over and use Paper Snips to trim off the DSP that hangs over the sides.

IMG_4138

4. Behold your breathtaking creation!

IMG_4139


Here are a few more shots of the card. I thought the yellow flower from the Botanical Blooms Thinlits Dies set worked really well to bring out the little bits of yellow in the DSP designs. Strips

I adhered the flower with a glue dot and the sentiment piece with Stampin’ Dimensionals.

Stripes Flat

I hope you are inspired to try this layout and have fun with some DSP. 🙂

Joyful stamping!

~Stephanie

Supplies**: Affectionately Yours Specialty Designer Series Paper, Botanical Blooms Thinlits Dies, Butterfly Basics Stamp Set, Decorative Label Punch, Cucumber Crush Classic Stampin’ Pad, Crumb Cake Cardstock, Night of Navy Cardstock, Daffodil Delight Cardstock, Whisper White Cardstock, Paper Snips, Glue Dots, Stampin’ Dimensionals, Snail Adhesive, Pearls Basic Jewels.

**All supplies can be purchased from my online store. If you would like to place an order (and it is under $150) I invite you to enter 4ZN3MB4Z in the Hostess Code box. Thank you for your support!

2016-2018 In Color Cards, All Occasion Cards, Designer Series Paper Cards, Just Because Cards, Stampin' Up!

In Color Paper Weaving

Hello everyone! Here is the 4th and last card in my current Designer Series Paper (DSP) series. This is not the first time I’ve done a card with paper weaving on my blog (see Paper Weaving with DSP). However, it is an excellent way to use up DSP scraps and I wanted to include that idea with these DSP cards.

Dimensions: The cardbase is 8 1/2 x 5 1/2″ (scored in half at 4 1/4″). The Flirty Flamingo Layer is 3 3/4 x 5″. The Crumbcake layer is 3 1/2 x 4 3/4″. The DSP strips are 1/2 x 4 3/4″. The cardstock strips are 1/2 x 3 1/2″.

Weaving

The biggest hint I can give for weaving the DSP strips is to adhere one end of all the strips in place with a glue dot. This gives just enough adhesive to keep the strips where you want them and still allows you to maneuver the strips into the woven pattern. I also used a few glue dots to adhere the rest of the strips into place after weaving.

The second hint is to keep the strips pretty close together. This is actually the second card I made because the first card had a looser weave that just didn’t look as striking. Speaking of striking, how awesome are those adorable little white hearts? I think they are what pulls the card together.

Weaving Side

I hope you are inspired to play with paper weaving and to create with some of the new 2016-2018 In Colors as well. Aren’t they lovely?

Joyful stamping!

~Stephanie

**Supplies**: Sweet Sugarplum Cardstock, Flirty Flamingo Cardstock, Crumb Cake Cardstock, 2016-2018 In Color Envelope Paper, Hearts Border Punch, Crumb Cake Classic Stampin’ Pad, Love You Lots Stamp Set, Glue Dots, Snail Adhesive, Stampin’ Trimmer.

**All supplies can be purchased from my online store. If you would like to place an order (and it is under $150) I invite you to enter 4ZN3MB4Z in the Hostess Code box. Thank you for your support!


All Occasion Cards, Birthday Cards, Designer Series Paper Cards, Just Because Cards, Stampin' Up!

Double Vision

Hello everyone! Today’s post is a double feature. Both cards have the same design and basic color scheme, but one is subdued while the other is bold.

IMG_4123

Both cards feature the Affectionately Yours Specialty Designer Series Paper (DSP). One neat thing about Stampin’ Up!’s DSP packs is that all the colors used in each individual pack coordinate with the other colors used in that pack. That way, even if you use a one color design like I did on both cards, you don’t have to think too long about what colors to use with it.IMG_4121

I love how the large chunks of Watermelon Wonder contrast with the pops of Night of Navy in the bold card. I also love the softness of the light contrast between the little dots of Watermelon Wonder and the Crumb Cake in the subdued card. Which one is your favorite? Leave me a comment below and let me know. 🙂

IMG_4124

Instructions: Cut a piece of DSP to 3 3/4 x 4 1/4″.  If you want a larger gap between your pieces simply make your DSP starting piece shorter than 4 1/4″.  To create the gap between the pieces of DSP you will need to use your Stampin’ Trimmer.  It looks strange at first, but when cutting you need to make sure the top left hand corner of the DSP is on the right side of your cutting blade.  The ruler extends to 1 1/4 on the right side of the blades. This is important for creating the slant that you want.  I wanted a gentle slant so I placed the top left hand corner of the DSP at the 1 1/4″ mark on the right hand side of the blade and I lined up the bottom right hand corner with the 1 1/4″ line on the left hand side of the blades. If you want steeper slant, simply line those same corners up with lines closer to the cutting blade.

IMG_4125

This layout is great if you really want your DSP to shine. With so much of the pattern showing, your DSP is sure to get lots of attention! The “HAPPY” sentiment is from the “Celebrate Today” stamp set. I stamped the “birthday” image on the inside of the cards in Watermelon Wonder ink. I punched the flower out with the Flower Medallion punch and popped it up with Stampin’ Dimensionals.

I hope you are inspired to try this layout with your favorite DSP. I’d love to see what you come up with. If you send me your creations at stephaniemackey2012@gmail.com, I might include them in a future blog post. 🙂

Joyful stamping!

~Stephanie

**Supplies** used on both cards: Affectionately Yours Specialty DSP, Stampin’ Trimmer, Celebrate Today Stamp Set, Watermelon Wonder Classic Stampin’ Pad, Flower Medallion Punch, Whisper White Cardstock, Stampin’ Dimensionals, Snail Adhesive.

Bold card only: Watermelon Wonder cardstock

Subdued Card only: Crumb Cake Cardstock.

**All supplies can be purchased from my online store. If you would like to place an order (and it is under $150) I invite you to enter 4ZN3MB4Z in the Hostess Code box. Thank you for your support!


Designer Series Paper Cards, Stampin' Up!, Thank You Cards

Cut & Flipped Hearts

Hello everyone! Here is the second card in my Designer Series Paper (DSP) blog post series.  Stampin’ Up!’s DSP is known for being two sided. Unfortunately, when we use one beautiful side of the DSP, we have to (usually) hide the other side.  I thought this cut & flipped hearts layout was a fun way to showcase both sides of each of these gorgeous DSP sheets.

Hearts Front

The DSP featured on this card is from the Affectionately Yours Specialty DSP pack. I used the Sweetheart Punch to punch out 3 hearts each from 2 different DSP sheets. I then cut them in half, flipped one half of each heart over, and re-matched them up with their other halves. It can’t be the original one because when you flip it over you have two of the same side.

Hearts Angle

I used the Multipurpose liquid glue to adhere the hearts. This glue doesn’t dry immediately so it gave me some time to wiggle the halves of the hearts into the right place before the glue dried. I used the Fine Tip Glue Pen on the “Thanks” thinlit die from the Hello You Thinlits die cut set.

I hope you are inspired to try this layout or another that lets you showcase both awesome sides of DSP sheets!

Joyful stamping!

~Stephanie

Supplies**: Hello You Thinlits, Sweetheart Punch, Affectionately Yours Specialty Designer Series Paper, Crumb Cake Cardstock, Whisper White Cardstock, Cucumber Crush Cardstock, Stampin’ Trimmer, Fine Tip Glue Pen, Snail Adhesive, Multipurpose Liquid Glue.

** All supplies are available for purchase from my Online Store. If you would like to place an order (and it is under $150) I invite you to enter 4ZN3MB4Z in the Hostess Code box. Thank you for your support!

All Occasion Cards, Designer Series Paper Cards, Just Because Cards, Stampin' Up!, Sympathy Cards

Butterfly Boutique

Hello everyone! I recently taught a class based on Designer Series Paper (DSP). When I was designing cards for this class I was thinking of layouts that showcase many designs of DSP packs as well as use up scraps of DSP so they don’t have to go to waste. My next few posts will be cards from this DSP class. I hope you enjoy them!

Navy Front

The DSP showcased in this first card is the Floral Boutique DSP. My favorite design of the 12 different designs in this pack is the one with the differently shades of blue lines (upper right hand corner). I love things with shades of the same color.

Navy Side

The rectangles measure 2 x 1 1/2″. The crumb cake banner measures 3 1/2 x 3/4″. The whisper white banner measures 3 1/4 x 1/2″.

Navy Top Angle

I borrowed my friend’s precision base plate to use with this detailed die cut from the Butterfly Thinlits die set. I wanted to see if it really made a difference in getting a cleaner cut for all the little pieces and I am happy to report that it did. It was also very helpful in getting a clean cut with the largest die cut of the Flourish Thinlits (see my recent post, Flowering Flourishes) and also for the two larger dies in the Detailed Floral Thinlits die set.

Navy Inside

I couldn’t resist adding a little interest to the inside of the card with this gorgeous little butterfly from the Papillon Potpourri stamp set. This more realistic butterfly image is my favorite from this set.

I hope you are inspired to be creative with some DSP and maybe to give this layout a try. 🙂

Joyful stamping!

~Stephanie

All Occasion Cards, Birthday Cards, Designer Series Paper Cards, Just Because Cards, Stampin' Up!, Thank You Cards

Sweet Schoolhouse Thank You

Hello everyone! Today’s card is a delightful DSP card. I CASEd the layout from Susan Itell’s blog, Simple Stampin’, but I changed up the Designer Series Paper.  I made this card with two different DSP Collections to show you how this layout will work for pretty much any DSP!
Blue School Angle

Blue School

Blue School Flat

This first card showcase designs from the Schoolhouse DSP.  It will be retiring at the end the month. If you don’t have it yet, I suggest ordering it now, while you still can! 🙂

I chose a sentiment from the “Apple of my Eye” stamp set for this card. I am thinking of it as a Thank You card, but with a sentiment like “You’re just the sweetest” you could also use this card as a Birthday card or a Just Because card.

Supplies**: Schoolhouse DSP, Apple of my Eye stamp set, 2″ Circle Punch, 1 3/4″ Circle Punch, Pool Party Cardstock, Whisper White Cardstock, Whisper White Thick Cardstock, Pool Party Classic Stampin’ Pad, Daffodil Delight Classic Stampin’ Pad, Stampin’ Trimmer, Stampin’ Dimensionals, Snail Adhesive.


I thought it would be neat to see what this Schoolhouse DSP card looked like with a different accent color.  The card below features Tangerine Tango instead of Pool Party for the accents. I also used Pool Party for the Sentiment instead of Daffodil Delight.  Leave me a comment and let me know which accent color you prefer for this card.

Orange School Angle

Orange School Flat

Orange School

**Supplies are the same as above cards with the following substitutions: Tangering Tango Cardstock and Pool Party Classic Stampin’ Pad.


I didn’t see any dimensions on Susan’s blog, so I played around and figured out my own. Took awhile to figure it out, but now I can I can whip up this card super quick. 🙂 The card base is 4 1/4″ x 11″, scored in half at 5 1/2″.  The colored cardstock layer is 4″ x 5 1/4″.  The Whisper White layer is 3 3/4″ x 5″. The two small vertical panes measure 2 3/8″ x 1/4″ and the long horizontal pane measures 3 1/2″ x 1/4″. The drawing below is the area that the cardstock DSP (Designer Series Paper) covers. It does not show any cardstock area.

IMG_3993


The following card was the first card I made. It showcases the retired “Sea Street” DSP. I wanted to include it in this blog for those of you who still had some in your retired stash. Whenever I see cards like this that use lots of DSP I immediately think of all the retired DSP I have.Sea

Sea Flat

**Supplies are the same as above cards with the following substitutions: Real Red Cardstock, Night of Navy Classic Stampin’ Pad, & Tin of Cards Stamp Set.


I hope you are inspired to try this layout out with your favorite DSP – be it current or retired. 🙂 If you would like to share your creations with me, you can do so via email at stephaniemackey2012@gmail.com and I will post them to my blog in a future post.

Joyful stamping!

~Stephanie

** All supplies can be purchased from my Online Store. I would love to be your Stampin’ Up! demonstrator.:) If you order through me, I invite you to use the Hostess Code RBTK9C7N when you place your online order.

Stampin' Up!, Thank You Cards

Blooming Thanks

Hello everyone! I have been on a thank you card kick this past month due to the many gifts we have received for Scarlette since her birth (4 weeks ago!). The inspiration for today’s card comes from p. 120 in the Stampin’ Up! 2015-2016 Annual Catalog.

Angle Thanks

I didn’t have the exact stamps sets used on the card in the catalog, but I liked the design of the card, so I switched it up a little and worked with similar sets that I already owned. I also used Melon Mambo ink instead of Rose Red as pictured on the card in the catalog.

Thanks

I used a flower from the “Crazy About You” stamp set. Although there is a leaf image in this set, it was disproportionate to the flower so I used a leaf image from a retired set “Fall Fest”. There are lots of current stamps sets with leaf images to choose from as well. The piece of Designer Series Paper measures 1 1/2 x 5 1/2″.

Close Up Thanks

I just love the wooden accents from the Expressions Natural Elements pack. There are 5 each of 3 expressions; “Thanks”, “Congrats”, & “Celebrate”.

I hope you have been inspired by today’s card. I encourage you to incorporate something unexpected, like a wooden accent, onto your next card.

Joyful stamping!

~Stephanie


Birthday Cards, Designer Series Paper Cards, Fab Friday Cards, Punch Art, Stampin' Up!, Techniques

Out on a Limb for FabFri73

Hello all!  I am pleased to introduce you to another challenge blog that I have discovered. It is called Fab Friday and is another challenge blog run by Stampin’ Up! demonstrators.

One of the design team members for Fab Friday  is Brian King, who is also on the design teams for two other challenge blogs I follow: the Global Design Project & Pals Paper Arts. The interesting thing about the Fab Friday challenges is that they run for two weeks, rather than one week like all other challenge blogs I’ve seen.

Here is the most recent challenge:

Fab Friday Logos-003

Here’s the card I came up with based on this color challenge. I am still having fun creating with my Owl Builder Punch. 🙂

Owl

I also brought out my Color Me Irresistible Specialty Designer Series Paper. This DSP is unique because it is pre-embossed. Some sheets are white images embosssed on white sheets, while others are colored sheets embossed with clear images. I used a brayer to add the Rich Razzleberry ink to the a portion of white DSP with white embossed dots. I wiped off the excess ink with a tissue. Color Me Irresistible Specialty Designer Series Paper

Here’s a close up of this adorable owl. I embossed his green front with the Decorative Dots embossing folder for a little something extra.

Owl Close Up

The cute little branch comes from the Tree Builder Punch; also a very versatile punch.

tree punch

I hope you were inspired by today’s post. Please leave me a comment and let me know what you think about this card and if you would have done anything differently.

Joyful stamping!

~Stephanie

Price: $12.50

Price: $110.00

Price: $5.25

Supply List

Built for Free Using:  My Stampin Blog

Birthday Cards, Designer Series Paper Cards, Global Design Project Cards, Just Because Cards, Shaker Cards, Stampin' Up!

Shaker Card for GDP002

I am excited to show you another shaker card for a brand new challenge blog, Global Design Project. This challenge, #GDP002, is the second challenge ever for this challenge blog. Some of the design team also design for the Pals Paper Arts challenges that I participate in.
GDP002
This shaker card is a little more traditional than my last one. In my last post, Birthday Card for MOJO415,  I went big and did a full card shaker card.  There really are so many variations of shaker cards – you can experiment for weeks and not get bored.

This card could also be considered a DSP card. I have been creating A LOT of cards that feature Designer Series Paper lately, the reason being that I have so much retired DSP that I love and am trying to use so it doesn’t go to waste. The DSP on this card is current DSP called Cherry on Top Designer Series Paper.  Once I had picked out the DSP, the colors for this card kind of fell into place.

To a Good Friend

I felt the Cajun Craze layer under the shaker frame would look a little naked if I didn’t jazz it up a little so I embossed it with the Happy Hearts Textured Impressions Embossing Folder.  I had a lot of fun creating my own confetti for this card using the Hearts Border Punch. 

You may notice that there is a piece of the Cajun Craze embossed layer missing so as to showcase the shaker frame completely. To achieve this I first die cut the Always Artichoke shaker frame. I then laid it over the Cajun Craze piece and lightly traced around the shaker frame with pencil. After cutting that out and finishing the shaker frame, all I had to do was adhere the frame in place. Just a hint with the dimensionals – I suggest using two layers so that your confetti or sequins have plenty of room to move around. They get a little squished sometimes when there is only one layer of dimensionals.
To a Good Friend Closeup

I really love the versatility of the sentiment. It could be used as a birthday card or a “just because” card. I also think that with this color combination of Crushed Curry, Cajun Craze, and Always Artichoke this card could work for a masculine card.

However, I have a feeling that my husband would tell me the shaker frame (especially with the heart confetti) makes this NOT a masculine card. 🙂 Leave me a comment and let me know your thoughts on the masculinity of this card. 

Joyful stamping!

~Stephanie

Price: $110.00

Price: $5.25

Supply List

Built for Free Using:  My Stampin Blog