Christmas Cards, Stampin' Up!

Golden Sleigh Ride Card

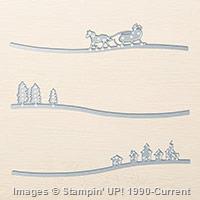
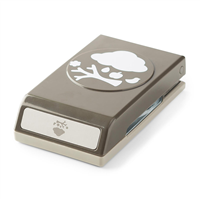
Hello all! I decided to get a VERY early start on the swaps for my Stampin’ Up! team meeting on October 17th, seeing as everyone keeps telling me how busy I will be when my baby arrives. 🙂 The theme for the swap is Christmas/Fall. Since I just love these Sleigh Ride Thinlits, I decided to go with a Christmas card.  GoldWhiteSleighRide

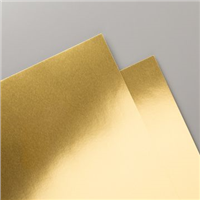
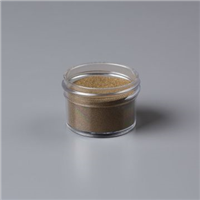
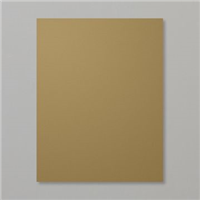
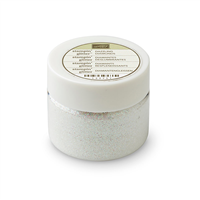
I CASEd (Copy and Share Everything) this card from one I saw on Pinterest, but I did change it up. The original card used Winter Wonderland Designer Vellum Stack. I haven’t purchased that yet, so I made my own snowy layer with Gold Stampin’ Emboss Powder, Versamark Ink, and the Heat Tool. Here is the link to the card I CASEd.

The dimensions for this card are: Card base= 4 1/4″ x 11″ (scored at 5 1/2″), Embossed layer= 2″ x 5 1/2″, Gold Foil strips= 1/4″ x 5 1/2″. I turned the embossed layer upside down, adhered Snail Adhesive along the very edge of the cardstock, and laid half of the gold foil strip on the cardstock by lining up the outer edge of the foil strip 1/8″ from the edge of the embossed layer.

CloseupGoldWhiteSleighRide

I thought you might enjoy a closer look at the sleigh on the snowy background. I really enjoy the simple elegance that the gold and white give to this card. I hope the recipient of this card enjoys receiving it as much a I enjoyed making it.

Joyful stamping!

~Stephanie

All Occasion Cards, Birthday Cards, Just Because Cards, Stampin' Up!

Golden Butterfly Card

Hello all! Awhile ago I was making a card with a Gold Foil Paper layer. I didn’t want to waste all the foil that would be covered up with another layer, so I die cut a bunch of things out of the middle of the Gold Foil Paper. I had them sitting on my desk for more than a week. Finally, I decided to create some cards with them. Here is one of those cards.
GoldHappyButterfly

I wish you could see this card in person. The Gold Foil Paper is so much prettier in real life. I’m not sure if you can tell, but the embossed layer is a light purple, Wisteria Wonder to be specific. I used the Tiny Triangles embossing folder to emboss the cardstock. I placed this all on a Very Vanilla card base.

CloseUPGoldHappyButterfly

I wanted you to be able to really see all the intricate beauty of this die cut butterfly from the Butterflies Framelits Dies. I love it so much. This die cut is so impressive when it is metallic or glittery.

It seems I have made yet another very versatile card, sentiment wise. I could see myself sending this as a birthday card, a congratulations card, or a cheer up card. I hope this card inspires you to be creative with your extra pieces, gold, embossing, word thinlits, or anything else. 🙂

Joyful stamping!

~Stephanie

Congratulations Cards, Designer Series Paper Cards, Stampin' Up!, Thank You Cards

“Thank You” for SSC110

Hello everyone! I have yet another new challenge blog to introduce to you. This one is called Sunday Stamps.  It is a bi-weekly challenge, like the Fab Friday challenge blog. Apparently there are more bi-weekly challenges than I realized.

Here is the current sketch challenge:

SSC110


Here is the card I came up with based on the sketch. The top piece of DSP is Crushed Curry (just like the scallop circle piece of cardstock). Not sure if you can tell that from the photo. The bottom DSP is Bermuda Bay, as is the ink for the sentiment from Tin of Cards.

Thank You


The two pieces of Designer Series Paper come from the Cherry on Top DSP Stack. This is a stack of 48 double sided 6×6 pieces of designer series paper. When you flip through one direction there are lots of bold patterns, but when you flip through the other direction there are some calmer  patterns like the two pieces I chose for this card.  I tend to favor the calmer patterns.

cherry on top dsp


Here is a close up of the sentiment piece. I love the line of connected rhinestones from the Rhinestone Basic Jewels pack.

Thank You Close Up


When I cut my triangles for the sketch card, I first cut squares and then cut the squares in half diagonally. I decided to go ahead and use the other halves right away on a similar card. As you can see, the proportions of the DSP pieces are different.

I invite you to leave me a comment below and tell me which proportions you prefer: the one with the larger Crushed Curry piece of DSP or the one with the larger Bermuda Bay piece of DSP.

Congrats to You

I hope you are inspired by this sketch challenge, as I was.

Joyful stamping!

~Stephanie

Baby Cards, Global Design Project Cards, Stampin' Up!

Balloons & Babies for GDP003

Hello everyone! This week’s challenge (#GDP003) from the Global Design Project challenge blog is not a sketch, not a color combo, but a THEME! What a cool idea for a challenge. It’s the first one of it’s kind I’ve come across, but I’m sure there are more.  The theme is Baby.GDP_Theme_Baby

Here’s the card I came up with for the challenge.

GDP003

I’d been wanting to create something with the super cool corrugated paper that came out with Stampin’ Up!’s 2015-2016 Annual Catalog back in June, and this is the first card I’ve used it on! Crazy, huh?

It was really easy to pick out the colors for this baby card.  My husband and I chose not to find out the gender of our baby before it is born, so I am always conscious of that with baby cards. I chose a “boy” color, a “girl” color, & a “neutral” color (yellow) to cover all my bases. 🙂

GDP003Closeup

It took me awhile to get the placement right on this card. I popped the balloons up on Stampin’ Dimensionals and adhered the banners with Multipurpose Liquid Glue. I attached the tails of the balloons with Glue Dots.

Hopefully you can tell by the picture that the little sparkles on the balloons are embossed. I used White Stampin’ Emboss Powder. I love adding a little heat embossing whenever I can. 🙂 I love the texture it adds to the project.

I hope that you are inspired to make a baby card too, or any card!

Joyful stamping!

~Stephanie

Price: $110.00

Price: $5.25

Supply List

Built for Free Using:  My Stampin Blog

Birthday Cards, Designer Series Paper Cards, Fab Friday Cards, Punch Art, Stampin' Up!, Techniques

Out on a Limb for FabFri73

Hello all!  I am pleased to introduce you to another challenge blog that I have discovered. It is called Fab Friday and is another challenge blog run by Stampin’ Up! demonstrators.

One of the design team members for Fab Friday  is Brian King, who is also on the design teams for two other challenge blogs I follow: the Global Design Project & Pals Paper Arts. The interesting thing about the Fab Friday challenges is that they run for two weeks, rather than one week like all other challenge blogs I’ve seen.

Here is the most recent challenge:

Fab Friday Logos-003

Here’s the card I came up with based on this color challenge. I am still having fun creating with my Owl Builder Punch. 🙂

Owl

I also brought out my Color Me Irresistible Specialty Designer Series Paper. This DSP is unique because it is pre-embossed. Some sheets are white images embosssed on white sheets, while others are colored sheets embossed with clear images. I used a brayer to add the Rich Razzleberry ink to the a portion of white DSP with white embossed dots. I wiped off the excess ink with a tissue. Color Me Irresistible Specialty Designer Series Paper

Here’s a close up of this adorable owl. I embossed his green front with the Decorative Dots embossing folder for a little something extra.

Owl Close Up

The cute little branch comes from the Tree Builder Punch; also a very versatile punch.

tree punch

I hope you were inspired by today’s post. Please leave me a comment and let me know what you think about this card and if you would have done anything differently.

Joyful stamping!

~Stephanie

Price: $12.50

Price: $110.00

Price: $5.25

Supply List

Built for Free Using:  My Stampin Blog

All Occasion Cards, Punch Art, Stampin' Up!, Techniques

Sparkles & Owls for PPA268

I’ve been wanting to play around with my Owl Builder Punch since I got it several months ago. I’ve used the eye parts of the punch for other punch art cards, but I had yet to use the Owl Builder Punch to actually build an owl.  That is until yesterday!

Owl Builder Punch

This sketch (PPA268) from the Pals Paper Arts inspired me to put my Owl Builder Punch into action.

PPA2681

As you can see, I deviated slightly from the original sketch. That’s the fun of sketches though – you don’t have to do EXACTLY what the sketch says. The purpose of sketches are for inspiration. I obviously couldn’t put two owls together, so I thought for awhile and decided a cute sparkly heart would be a complimentary shape.

Owl Card for PPA268

This close up almost does the sparkly heart justice. It’s so easy to make too! Here are the directions: 1) punch out the heart 2) press it into your Versamark pad 3) sprinkle on some Heat & Stick powder 4) heat the powder with your Heat Tool just until it turns shiny (it IS possible to overheat this Heat & Stick powder) 5) sprinkle on the Dazzling Diamonds glitter, and briefly heat set the glitter.

Owl Card Close Up

I used the 3rd and 4th smallest framelits from the Squares Collection Framelits for the two squares. I hadn’t done this for a long time, but I was inspired to emboss the envelope flap to match the background on my card.  Our Stampin’ Up! envelopes are awesome for embossing and stamping on. Owl Card with Envelope

I think this is my favorite card I’ve made in awhile. I want to keep it for decoration in my craft room and never give it away! I am also really starting to think about making this card again in different colors. A minty green? A lavender-like purple? A sweet pea pink? 🙂 What a cute birth announcement card!

I hope you are inspired to play around with papercrafting supplies you’ve had for awhile but haven’t gotten around to using yet. It is worth it!

Joyful stamping!

~Stephanie

Price: $110.00

Supply List

Built for Free Using:  My Stampin Blog

Birthday Cards, Designer Series Paper Cards, Global Design Project Cards, Just Because Cards, Shaker Cards, Stampin' Up!

Shaker Card for GDP002

I am excited to show you another shaker card for a brand new challenge blog, Global Design Project. This challenge, #GDP002, is the second challenge ever for this challenge blog. Some of the design team also design for the Pals Paper Arts challenges that I participate in.
GDP002
This shaker card is a little more traditional than my last one. In my last post, Birthday Card for MOJO415,  I went big and did a full card shaker card.  There really are so many variations of shaker cards – you can experiment for weeks and not get bored.

This card could also be considered a DSP card. I have been creating A LOT of cards that feature Designer Series Paper lately, the reason being that I have so much retired DSP that I love and am trying to use so it doesn’t go to waste. The DSP on this card is current DSP called Cherry on Top Designer Series Paper.  Once I had picked out the DSP, the colors for this card kind of fell into place.

To a Good Friend

I felt the Cajun Craze layer under the shaker frame would look a little naked if I didn’t jazz it up a little so I embossed it with the Happy Hearts Textured Impressions Embossing Folder.  I had a lot of fun creating my own confetti for this card using the Hearts Border Punch. 

You may notice that there is a piece of the Cajun Craze embossed layer missing so as to showcase the shaker frame completely. To achieve this I first die cut the Always Artichoke shaker frame. I then laid it over the Cajun Craze piece and lightly traced around the shaker frame with pencil. After cutting that out and finishing the shaker frame, all I had to do was adhere the frame in place. Just a hint with the dimensionals – I suggest using two layers so that your confetti or sequins have plenty of room to move around. They get a little squished sometimes when there is only one layer of dimensionals.
To a Good Friend Closeup

I really love the versatility of the sentiment. It could be used as a birthday card or a “just because” card. I also think that with this color combination of Crushed Curry, Cajun Craze, and Always Artichoke this card could work for a masculine card.

However, I have a feeling that my husband would tell me the shaker frame (especially with the heart confetti) makes this NOT a masculine card. 🙂 Leave me a comment and let me know your thoughts on the masculinity of this card. 

Joyful stamping!

~Stephanie

Price: $110.00

Price: $5.25

Supply List

Built for Free Using:  My Stampin Blog

Birthday Cards, Shaker Cards, Stampin' Up!

Birthday Card for MOJO415

Hello all! I decided to try out another sketch blog. This one is called Mojo Monday and is sponsored by Verve Stamps. Here’s the sketch from this Monday’s challenge, MOJO415.


I decided to go a little bit outside of the box and make my card for this challenge a shaker card.  It’s been awhile since I played around with shaker cards and I have been wanting to do so for awhile. I had a lot of fun interpreting this sketch as a shaker card.

MojoMonday415View1

I can never find great lighting in my house, so I need to explain the colors a little bit. Some things that look orangey are actually pink. The card base, larger rectangle of the pocket, and the stamped star are all Melon Mabmbo, a pink Stampin’ Up! ink. The smaller rectangle of the pocket is Tangerine Tango.

Here are the card dimensions: Melon Mambo base= 4 1/4″ x 11 (scored at 5 1/2″). Whisper White frame= 4″ x 5 1/4″ (I cut out the middle using my Stampin’ Trimmer- there is a 1/2″ border). Window sheet= 3 3/4″ x 5″. Tempting Turquoise strip= 1″ x 5 1/4″. Tangerine Tango rectangle= 1 3/4″ x 2 3/4″. Melon Mambo rectangle= 1 7/8″ x 2 7/8″. Bookmark= 2″ x 2 1/2″.


Here’s a closer look at the pocket. I really liked this idea of a little bookmark to fit in the pocket.

MojoMonday415View2


Hopefully the recipient of this card will take the bookmark out to admire the cute stamping on the lower half! 🙂

MojoMonday415Tag


The pocket looked a little bare at first so I stamped one of the decorative images from  the Tin of Cards stamp set in Tangerine Tango ink on the Tangerine Tango rectangle for a cool tone-on-tone look. MojoMonday415View3


If I were to do this card over, I would probably make the card base Whisper White and the shaker card layer Melon Mambo. I’m feeling like this card could use a little more Melon Mambo. I’m still happy with it though. 🙂

Leave me a comment below and let me know your thoughts. I welcome constructive criticism!

Joyful stamping!

~Stephanie

Price: $5.25

Supply List

Built for Free Using:  My Stampin Blog

Birthday Cards, Designer Series Paper Cards, Stampin' Up!

Paper Weaving with DSP

Hello all! Here is the last card I made for the Designer Series Paper challenge from my Stampin’ Up! team leader. I was again inspired by Pinterest for the layout of this card, but changed up the DSP and coordinating colors. You can view the first two DSP cards on my two most recent blog posts, “Hello, My Friend: A Pocket Card” & DSP!

IMG_3333

I thought the weaving on this card is the coolest thing.  It reminds me of the place mats we wove out of construction paper in kindergarten. Leave me a comment if you know what I’m talking about. 🙂

Instructions: It took some experimenting to figure out an easy way to weave the DSP strips with the cardstock strips. I found my Grid Paper (see picture below) & Glue Dots to be extremely useful. I first stamped my sentiment in the corner so I knew how much space I had left to work with for the weaving. I then decided how far down the side of the card I wanted my first DSP strip to be and adhered the end in place with a glue dot. I spaced the other two DSP strips 1/4″ apart, adhering the ends with glue dots as well. At this point I switched to the cardstock strips. I wove these in first and then adhered both ends with glue dots. I also adhered the other ends of the DSP strips with glue dots. I decided to put a few more glue dots under the DSP strips to help secure them because they were so long.

grid paper

Dimensions: The card base is 8 1/2″ x 5 1/2″, scored at 4 1/4″.  The first layer is 3 3/4″ x 5″. The second layer is 3 1/2″ x 4 3/4″. The DSP strips are 3/8″ x 4 3/4″. The cardstock strips are 3/8″ x 3 1/2″. 

I hope you enjoyed this little DSP series and are inspired to make some cards with DSP as well.  🙂

While I’m thinking of it, I should let you know that my blog post frequency may slow down for awhile. My husband and I are closing on a house on Thursday, cleaning it on Friday, and then moving into it on Saturday.  My due date is the Wednesday after we move in. I will do my best to have some posts ready to go before hand so that I can keep up my blog even with all the awesome craziness of having a baby. 🙂

Joyful stamping!

~ Stephanie

Designer Series Paper Cards, Just Because Cards, Pocket Cards, Stampin' Up!

Hello, My Friend: A Pocket Card

Hello all! I have another DSP project for you today. This project uses the Schoolhouse Designer Series Paper. The layout for this project was inspired by a project I saw on Pinterest, which used a very cute, but very retired, collection of DSP.  In order to keep things current, and show you a project you could still make, I switched out the DSP and coordinating colors.

Lately, I have been really intrigued by non-traditional cards. I love the pocket idea. I feel like I will be experimenting with that idea some more in the days and weeks to come.

IMG_3334

Here’s a better look at the insert. I think this would make a cute little note for a friend, probably someone to whom it could be hand delivered. 🙂  I did slip up and use some retired baker’s twine by accident. Oops!

IMG_3335

Here’s a close up of the more detailed lower half of the pocket.  I used the second smallest star from the Stars Framelits Dies. I sponged around the star die cut with Pool Party ink. 

IMG_3337

Card dimensions: One really cool Stampin’ Up! tool that I love, but haven’t used for awhile is the Envelope Punch Board. That is how I made the pocket for this card. The punch board lists paper size and directions for making envelopes for  22 different sizes of cards.  I made an envelope for a 3″ x 6″ card.  The actual insert is bigger than that (3″ x 7 1/2″) because I wanted it to peek out of the pocket.  The belly band for this card was 3 1/4″ x 7 1/2″. I scored it at 1 7/8″ & 5 1/4″ to make it easier to wrap around the pocket.

I hope you are inspired to try a pocket card of your own. Someone will be very pleased to receive it!

Joyful stamping!

~Stephanie

Price: $110.00

Supply List

Built for Free Using:  My Stampin Blog