Hello all! I apologize for not posting for over a week. I do intend to post every two or three days. I will get myself back on track. 🙂
Yesterday I had my Stampin’ Up! team meeting. Every other month our team does a card swap. This month’s swap theme is Fall/Halloween. We wanted to get a jump start on ideas for the upcoming season. I went with the Fall option for my swap card.
In reading through some posts of blogs that I subscribe to, I was reminded of the Joseph’s Coat technique. I had never tried it so I decided to give it a go. I love the effect. I think it is perfect for getting the right look for fall foliage. 🙂
This technique involves a bit of sponging. I thought I would first give a tip on how I use Stampin’ Up!’s Stamping Sponges and then let you jump into the tutorial on the technique.


When you purchase the Stamping Sponges they come whole like the above picture on the left. I cut my sponges into fourths and label them, attaching the label to the sponge with the Handheld Stapler, as you can see in the above picture on the right.
Here is the picture/written tutorial on the Joseph’s Coat technique:
- Sponge your favorite combination of fall colors onto a piece of Whisper White Cardstock.

(1. I started with Daffodil Delight)

(1. I followed the Daffodil Delight with Tangerine Tango.)

(1. I finished my sponging with Real Red.)

2. After sponging is completed, rub the Embossing Buddy over the entire cardstock. This will remove the static so that the embossing powder does not stick to areas you don’t want it to.

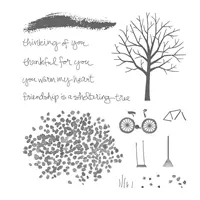
3. Stamp your image in Versamark Ink (I used an image from the stamp set “Lovely as a Tree“) and sprinkle with Clear Stampin’ Emboss Powder. (I didn’t show a picture of the stamping because the Versamark ink is clear and it would have been very hard to see.)

(3. After you tap off the excess powder it should look like this. Even thought the powder is white now, it will turn clear when you heat set it.)

4. Use the Heat Tool to heat the powder so that it melts and becomes clear. The transformation is a little magical. 🙂 Be sure to heat all of the powder. Tilt the cardstock around in the light to make sure you can see that all the powder is shiny.

5. Use a Brayer to apply Early Espresso ink to the entire piece of cardstock. The embossing resists the ink.

6. The last step is to rub a Kleenex over the cardstock to pick up any ink that is sitting on top of the embossing.

7. After the technique piece is done you just have to assemble your card. Below is my completed card. I added a Tangerine Tango layer between the technique piece and the Early Espresso card base. I used the Hello You thinlits dies for my sentiment. You’ll need the Big Shot to use the thinlits dies. I chose Real Red cardstock for the sentiment to try to bring out the Real Red sponging.

I hope you enjoyed this technique and will give it a try. 🙂
Joyful stamping!
~Stephanie


