Embossing Folder Cards, Stampin' Blends, Stampin' Up!, Thank You Cards

Copper Embossed Butterfly with Stampin’ Blends

If you love our Stampin’ Blends markers, then you need this stamp set, Beautiful Day. There are just so many possibilities with this stamp set and the Stampin’ Blends markers. I love the butterfly image from this set. Previously I have used the light and dark markers of just one color to color this image, but today I have a multicolored butterfly for you. I think the Calypso Coral and Daffodil Delight make for a beautiful, bright butterfly to lighten the darker winter months we’re experiencing now.

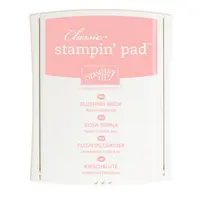
Another first for me (at least that I can remember) with this stamp set was embossing the image instead of stamping with Memento Tuxedo Black Ink (which is the ink you need to use when coloring with the Blends markers).  In the picture below you can really see the shine from the copper embossing powder, which I felt would help contribute to the cheeriness of the card as well as switching things up from the traditional Memento ink. I also embossed the sentiment (from the Floral Phrases stamp set) with copper embossing powder.

The Basket Weave embossing folder hasn’t seen much love from me since it was first introduced last year, but I think it really adds to this card. I love these Dynamic, or super thick, embossing folders. They make such a deep impression on the cardstock, and as you can see below, embossing looks great on envelope flaps too!

***Tip: When embossing with the Dynamic embossing folders spritz your cardstock with water before embossing to help the cardstock fibers to flex and  be able to give the great super deep impression they are meant to give without cracking the cardstock.

Dimensions: 

*Card base: 8 1/2 x 5 1/2″, scored in half at 4 1/4″

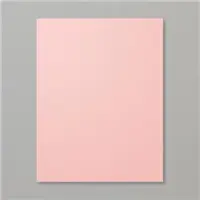
*Calypso Coral embossed layer: 4 x 5 1/4″

*Sentiment layer: 3 1/4 x 4 1/2″


49067511_700137627382_1736234074072154112_n

Stampin’ Up!’s biggest sale of the year, Sale-A-Bration starts again in two days! Earn free product for every $50 or $100 you spend between January 3rd and March 1st. Look for a post on January 3rd with more ways to earn rewards as well as a PDF link to both the new Occasions Catalog and the Sale-A-Bration Brochure.


Image result for thank you

Thank you so very much for taking the time to read my post. I hope you have been inspired!

I would love to be your Stampin’ Up! demonstrator and would truly appreciate your business and support. If you would like to order with me you can do so by clicking the link to my Online Store on the right hand side of this page.

If your order is less than $150, I invite you to use this month’s Host Code 4SWVPDVC when checking out. If your order is $150 or more, than be sure to claim the Host Rewards for yourself! 🙂

Joyful stamping!

~Stephanie


Product List

Big Shot

$110.00
Heat Tool

$30.00

Birthday Cards, Die Cut Cards, Stampin' Up!, Thank You Cards

Lemon Lime Twist Thank You Card & Berry Burst Birthday Card

Today I have the last two cards for you that I made for my new In Color class a few weeks ago. It has been fun to relive the class through blogging. Please leave me a comment and let me know if you’ve enjoyed these In Color cards and coordinating card box (see links near end of post). Scroll to the bottom of my this blog post for card dimensions and supply lists.
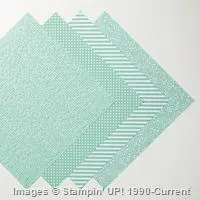
Both of the cards today showcase the delightful Fresh Florals Designer Series Paper Stack. It was available in the last annual catalog in Night of Navy. I have very much enjoyed the makeover this DSP received in the new annual catalog. 🙂 Amazing how different it looks with these bright and cheery In Colors.


The inside of the card has a floral image from the Floral Phrases stamp set that coordinates with the Fresh Florals DSP stack as well as a sentiment from the Dragonfly Dreams stamp set.  I really like how well the floral image goes with this particular design from the DSP stack.I just adore the 1/2″ Finely Woven Ribbon that is available in all five new In Colors.  I am not very talented with bows so I am always trying to think of different ways to use ribbon that I like. This Lemon Lime card shows an alternative way I came up with to use the ribbon.  It’s like a ribbon shaped ribbon. lol Hard to describe.

I secured the ribbon to the back of the circles by laying down some Snail first and also putting some dimensionals down with half the dimensional on the ribbbon and half of it on the cardstock. This allowed me to pop the ribbon/circle piece up as well as really secure the ribbon in place.


If you’ve read some of my blog posts before, you may know that I love stamping on Stampin’ Up! envelopes – they are specifically designed for it! I thought I was a little inventive with this envelope stamping. 🙂 I stamped the floral image upside down on the front (still looks great, huh?) with the idea of the recipient’s address being written above it (where my watermark is). I stamped the floral image on the back of the envelope specifically where I did as if it was a wax seal. The elegance of this floral image made me think of the olden days when wax seals were used to ensure the letter arrived to the recipient unopened.


I CASEd (Copy And Share Everything) this Berry Burst Happy Birthday card from fellow demonstrator Jodi Reinert at Stampin’ With Jodi. I changed the punch and sentiment and added the bow.  The inside and outside sentiments are part of an awesome stamp set that carried over into the new annual catalog. The set is called “Better Together” and is a collection of coordinating sentiments for inside and outside the card. I have really been liking those lately.

These Bitty Bows are also available in all five of the new 2017-2019 In Colors. I can’t get enough of them! I also can’t get enough of the Stitched Shapes Framelits that first debuted as an early release to last year’s Holiday Catalog. It is a super versatile framelit set because it has four of each of the following shapes: squares, circles, and ovals.  A great buy if you can’t afford all of the layering framelits sets Stampin’ Up! offers. I popped the die cut up over the ribbon with Stampin’ Dimensionals.


Click the links to see the past posts on the Tranquil Tide card, Powder Pink card, and the Fresh Fig card. I also created a card holder box that coordinates with these 2017-2019 In Color Cards.


During the month of August demonstrators get to preorder from the Holiday Catalog. But it’s not just demonstrators who get to have all the fun – you too can preorder the “Carols of Christmas” stamp set and coordinating “Card Front Builder Thinlits” dies (separately or in a bundle), through the end of August. You can even use your Bonus Days coupons that you earned in July towards this stamp set and die set. The Holiday Catalog goes live for customers September 1st.

Click the link for a VIDEO showcasing the “Carols of Christmas” bundle.


If you would like to buy any Stampin’ Up products, you can shop on line 24/7 in my online store HERE, or get in touch with me at stephaniemackey2012@gmail.com.  I would love to help you in whatever way I can.

I hope you are inspired to use ribbon in different ways on your projects and to pull out that beautiful DSP you’ve purchased and to actually use it!

Joyful stamping!

~Stephanie

Dimensions for Lemon Lime Twist Card:

  • Card base – standard A2 size (5 1/2 x 8 1/2″, scored in half at 4 1/4″)
  • DSP layer – 5 1/4 x 4 ″
  • (Inside) Whisper White layer – 5 1/4 x 4″

Supplies for Lemon Lime Twist Card:

  • All Things Thanks Stamp Set (outside sentiment)
  • Floral Phrases Stamp Set (floral image on envelope and inside card)
  • Dragonfly Dreams Stamp Set (inside sentiment)
  • Fresh Florals Designer Series Paper Stack
  • Layering Circles Framelits Dies (4th smallest regular circle and 4th smallest of scalloped circles)
  • Lemon Lime Twist 1/2″ Finely Woven Ribbon
  • Lemon Lime Twist Classic Stampin’ Pad
  • Cardstock: Lemon Lime Twist, Whisper White
  • Adhesive: Snail & Stampin’ Dimensionals

Dimensions for Berry Burst Card

  • Card base (Thick Whisper White) – standard A2 size (5 1/2 x 8 1/2″, scored in half at 4 1/4″)
  • Berry Burst layer – 5 1/4 x 4 ″
  •  Whisper White layer – 5 x 3 3/4″ (This layer does not show: it is used to line up the DSP strips and is completely covered by them.)
  • DSP strips: 1 1/4 x 3 3/4″

Supplies for Berry Burst Card

  • Better Together Stamp Set
  • Stitched Shape Framelits Dies
  • Fresh Florals DSP Stack
  • Cardstock: Thick Whisper White, Whisper White, Berry Burst
  • Berry Burst Twist 1/2″ Finely Woven Ribbon
  • Berry Burst Classic Stampin’ Pad
  • 2017-2019 In Color Bitty Bows
  • Adhesive: Snail & Stampin’ Dimensionals
Thank You Cards

Tranquil Tide Thanks Card

Here is the second card in the collection of In Color cards I created for my In Color card class. Click here to see the first card in the collection and here to see the coordinating card box.   Scroll down to see all five cards I created. This gorgeous new In Color is called Tranquil Tide. Makes you feel calm picturing an peaceful ocean this color.
The Detailed Floral Thinlits die set makes it so easy to create elegant cards. I chose not to use the edgelit piece to cut out the detailed pieces and instead just ran the two detailed pieces through the Big Shot together to get this beautiful laser cut look.Here is a close up of the intricate die cutting. It’s so much fun to see how this die cut looks used with different colors of cardstock.   If I have a chance to create this card in the other new In Colors, I’ll be sure to post them. I really like these matching inside/outside stamp sentiments.  I’ve been doing a lot of inside sentiment stamping lately.  It’s fun to see that pop of color inside the card as well as all the gorgeousness happening on the outside. 🙂


Check back in a few days to see the next card from the 2017-2019 In Color Collection (I’m thinking it will be the Fresh Fig card) or subscribe to my blog by email so as not to miss a post (see the “Follow My Blog by Email” section near the top right of my blog).

Below you will find information on two specials running this month -there are just 2 days left to take advantage of them. Click here to be redirected to a previous blog with more detailed information.


–> Bonus Days

For every $50 you spend in July, you earn a $5 coupon to spend in August.

Bonus Days are back!...Stampin’ Up!® - Stamp Your Art Out! www.stampyourartout.com

  • There is no limit to the number of coupons participants can receive per order or throughout the duration of the promotion.
  • An email address is required to participate; Bonus Days coupon codes can only be delivered via email.

–> Christmas in July for new demonstrators!

Purchase the Starter Kit in July for $99 ($175 value) to join my community of Stampin’ Up!® demonstrators and you will receive the Carols of Christmas stamp set AND Essentials Gift Pack of Tools for FREE (an extra $72 value)!It’s Christmas in July!...Stampin’ Up!® - Stamp Your Art Out! www.stampyourartout.com

Essentials Gift Pack:

  • 118485 – D Block (x2)
  • 130148 – Grid Paper
  • 103579 – Paper Snips
  • 104332 – SNAIL Adhesive
  • 102300 – Bone Folder


If you would like to buy any Stampin’ Up products, you can shop on line 24/7 in my online store HERE, or get in touch with me at stephaniemackey2012@gmail.com.  I would love to help you in whatever way I can.

I hope you are inspired to create with some intricate dies – they make it so easy to create elegant cards in just a few minutes.

Joyful stamping!

~Stephanie

Dimensions:

  • Card base – standard A2 size (5 1/2 x 8 1/2″, scored in half at 4 1/4″)
  • Tranquil Tide layer – 5 1/2 x 4 1/4″

Supplies:

  • Floral Phrases Stamp Set
  • Detailed Floral Thinlits Dies
  • Cardstock: Thick Whisper White & Tranquil Tide
  • Ink: Versamark & Tranquil Tide Classic Stampin’ Pad
  • Tools: Big Shot Machine & Heat Tool
  • Adhesive: Multipurpose Liquid Glue
  • Other: White Stampin’ Emboss Powder
Thank You Cards

Floral Bunch of Banners Framelits Thank You Card

Hello everyone! It has been harder to keep up with my blog than I thought it would be now that I am teaching again part time. I really did have a lot of fun CASEing this card from the Annual Catalog (p. 78) and maybe that will motivate me to make more time for stamping and blogging. 🙂

I really do love using the catalogs as inspiration. It helps me to become familiar with new products which then enables me to create projects of my own.

banner-framelits-straight-on

I never would have picked this color combination of Tangerine Tango, Emerald Envy, Pumpkin Pie, and Sweet Sugarplum myself but I really like it. I have had this card sitting out on the counter in my dining room for a few days just so I can catch glimpses of this card throughout the day. 🙂

banner-framelits-side

I ordered this bundle (Banners for You photopolymer stamp set + Bunch of Banners Framelits $48.50 ) about a month ago and just now actually made time to create with them. I am so glad I did! The flower and fauna images pair amazingly with the large banner dies. I think the banner looks so eye catching popped up with Stampin’ Dimensionals.

banner-framelits-close-up

Steps:

  1. Stamp and die cut banner image using Tangerine Tango ink on Pumpkin Pie cardstock. Then stamp sentiments with Emerald Envy.
  2. Without applying Stampin’ Dimensionals, lay banner down on Whisper White layer (4″ x 5 1/4″) to gauge where to stamp your flower and fauna images. I only used Emerald Envy for my fauna images, stamping off at times to achieve the lighter images. I used Sweet Sugarplum and Tangerine Tango for the flowers.
  3. After the stamping is done, wrap Whisper White baker’s twine around Whisper White cardstock and tie a bow. Adhere this layer to the Tangerine Tango card base (8 1/2″ x 5 1/2″, scored in the middle at 4 1/4″).
  4. Apply Stampin’ Dimensionals to the back of the banner and place in the middle of the flower and fauna images.
  5. Using glue dots, adhere some clear sequins from the Metallic Sequins Assortment randomly around the banner and stamped images.

I hope you are inspired to create with this Banners for You and Bunch of Banners Framelits bundle. I am looking forward to a lot more fun from this bundle!

Joyful stamping!

~Stephanie

**Supplies: Banners for You Stamp Set + Bunch of Banners Framelits (Bundle $48.50 p. 79), Tangering Tango cardstock, Pumpkin Pie cardstock, whisper white cardstock, Tangering Tango Classic Stampin’ Pad, Sweet Sugarplum Classic Stampin’ Pad, Emerald Envy Classic Stampin’ Pad, Whisper White Baker’s Twine, Metallic Sequin Assortment, Glue Dots, Stampin’ Dimensionals, Stampin’ Trimmer, & Snail Adhesive.

**All supplies are available from my Stampin’ Up! online store. If you would like to place an order, I invite you to use the Hostess Code JG2Q9E96 when you check out. Thank you for your support!


Stampin' Up!, Thank You Cards

Thoughtful In Color Card

Hello everyone! I just finished preparing for my new In Color class with the 2016-2018 In Colors and here is one of the cards I came up with. I wanted to make sure I used the Stampin’ Write markers. I remembered a card with this marker technique last year and I love how it turned with these colors. Marker

I used the brush tip of the markers and free handed the lines. I like the carefree feel that resulted. It has been awhile since I inked up a stamp with markers. Such a fun way to give more expression to the sentiment.

marker angle

I am having a great time with the In Color Enamel Shapes. Isn’t that little heart just darling?  This decorative label punch does not come in different sizes, but if you cut it down the middle you can space it apart and create a border.Marker Close Up

I hope you are inspired to create with some of the new 2016-2018 In Color supplies. I’d love to see what you come up with. If you send me your creations at stephaniemackey2012@gmail.com, I might include them in a future blog post.:)

Joyful stamping!

~Stephanie

Supplies**: Emerald Envy Stampin’ Write Marker, Dapper Denim Stampin’ Write Marker, Flirty Flamingo Stampin’ Write Marker, Sweet Sugarplum Stampin’ Write Marker, Peekaboo Peach Stampin’ Write Marker, Sweet Sugarplum Cardstock, Dapper Denim Cardstock, Whisper White Cardstock, 2016-2018 In Color Enamel Shapes, Whisper White Baker’s Twine, Stampin’ Dimensionals, Snail Adhesive, Paper Snips, Stampin’ Trimmer.

**All supplies can be purchased from my online store. If you would like to place an order (and it is under $150) I invite you to enter 4SHN2EBW in the Hostess Code box. Thank you for your support!


2016-2018 In Color Cards, All Occasion Cards, Birthday Cards, Congratulations Cards, Die Cut Cards, Just Because Cards, Stampin' Up!, Thank You Cards

Color Blocking with In Colors

Hello everyone! A few weeks ago I held a New Catalog Launch party. One of the Make & Takes was a color blocking card with the new 2016-2018 In Colors. I had a few extra cards prepped and thought I would have some fun coming up with different ways to finish off this card using the color blocking with the In Colors as the starting point. The strips of cardstock are 3 3/4 x 5″.

Leave me a comment below and let me know which of the five versions is your favorite!

Die Cut

Card #1: Flourish Thinlits and Floral Phrases stamp set.

(For a little extra dimension and to make the spacing easier I glued the colored cardstock strips to a piece of 4 x 5 1/4″ piece of Whisper White carstock and then adhered it to the card base.)

Hip Hip Hooray

Card #2: Party Pop Ups Thinlits

Embossed

Card #3: Gold Embossed with Floral Phrases stamp set

Tone on Tone

Card #4: Tone-on-tone with Kinda Eclectic Stamp Set

(Sweet Sugarplum banner 3 5/8 x 1 3/4″, Whisper White banner 3 3/8 x 1″)

Mini Treat Bag

Card #5: Mini Treat Bag Thinlits Dies & Rhinestone Basic Jewels

(3 1/2 x 1/2″ banner, it is smaller than the die)

I hope you are inspired to try your hand at some color blocking, especially with the new 2016-2018 In Colors. They look awesome together!

Joyful stamping!

~Stephanie

Supplies**: Whisper White Thick Cardstock, Peekaboo Peach Cardstock, Emerald Envy Cardstock, Flirty Flamingo Cardstock, Sweet Sugarplum Cardstock, Dapper Denim Cardstock, Snail Adhesive, Stampin’ Trimmer.

**All supplies can be purchased from my online store. If you would like to place an order (and it is under $150) I invite you to enter 4ZN3MB4Z in the Hostess Code box. Thank you for your support!

Designer Series Paper Cards, Stampin' Up!, Thank You Cards

Cut & Flipped Hearts

Hello everyone! Here is the second card in my Designer Series Paper (DSP) blog post series.  Stampin’ Up!’s DSP is known for being two sided. Unfortunately, when we use one beautiful side of the DSP, we have to (usually) hide the other side.  I thought this cut & flipped hearts layout was a fun way to showcase both sides of each of these gorgeous DSP sheets.

Hearts Front

The DSP featured on this card is from the Affectionately Yours Specialty DSP pack. I used the Sweetheart Punch to punch out 3 hearts each from 2 different DSP sheets. I then cut them in half, flipped one half of each heart over, and re-matched them up with their other halves. It can’t be the original one because when you flip it over you have two of the same side.

Hearts Angle

I used the Multipurpose liquid glue to adhere the hearts. This glue doesn’t dry immediately so it gave me some time to wiggle the halves of the hearts into the right place before the glue dried. I used the Fine Tip Glue Pen on the “Thanks” thinlit die from the Hello You Thinlits die cut set.

I hope you are inspired to try this layout or another that lets you showcase both awesome sides of DSP sheets!

Joyful stamping!

~Stephanie

Supplies**: Hello You Thinlits, Sweetheart Punch, Affectionately Yours Specialty Designer Series Paper, Crumb Cake Cardstock, Whisper White Cardstock, Cucumber Crush Cardstock, Stampin’ Trimmer, Fine Tip Glue Pen, Snail Adhesive, Multipurpose Liquid Glue.

** All supplies are available for purchase from my Online Store. If you would like to place an order (and it is under $150) I invite you to enter 4ZN3MB4Z in the Hostess Code box. Thank you for your support!

All Occasion Cards, Birthday Cards, Designer Series Paper Cards, Just Because Cards, Stampin' Up!, Thank You Cards

Sweet Schoolhouse Thank You

Hello everyone! Today’s card is a delightful DSP card. I CASEd the layout from Susan Itell’s blog, Simple Stampin’, but I changed up the Designer Series Paper.  I made this card with two different DSP Collections to show you how this layout will work for pretty much any DSP!
Blue School Angle

Blue School

Blue School Flat

This first card showcase designs from the Schoolhouse DSP.  It will be retiring at the end the month. If you don’t have it yet, I suggest ordering it now, while you still can! 🙂

I chose a sentiment from the “Apple of my Eye” stamp set for this card. I am thinking of it as a Thank You card, but with a sentiment like “You’re just the sweetest” you could also use this card as a Birthday card or a Just Because card.

Supplies**: Schoolhouse DSP, Apple of my Eye stamp set, 2″ Circle Punch, 1 3/4″ Circle Punch, Pool Party Cardstock, Whisper White Cardstock, Whisper White Thick Cardstock, Pool Party Classic Stampin’ Pad, Daffodil Delight Classic Stampin’ Pad, Stampin’ Trimmer, Stampin’ Dimensionals, Snail Adhesive.


I thought it would be neat to see what this Schoolhouse DSP card looked like with a different accent color.  The card below features Tangerine Tango instead of Pool Party for the accents. I also used Pool Party for the Sentiment instead of Daffodil Delight.  Leave me a comment and let me know which accent color you prefer for this card.

Orange School Angle

Orange School Flat

Orange School

**Supplies are the same as above cards with the following substitutions: Tangering Tango Cardstock and Pool Party Classic Stampin’ Pad.


I didn’t see any dimensions on Susan’s blog, so I played around and figured out my own. Took awhile to figure it out, but now I can I can whip up this card super quick. 🙂 The card base is 4 1/4″ x 11″, scored in half at 5 1/2″.  The colored cardstock layer is 4″ x 5 1/4″.  The Whisper White layer is 3 3/4″ x 5″. The two small vertical panes measure 2 3/8″ x 1/4″ and the long horizontal pane measures 3 1/2″ x 1/4″. The drawing below is the area that the cardstock DSP (Designer Series Paper) covers. It does not show any cardstock area.

IMG_3993


The following card was the first card I made. It showcases the retired “Sea Street” DSP. I wanted to include it in this blog for those of you who still had some in your retired stash. Whenever I see cards like this that use lots of DSP I immediately think of all the retired DSP I have.Sea

Sea Flat

**Supplies are the same as above cards with the following substitutions: Real Red Cardstock, Night of Navy Classic Stampin’ Pad, & Tin of Cards Stamp Set.


I hope you are inspired to try this layout out with your favorite DSP – be it current or retired. 🙂 If you would like to share your creations with me, you can do so via email at stephaniemackey2012@gmail.com and I will post them to my blog in a future post.

Joyful stamping!

~Stephanie

** All supplies can be purchased from my Online Store. I would love to be your Stampin’ Up! demonstrator.:) If you order through me, I invite you to use the Hostess Code RBTK9C7N when you place your online order.

All Occasion Cards, Birthday Cards, Just Because Cards, Punch Art, Stampin' Up!, Thank You Cards

You’re Just the Sweetest

Hello everyone! Today’s card is simple and sweet. It makes me think of my mom, who loves oranges. I think this sentiment works fantastically for a “thank you” card or a “birthday” card. You could even send it to a friend for a “just because” card. Versatility is always a plus, am I right? 🙂Oranges

The sentiment comes from the stamp set “Apple of My Eye”. This set has really grown on me. I recommend Pinterest-ing for a few minutes to browse more adorable card ideas with this stamp set. 🙂

What I love most about this sweet little card is the glint of Wink of Stella that is brushed over both oranges.  This picture below doesn’t do the sparkliness justice, but I hope you can see a little bit of it.Oranges Close Up

Stampin’ Up! has recently partnered with the company that makes these glitter brushes and now offers the Wink of Stella glitter brushes in clear and gold


Header_SAB_demo_Nov1615_NA

We are in our final month of Sale-A-Bration. If you would like more information on how you can earn FREE product from now until March 31st, leave me a comment or see my previous posts, “Flowering Fields Sympathy” & “A Watermelon Just for You”.


I hope you are inspired to do some creating with this adorable stamp set and/or the Wink of Stella Glitter Brushes. I know you’ll enjoy yourself!

~Stephanie


Supplies used on this card*: Apple of My Eye stamp set, Whisper White cardstock, Crumb Cake cardstock, Memento Black Classic Stampin’ Pad, Tangelo Twist Classic Stampin’ Pad, Pumpkin Pie Classic Stampin’ Pad, Pear Pizzazz Classic Stampin’ Pad, 1 3/4″ Circle Punches, Rhinestone Basic Jewels, Wink of Stella Glitter Brush – clear, Stampin’ Dimensionals, Snail Permanent Adhesive.

*All supplies are available in my online store (see picture link to the right, near the top).

Just Because Cards, Stampin' Up!, Thank You Cards

“You’re So Sweet” Thank You

Hello everyone! The inspiration from today’s card comes from a really cute treat bag in the Sale-A-Bration Brochure. I made a few changes turning it into a card and putting my own twist on it (different background stamping). Check out the original on p. 14 of the SAB Brochure.

You're So Sweet Angled

The set I used for this card is Honeycomb Happiness from p. 15 of the Sale-A-Bration Brochure.  This set (and all items in the SAB Brochure) is yours FREE with a $50 purchase.

I think this card makes a really cute thank you card. You could also send this as a “Just Because” card to a friend. I used the Triple Banner Punch for the Designer Series Paper and the retired Angled Tag Topper punch (still available in the Clearance Rack) for the Whisper White tag.

You're So Sweet Front

Here is slightly more of a closeup of this cute little ice cream cone. I fussy cut the scoop of ice cream out for a little more interest. I think the Whisper White Baker’s Twine bow is the perfect finishing touch for this thank you card.

You're So Sweet Close Up

Another way to add interest would be to use one of the new Honeycomb Embellishments from the new Occasions Catalog.

Honeycomb Embellishments by Stampin' Up!

I hope you are inspired to make some cards with this cute Honeycomb Happiness set and/or the adorable Honeycomb Embellishments.

Joyful stamping!

~Stephanie

Price: $5.25

Supply List

Built for Free Using: My Stampin Blog