All Occasion Cards, Birthday Cards, Designer Series Paper Cards, Just Because Cards, Stampin' Up!

Double Vision

Hello everyone! Today’s post is a double feature. Both cards have the same design and basic color scheme, but one is subdued while the other is bold.

IMG_4123

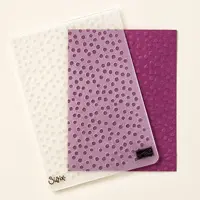
Both cards feature the Affectionately Yours Specialty Designer Series Paper (DSP). One neat thing about Stampin’ Up!’s DSP packs is that all the colors used in each individual pack coordinate with the other colors used in that pack. That way, even if you use a one color design like I did on both cards, you don’t have to think too long about what colors to use with it.IMG_4121

I love how the large chunks of Watermelon Wonder contrast with the pops of Night of Navy in the bold card. I also love the softness of the light contrast between the little dots of Watermelon Wonder and the Crumb Cake in the subdued card. Which one is your favorite? Leave me a comment below and let me know. 🙂

IMG_4124

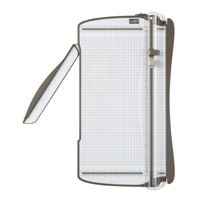
Instructions: Cut a piece of DSP to 3 3/4 x 4 1/4″.  If you want a larger gap between your pieces simply make your DSP starting piece shorter than 4 1/4″.  To create the gap between the pieces of DSP you will need to use your Stampin’ Trimmer.  It looks strange at first, but when cutting you need to make sure the top left hand corner of the DSP is on the right side of your cutting blade.  The ruler extends to 1 1/4 on the right side of the blades. This is important for creating the slant that you want.  I wanted a gentle slant so I placed the top left hand corner of the DSP at the 1 1/4″ mark on the right hand side of the blade and I lined up the bottom right hand corner with the 1 1/4″ line on the left hand side of the blades. If you want steeper slant, simply line those same corners up with lines closer to the cutting blade.

IMG_4125

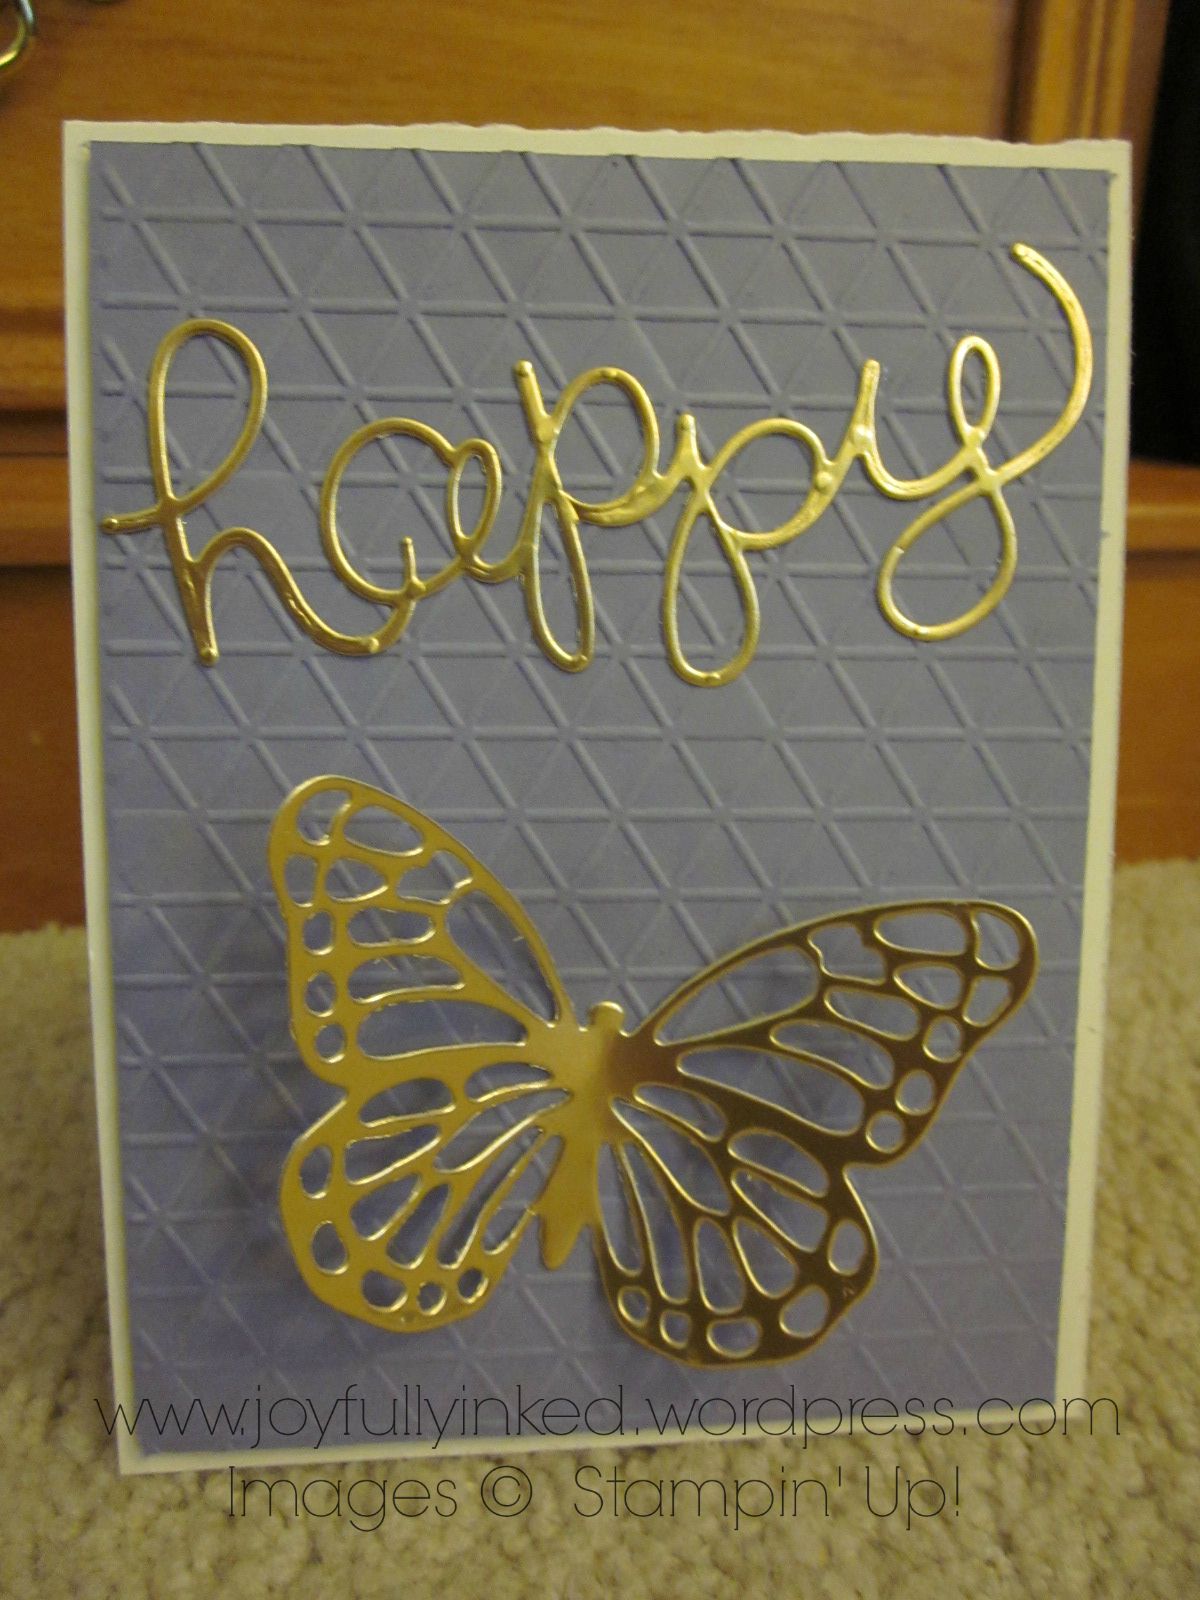
This layout is great if you really want your DSP to shine. With so much of the pattern showing, your DSP is sure to get lots of attention! The “HAPPY” sentiment is from the “Celebrate Today” stamp set. I stamped the “birthday” image on the inside of the cards in Watermelon Wonder ink. I punched the flower out with the Flower Medallion punch and popped it up with Stampin’ Dimensionals.

I hope you are inspired to try this layout with your favorite DSP. I’d love to see what you come up with. If you send me your creations at stephaniemackey2012@gmail.com, I might include them in a future blog post. 🙂

Joyful stamping!

~Stephanie

**Supplies** used on both cards: Affectionately Yours Specialty DSP, Stampin’ Trimmer, Celebrate Today Stamp Set, Watermelon Wonder Classic Stampin’ Pad, Flower Medallion Punch, Whisper White Cardstock, Stampin’ Dimensionals, Snail Adhesive.

Bold card only: Watermelon Wonder cardstock

Subdued Card only: Crumb Cake Cardstock.

**All supplies can be purchased from my online store. If you would like to place an order (and it is under $150) I invite you to enter 4ZN3MB4Z in the Hostess Code box. Thank you for your support!


Birthday Cards, Die Cut Cards, Stampin' Up!

Just a Little Wink

Hello everyone! In my last post, Flowering Flourishes, I had some fun with the in-laid die cut technique and the Flourish Thinlits. Today’s card also features the Flourish Thinlits, but this time they are are free standing and just as gorgeous!
Wink Front

It’s funny how some cards develop from one spark of an idea. My only plan starting out was to do the leaf die cut in Old Olive. I pretty much built the rest of the card around that. I am really happy with the results. 🙂

IMG_4103

It doesn’t show up super well in the photos, but I added some clear glitter with the clear Wink of Stella glitter brush. The die cuts are beautiful on their own, but who doesn’t like a little glitter? 😉

Wink Close Up

I used to be all about Crumb Cake, but recently I am seeing the beauty of Sahara Sand. It is an even starker contrast with these bright colors than Crumb Cake was. Look how those cute little die cuts pop against the gentle Sahara Sand backdrop. It’s fun to have so many great neutrals to choose from!

IMG_4100

Dimensions: Card base is 4 1/4 x 11″ (scored in half at 5 1/2″), Whisper White background layer is 3 3/4 x 5″. The Whisper White sentiment piece is 1 x 2 3/4″. The Sahara Sand sentiment layer is  1 1/4 x 3″.

Tips & Tricks: I popped the sentiment layers up with Stampin’ Dimensionals. I recommend brushing the die cuts with Wink of Stella before adhering them so you don’t get extra glitter on your card. I adhered the die cuts with the Fine Tip Glue Pen. I stamped off with the Rich Razzleberry ink before stamping the sentiment. It was too dark for my liking, what with such a fine script.ZIG Wink of Stella GLITTER CLEAR Brush Tip Marker 025320 Preview Image

I hope you are inspired to try your hand with some Wink of Stella. The glitter pen format makes it super easy to control the amount of glitter you apply. The pens come in clear and gold and are super fun to use.

Joyful stamping!

~Stephanie

**Supplies**: Flourish Thinlits Dies, Big Shot, Butterfly Basics Stamp Set, Rich Razzleberry Classic Stampin’ Pad, Sahara Sand Cardstock, Whisper White Cardstock, Old Olive Cardstock, Pool Party Cardstock, Wink of Stella- clear, Stampin’ Dimensionals, Snail Adhesive, Fine Tip Glue Pen, &Stampin’ Trimmer.

**All supplies can be purchased from my online store.

All Occasion Cards, Birthday Cards, Just Because Cards, Stampin' Up!

Golden Butterfly Card

Hello all! Awhile ago I was making a card with a Gold Foil Paper layer. I didn’t want to waste all the foil that would be covered up with another layer, so I die cut a bunch of things out of the middle of the Gold Foil Paper. I had them sitting on my desk for more than a week. Finally, I decided to create some cards with them. Here is one of those cards.
GoldHappyButterfly

I wish you could see this card in person. The Gold Foil Paper is so much prettier in real life. I’m not sure if you can tell, but the embossed layer is a light purple, Wisteria Wonder to be specific. I used the Tiny Triangles embossing folder to emboss the cardstock. I placed this all on a Very Vanilla card base.

CloseUPGoldHappyButterfly

I wanted you to be able to really see all the intricate beauty of this die cut butterfly from the Butterflies Framelits Dies. I love it so much. This die cut is so impressive when it is metallic or glittery.

It seems I have made yet another very versatile card, sentiment wise. I could see myself sending this as a birthday card, a congratulations card, or a cheer up card. I hope this card inspires you to be creative with your extra pieces, gold, embossing, word thinlits, or anything else. 🙂

Joyful stamping!

~Stephanie

Birthday Cards, Designer Series Paper Cards, Fab Friday Cards, Punch Art, Stampin' Up!, Techniques

Out on a Limb for FabFri73

Hello all!  I am pleased to introduce you to another challenge blog that I have discovered. It is called Fab Friday and is another challenge blog run by Stampin’ Up! demonstrators.

One of the design team members for Fab Friday  is Brian King, who is also on the design teams for two other challenge blogs I follow: the Global Design Project & Pals Paper Arts. The interesting thing about the Fab Friday challenges is that they run for two weeks, rather than one week like all other challenge blogs I’ve seen.

Here is the most recent challenge:

Fab Friday Logos-003

Here’s the card I came up with based on this color challenge. I am still having fun creating with my Owl Builder Punch. 🙂

Owl

I also brought out my Color Me Irresistible Specialty Designer Series Paper. This DSP is unique because it is pre-embossed. Some sheets are white images embosssed on white sheets, while others are colored sheets embossed with clear images. I used a brayer to add the Rich Razzleberry ink to the a portion of white DSP with white embossed dots. I wiped off the excess ink with a tissue. Color Me Irresistible Specialty Designer Series Paper

Here’s a close up of this adorable owl. I embossed his green front with the Decorative Dots embossing folder for a little something extra.

Owl Close Up

The cute little branch comes from the Tree Builder Punch; also a very versatile punch.

tree punch

I hope you were inspired by today’s post. Please leave me a comment and let me know what you think about this card and if you would have done anything differently.

Joyful stamping!

~Stephanie

Price: $12.50

Price: $110.00

Price: $5.25

Supply List

Built for Free Using:  My Stampin Blog

Birthday Cards, Shaker Cards, Stampin' Up!

Birthday Card for MOJO415

Hello all! I decided to try out another sketch blog. This one is called Mojo Monday and is sponsored by Verve Stamps. Here’s the sketch from this Monday’s challenge, MOJO415.


I decided to go a little bit outside of the box and make my card for this challenge a shaker card.  It’s been awhile since I played around with shaker cards and I have been wanting to do so for awhile. I had a lot of fun interpreting this sketch as a shaker card.

MojoMonday415View1

I can never find great lighting in my house, so I need to explain the colors a little bit. Some things that look orangey are actually pink. The card base, larger rectangle of the pocket, and the stamped star are all Melon Mabmbo, a pink Stampin’ Up! ink. The smaller rectangle of the pocket is Tangerine Tango.

Here are the card dimensions: Melon Mambo base= 4 1/4″ x 11 (scored at 5 1/2″). Whisper White frame= 4″ x 5 1/4″ (I cut out the middle using my Stampin’ Trimmer- there is a 1/2″ border). Window sheet= 3 3/4″ x 5″. Tempting Turquoise strip= 1″ x 5 1/4″. Tangerine Tango rectangle= 1 3/4″ x 2 3/4″. Melon Mambo rectangle= 1 7/8″ x 2 7/8″. Bookmark= 2″ x 2 1/2″.


Here’s a closer look at the pocket. I really liked this idea of a little bookmark to fit in the pocket.

MojoMonday415View2


Hopefully the recipient of this card will take the bookmark out to admire the cute stamping on the lower half! 🙂

MojoMonday415Tag


The pocket looked a little bare at first so I stamped one of the decorative images from  the Tin of Cards stamp set in Tangerine Tango ink on the Tangerine Tango rectangle for a cool tone-on-tone look. MojoMonday415View3


If I were to do this card over, I would probably make the card base Whisper White and the shaker card layer Melon Mambo. I’m feeling like this card could use a little more Melon Mambo. I’m still happy with it though. 🙂

Leave me a comment below and let me know your thoughts. I welcome constructive criticism!

Joyful stamping!

~Stephanie

Price: $5.25

Supply List

Built for Free Using:  My Stampin Blog

Birthday Cards, Embossing Paste Cards

Bohemian Style Embossing Paste Card

Embossing paste is a very cool crafting medium that adds a lot of interest to your cards & projects. The texture is kind of like a smooth frosting. It needs to harden up after application. The only drawback to embossing paste is that Stampin’ Up! does not currently carry it. However, to use embossing paste you need stencils, which Stampin’ Up! does carry. 🙂 When I was researching which embossing paste to purchase, I decided upon the Dreamweaver brand, which is the same thing as the Wendi Vecchi brand. Here is a link for the gold paste that I used on this card.

Metallic Gold Embossing Paste- Dreamweaver

The newest stencils from Stampin’ Up! are the four shown below. They come in a four pack called Happy Patterns Decorative Masks.  I have made a card using each one of these stencils/masks. I plan to share one project a day over the next few days. They work super well with embossing paste because of the tight patterns. I invite you to subscribe to my blog via email so you don’t miss a project (see sidebar on right).

IMG_3266

It is totally acceptable to apply the embossing paste directly to your cardstock, but I was inspired by a project I saw online to first sponge on my cardstock, and then emboss over top of it.

IMG_3255

Don’t worry too much about your sponging.  The embossing paste will catch the viewer’s attention and will cover up imperfections in the sponging.

IMG_3256

When you are done sponging and are ready to use your embossing paste, I recommend securing your stencil to your work surface so it doesn’t slip around. I use washi tape because it is sticky, but not too sticky that it will be difficult to lift up when you are done applying the paste.  The easiest way to apply the embossing paste is with the back of a pallette knife.

IMG_3258

Try to apply the embossing paste in an even layer over the stencil, unless you are going for a rough, edgy look. I was a little lighter with the paste in the lower right hand corner, but I eventually covered that with my sentiment. Try to brush the paste on lightly, in one direction, so you don’t get any underneath the stencil.

IMG_3259

Try to apply the paste quickly because you will need to wash off your stencil very soon after applying the paste. If you don’t, the paste will start to harden on your stencil and will be very difficult to wash off. I use dish soap when cleaning off my stencils and that seems to help.

IMG_3260

Above is what the embossing paste looks like immediately after removing the stencil. Below is what it looks like after drying over night. I have read that you can continue assembling your card after letting the paste dry for 20-40 minutes. I like to be extra careful. 🙂

IMG_3262

Here is my final card. I was inspired to go Bohemian with this card because of the stencil I chose. Take a look at Stampin’ Up!’s Bohemian Designer Series Paper (DSP) and you will see what I mean.  In my card I replaced the Hello Honey color with the gold embossing paste. I didn’t want those two colors to clash, being so close in tone to one another.

IMG_3263

The other supplies used on this card are: Island Indigo Cardstock, Blackberry Bliss Cardstock, Whisper White Cardstock. Bermuda Bay Ink (sentiment & background), Rich Razzleberry Ink (sentiment & background), Island Indigo Ink (sentiment only), Stampin’ Sponges, Bohemian Borders Stamp Set, 2 1/2″ Circle Punch, 2″ Circle Punch, Whisper White 3/8″ Stitched Satin Ribbon, Stampin’ Dimensionals (to pop up white circle), Snail Adhesive (to adhere card layers), & Multipurpose Liquid Glue (to adhere the Blackberry Bliss sentiment layer).

After I assembled the card I wished that I had also used Stampin’ Dimensionals to adhere the Blackberry Bliss sentiment layer. I used the Multipurpose Liquid Glue because I didn’t want TOO much dimension. As I look at the card now, I think the Stampin’ Dimensionals would have kept the top and bottom of the layer from sinking down. You could stick them in between the embossing paste diamonds to avoid adding too much more dimension.

I invite you to check back the next few days for 3 more projects showcasing embossing paste. Please leave me a comment below and let me know what you think about embossing paste and if you have ever tried it before.

Joyful stamping!

~Stephanie