2016-2018 In Color Cards, All Occasion Cards, Birthday Cards, Congratulations Cards, Die Cut Cards, Just Because Cards, Stampin' Up!, Thank You Cards

Color Blocking with In Colors

Hello everyone! A few weeks ago I held a New Catalog Launch party. One of the Make & Takes was a color blocking card with the new 2016-2018 In Colors. I had a few extra cards prepped and thought I would have some fun coming up with different ways to finish off this card using the color blocking with the In Colors as the starting point. The strips of cardstock are 3 3/4 x 5″.

Leave me a comment below and let me know which of the five versions is your favorite!

Die Cut

Card #1: Flourish Thinlits and Floral Phrases stamp set.

(For a little extra dimension and to make the spacing easier I glued the colored cardstock strips to a piece of 4 x 5 1/4″ piece of Whisper White carstock and then adhered it to the card base.)

Hip Hip Hooray

Card #2: Party Pop Ups Thinlits

Embossed

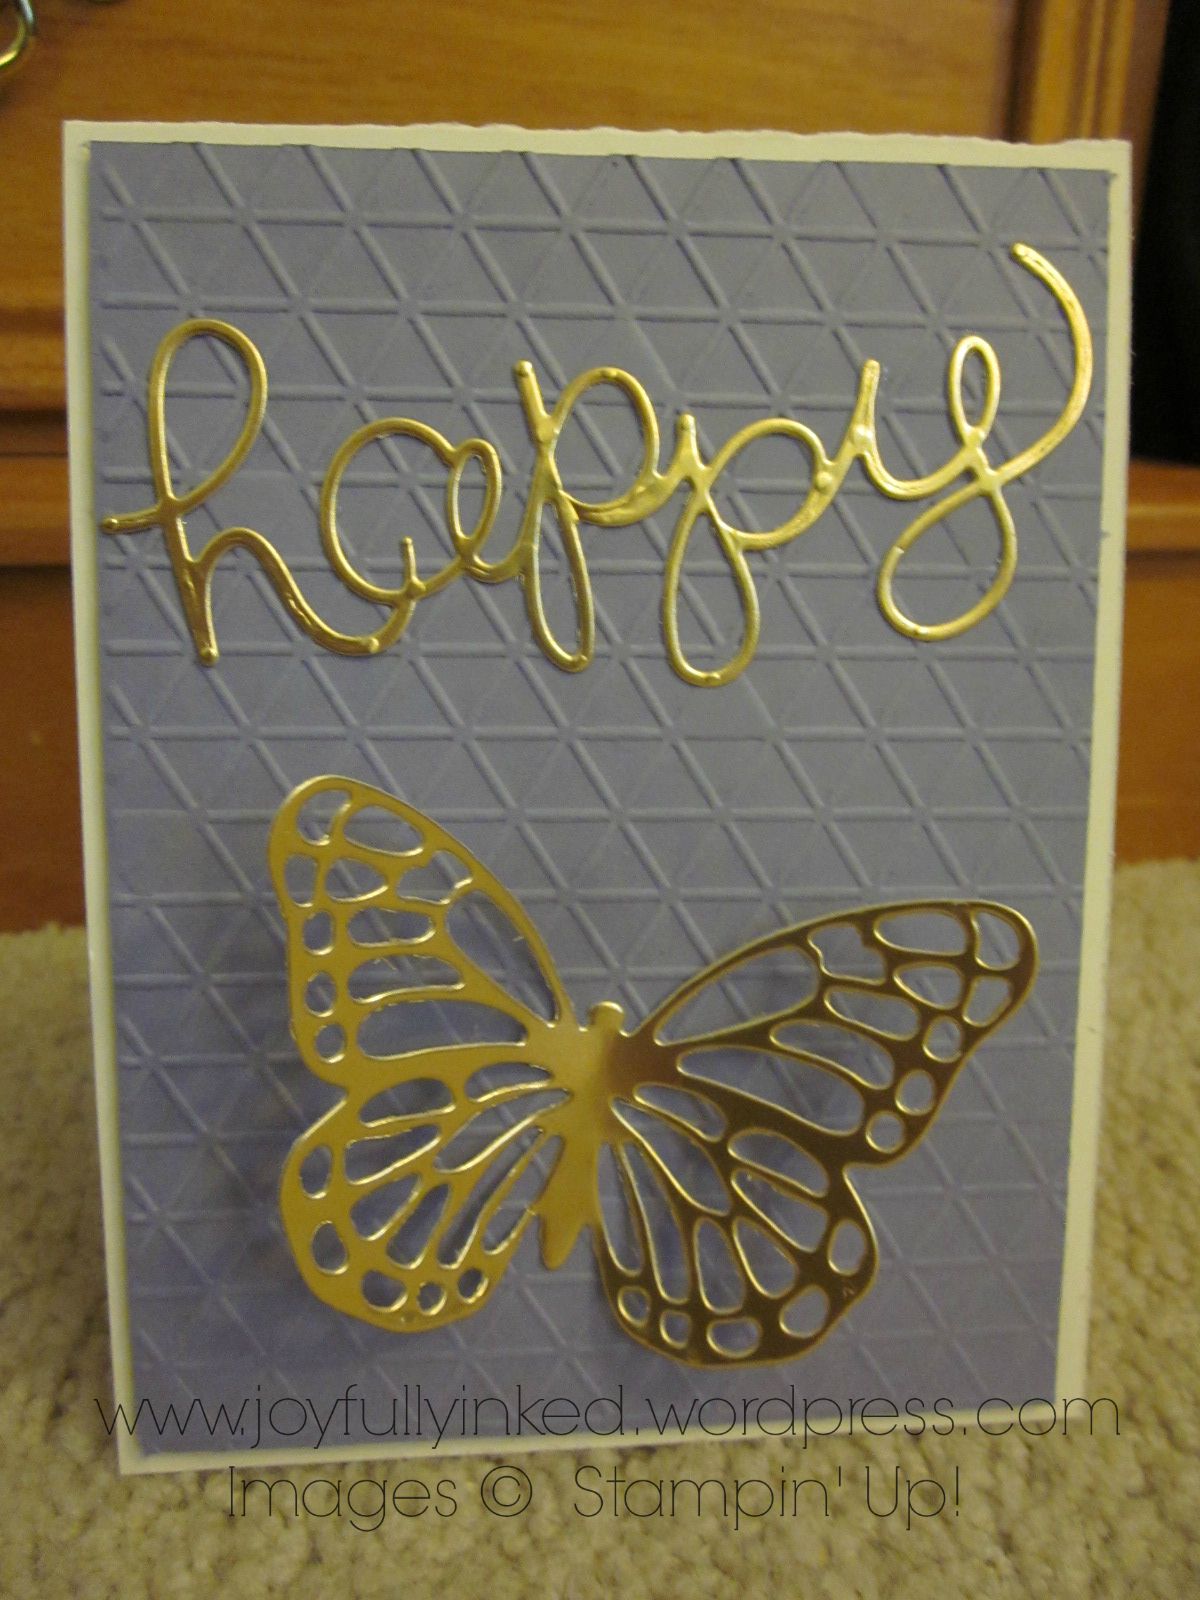
Card #3: Gold Embossed with Floral Phrases stamp set

Tone on Tone

Card #4: Tone-on-tone with Kinda Eclectic Stamp Set

(Sweet Sugarplum banner 3 5/8 x 1 3/4″, Whisper White banner 3 3/8 x 1″)

Mini Treat Bag

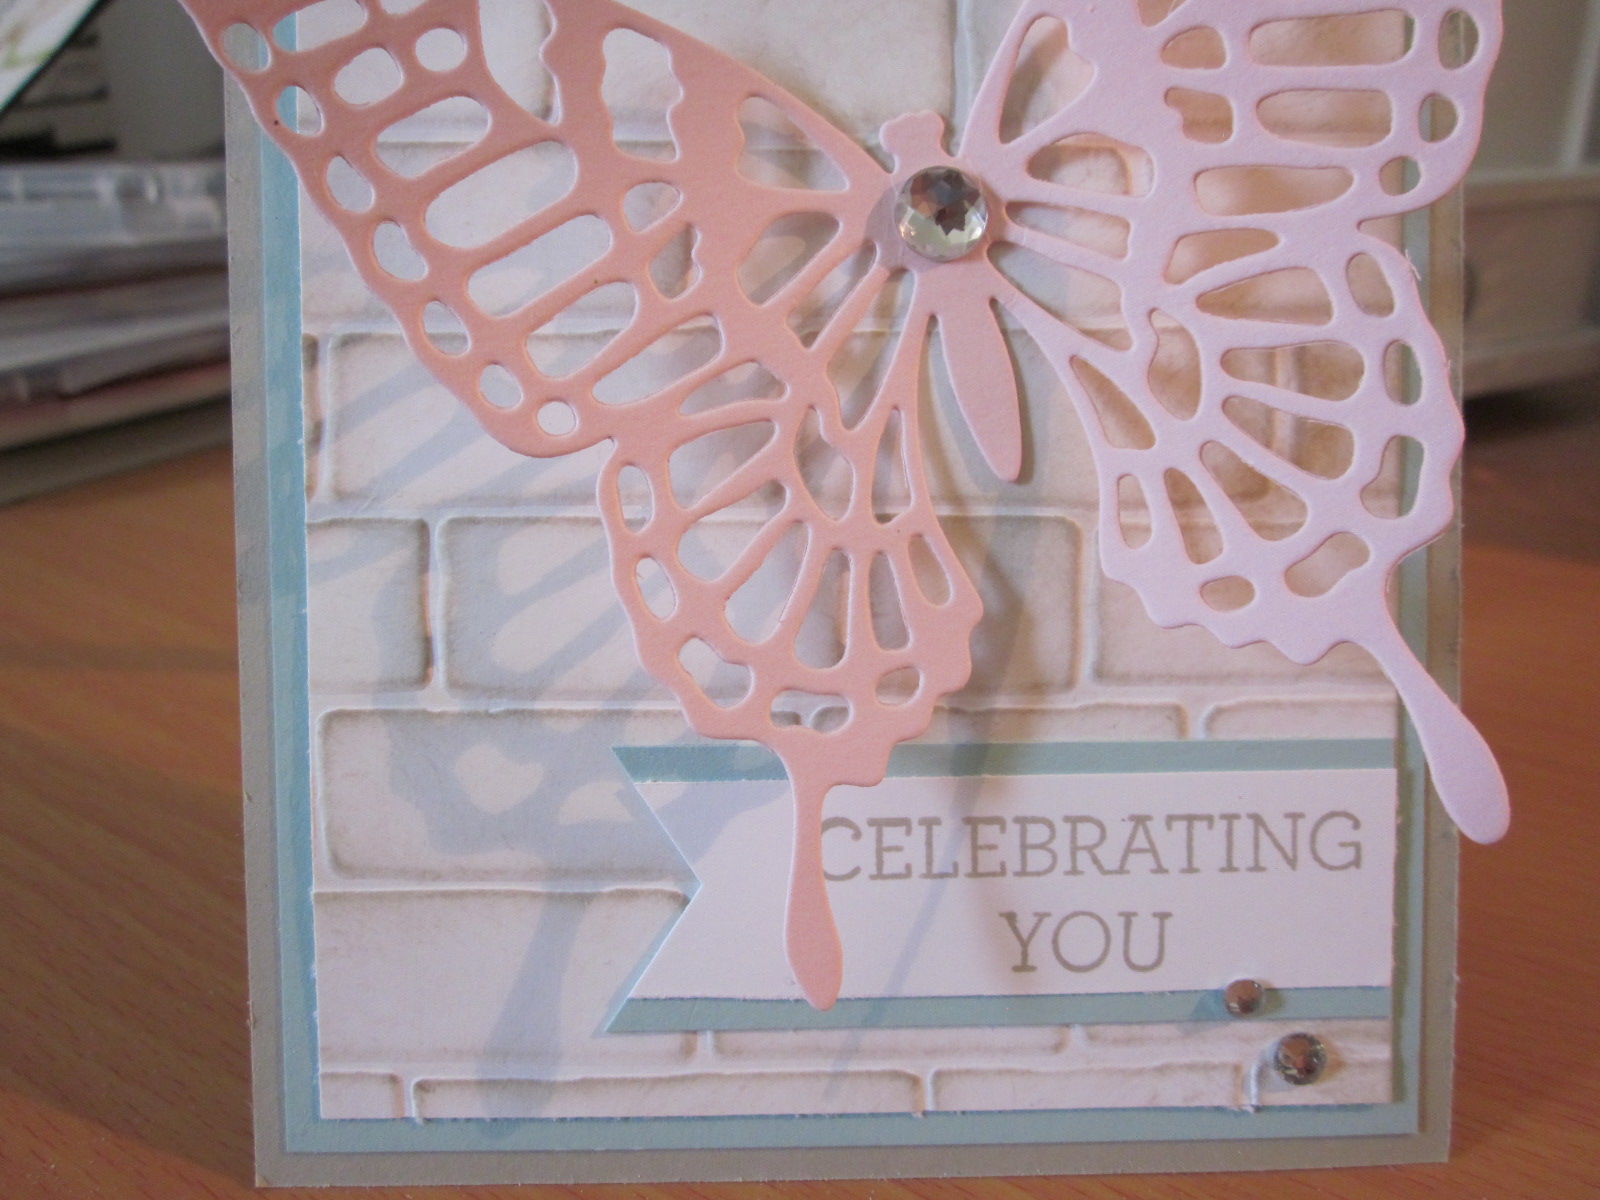
Card #5: Mini Treat Bag Thinlits Dies & Rhinestone Basic Jewels

(3 1/2 x 1/2″ banner, it is smaller than the die)

I hope you are inspired to try your hand at some color blocking, especially with the new 2016-2018 In Colors. They look awesome together!

Joyful stamping!

~Stephanie

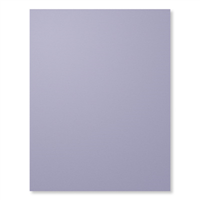
Supplies**: Whisper White Thick Cardstock, Peekaboo Peach Cardstock, Emerald Envy Cardstock, Flirty Flamingo Cardstock, Sweet Sugarplum Cardstock, Dapper Denim Cardstock, Snail Adhesive, Stampin’ Trimmer.

**All supplies can be purchased from my online store. If you would like to place an order (and it is under $150) I invite you to enter 4ZN3MB4Z in the Hostess Code box. Thank you for your support!

All Occasion Cards, Designer Series Paper Cards, Just Because Cards, Stampin' Up!, Sympathy Cards

Butterfly Boutique

Hello everyone! I recently taught a class based on Designer Series Paper (DSP). When I was designing cards for this class I was thinking of layouts that showcase many designs of DSP packs as well as use up scraps of DSP so they don’t have to go to waste. My next few posts will be cards from this DSP class. I hope you enjoy them!

Navy Front

The DSP showcased in this first card is the Floral Boutique DSP. My favorite design of the 12 different designs in this pack is the one with the differently shades of blue lines (upper right hand corner). I love things with shades of the same color.

Navy Side

The rectangles measure 2 x 1 1/2″. The crumb cake banner measures 3 1/2 x 3/4″. The whisper white banner measures 3 1/4 x 1/2″.

Navy Top Angle

I borrowed my friend’s precision base plate to use with this detailed die cut from the Butterfly Thinlits die set. I wanted to see if it really made a difference in getting a cleaner cut for all the little pieces and I am happy to report that it did. It was also very helpful in getting a clean cut with the largest die cut of the Flourish Thinlits (see my recent post, Flowering Flourishes) and also for the two larger dies in the Detailed Floral Thinlits die set.

Navy Inside

I couldn’t resist adding a little interest to the inside of the card with this gorgeous little butterfly from the Papillon Potpourri stamp set. This more realistic butterfly image is my favorite from this set.

I hope you are inspired to be creative with some DSP and maybe to give this layout a try. 🙂

Joyful stamping!

~Stephanie

All Occasion Cards, Birthday Cards, Just Because Cards, Stampin' Up!

Golden Butterfly Card

Hello all! Awhile ago I was making a card with a Gold Foil Paper layer. I didn’t want to waste all the foil that would be covered up with another layer, so I die cut a bunch of things out of the middle of the Gold Foil Paper. I had them sitting on my desk for more than a week. Finally, I decided to create some cards with them. Here is one of those cards.
GoldHappyButterfly

I wish you could see this card in person. The Gold Foil Paper is so much prettier in real life. I’m not sure if you can tell, but the embossed layer is a light purple, Wisteria Wonder to be specific. I used the Tiny Triangles embossing folder to emboss the cardstock. I placed this all on a Very Vanilla card base.

CloseUPGoldHappyButterfly

I wanted you to be able to really see all the intricate beauty of this die cut butterfly from the Butterflies Framelits Dies. I love it so much. This die cut is so impressive when it is metallic or glittery.

It seems I have made yet another very versatile card, sentiment wise. I could see myself sending this as a birthday card, a congratulations card, or a cheer up card. I hope this card inspires you to be creative with your extra pieces, gold, embossing, word thinlits, or anything else. 🙂

Joyful stamping!

~Stephanie

Stampin' Up!, Techniques, Tutorials

Embossing Paste with the Reverse Masking Technique

Hello all! I’m excited to share with you card #3 of my 4 day series on embossing paste. I think it is my favorite so far. Interestingly, it is the first embossing paste card I made, but for various reasons I decided to change the posting order.

This card uses another stencil from the Happy Patterns Decorative Masks pack.  Just like in my last post, I used white embossing paste and sprinkled Dazzling Diamonds on top before it dried.

IMG_3249

I love how the sponged/embossed circle really draws your eye to the fun “happy” cutout. I honestly love these word thinlits. I just had to add the sequins for a little more sparkle. 🙂

Other supplies used on this card: Melon Mambo cardstock, Basic Black cardstock, Whisper White cardstock, Melon Mambo ink, Crushed Curry ink, Memento Black ink, & Crazy About You stamp set.

In case you are new to the reverse masking technique, I’ve included a few pictures to give you an idea of how to go about this technique. ***Note: I didn’t think to do this until after I had assembled the card. Don’t be misled by the sponging/embossing paste already on my mask. 🙂

*First you will need to punch out an area from a larger piece of cardstock. It does not have to be a circle. This larger cardstock needs to be bigger than the piece you will put under it so as not to get anything (like sponging or embossing paste) in areas you want blank.

IMG_3275

*Second you will need to secure the mask over the cardstock you want to decorate. It is very helpful to secure the mask in place with washi tape (or another easily removable adhesive) so that it doesn’t slip around. You don’t want to get anything under the mask. One of my favorite parts of masking is taking off the mask and revealing the nice, crisp edge. 🙂

IMG_3277

Masking vs. Reverse Masking: When I started writing this post I had these two terms confused. I started wondering if I was describing the right technique, so I did some research and was very surprised by what I found. First, it is necessary to define the term “mask.” A mask is a cover or shield used to protect the surface beneath it from the mediums being applied.

With the masking technique you place the mask down, then spray or brush or paint  around the mask, & finally remove it to reveal an untouched area surrounded by color and/or texture. See below example I found on Pinterest.

Masking technique

Logically, reverse masking (the technique I used for this post’s embossing paste card) is using the larger piece of cardstock and applying color inside of the mask. Below is another card I made a long time ago that is an example of reverse masking.

IMG_3180

I had a lot of fun with this post and learned a lot. I’m so glad I now know the difference between these two closely related techniques! I hope this post was informative for you too.

Please leave me a comment below and let me which technique you like better: masking or reverse masking. I invite you to give one or both techniques a try. 🙂

Joyful stamping!

~Stephanie

Stampin' Up!, Thank You Cards

A Color Challenge: PPA262

This week’s challenge for the Pals Paper Arts was a color challenge using the above three colors. Here’s what I came up with:

IMG_3234

Lining up the cardstock at an angle was just a little tricky. The Mint Macaron and Pool Party cardstock are not just strips, they cover the other half of the Very Vanilla cardstock. For the layers, I took a piece of colored cardstock that was large enough to cover the rest of the Very Vanilla cardstock and used Snail Adhesive to glue the colored cardstock down. Then I trimmed off the excess cardstock from the two sides with my Paper Snips.

I realized when I got done assembling my card that I used the same “Thanks” thinlit die that I used on the card from my last post “Joseph’s Coat Technique.”  I guess you can never have too many thank you cards. 🙂

Another thing I realized is that I didn’t use any ink or stamps on this card. I don’t know if that happens to me very often. Just goes to show you how much variety there can be in papercrafting. 🙂 Here are the links to the cardstock I used: Mint Macaron, Pool Party, Tip Top Taupe, Very Vanilla.

My favorite parts of this card are the Metal Rimmed Pearls. I think they added just what was needed to make the card feel complete. I really liked how they tied in with the Tip Top Taupe cardstock.

Joyful stamping!

~Stephanie

Fall Cards, Stampin' Up!, Techniques

Joseph’s Coat Technique

Hello all! I apologize for not posting for over a week. I do intend to post every two or three days. I will get myself back on track. 🙂

Yesterday I had my Stampin’ Up! team meeting. Every other month our team does a card swap. This month’s swap theme is Fall/Halloween.  We wanted to get a jump start on ideas for the upcoming season. I went with the Fall option for my swap card.

In reading through some posts of blogs that I subscribe to, I was reminded of the Joseph’s Coat technique. I had never tried it so I decided to give it a go. I love the effect. I think it is perfect for getting the right look for fall foliage. 🙂

This technique involves a bit of sponging. I thought I would first give a tip on how I use Stampin’ Up!’s Stamping Sponges and then let you jump into the tutorial on the technique.

stamping sponges             IMG_3230

When you purchase the Stamping Sponges they come whole like the above picture on the left. I cut my sponges into fourths and label them, attaching the label to the sponge with the Handheld Stapler, as you can see in the above picture on the right.

Here is the picture/written tutorial on the Joseph’s Coat technique:

  1. Sponge your favorite combination of fall colors onto a piece of Whisper White Cardstock.

IMG_3219

(1. I started with Daffodil Delight)

IMG_3220

(1. I followed the Daffodil Delight with Tangerine Tango.)

IMG_3221

(1. I finished my sponging with Real Red.)

IMG_3222

2. After sponging is completed, rub the Embossing Buddy over the entire cardstock. This will remove the static so that the embossing powder does not stick to areas you don’t want it to.

IMG_3224

3. Stamp your image in Versamark Ink (I used an image from the stamp set “Lovely as a Tree“) and sprinkle with Clear Stampin’ Emboss Powder. (I didn’t show a picture of the stamping because the Versamark ink is clear and it would have been very hard to see.)

IMG_3223

(3. After you tap off the excess powder it should look like this. Even thought the powder is white now, it will turn clear when you heat set it.)

IMG_3225

4. Use the Heat Tool to heat the powder so that it melts and becomes clear. The transformation is a little magical. 🙂 Be sure to heat all of the powder. Tilt the cardstock around in the light to make sure you can see that all the powder is shiny.

IMG_3226

5. Use a Brayer to apply Early Espresso ink to the entire piece of cardstock. The embossing resists the ink.

IMG_3227

6. The last step is to rub a Kleenex over the cardstock to pick up any ink that is sitting on top of the embossing.

IMG_3229

7. After the technique piece is done you just have to assemble your card.  Below is my completed card. I added a Tangerine Tango layer between the technique piece and the Early Espresso card base. I used the Hello You thinlits dies for my sentiment. You’ll need the Big Shot to use the thinlits dies. I chose Real Red cardstock for the sentiment to try to bring out the Real Red sponging.

IMG_3231

I hope you enjoyed this technique and will give it a try. 🙂

Joyful stamping!

~Stephanie

Birthday Cards, Congratulations Cards, Stampin' Up!, Thank You Cards

Elegant or Edgy

Hello! I have two cards for you today that couldn’t be more different from each other. Even though they are two distinct styles, I had a lot of fun creating them both. The first is serene & rustic, while the second is bold & modern. After checking out the two cards, leave me a comment below and let me know which style you prefer. I love them both because I have a blast experimenting with all sort of styles of cards. 🙂


Elegant

Celebrating You Butterfly Thinlits Brick TIEF Card

Close Up Celebrating You Butterfly Thinlits Brick TIEF Card

The supplies used on this first card are the Crazy About You Stamp Set, Brick Wall Embossing Folder, Butterflies Thinlits Dies, Big Shot Machine, Banner Triple Punch, Rhinestone Basic Jewels, Sahara Sand Cardstock, Soft Sky Cardstock, Pink Pirouette Cardstock, Whisper White Cardstock, Glue Dots, Stampin’ Sponges (cut these into quarters), Crumb Cake Ink, & Sahara Sand ink. Both inks were sponged over the brick embossing to create the shabby chic look. Sentiment is stamped in Crumb Cake Ink.


Edgy

2015-2017 Thick Bakers Twine Thanks Card 

      Close Up Thick Baker's Twine Thanks Card

The supplies used for this second card are Blackberry Bliss Cardstock, Whisper White Cardstock, Metallic Sequin Assortment, Glue Dots, Stampin’ Dimensionals, Big Shot Machine, Hello You Thinlits Dies, and 2014-2016 In Color Thick Baker’s Twine. The last item is a retired Sale-A-Bration product from earlier this year.

Even though you can’t CASE (Copy And Share Everything) this card exactly, I really wanted to share this technique because you can still replicate the wrapping and stacking of the bakers twine with bakers twine from the current Stampin’ Up! Catalog. You can check out Stampin’ Up!’s current thick bakers twine offerings on p.158-159 of the Annual Catalog, or click over to my Online Store and entering “thick bakers twine” into the search box. I find the texture of all that thick bakers twine is really eye catching.


I hope you enjoyed these two cards. If there is a product or technique you have been wondering about, please leave a comment below and I will do my best to incorporate it into a card for this blog.

Joyful stamping!

~Stephanie