Birthday Cards, Shaker Cards, Stampin' Up!

Birthday Card for MOJO415

Hello all! I decided to try out another sketch blog. This one is called Mojo Monday and is sponsored by Verve Stamps. Here’s the sketch from this Monday’s challenge, MOJO415.


I decided to go a little bit outside of the box and make my card for this challenge a shaker card.  It’s been awhile since I played around with shaker cards and I have been wanting to do so for awhile. I had a lot of fun interpreting this sketch as a shaker card.

MojoMonday415View1

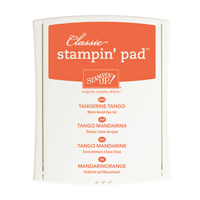
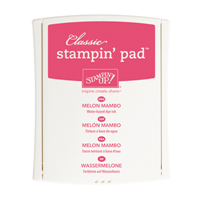
I can never find great lighting in my house, so I need to explain the colors a little bit. Some things that look orangey are actually pink. The card base, larger rectangle of the pocket, and the stamped star are all Melon Mabmbo, a pink Stampin’ Up! ink. The smaller rectangle of the pocket is Tangerine Tango.

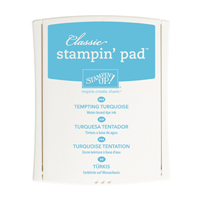
Here are the card dimensions: Melon Mambo base= 4 1/4″ x 11 (scored at 5 1/2″). Whisper White frame= 4″ x 5 1/4″ (I cut out the middle using my Stampin’ Trimmer- there is a 1/2″ border). Window sheet= 3 3/4″ x 5″. Tempting Turquoise strip= 1″ x 5 1/4″. Tangerine Tango rectangle= 1 3/4″ x 2 3/4″. Melon Mambo rectangle= 1 7/8″ x 2 7/8″. Bookmark= 2″ x 2 1/2″.


Here’s a closer look at the pocket. I really liked this idea of a little bookmark to fit in the pocket.

MojoMonday415View2


Hopefully the recipient of this card will take the bookmark out to admire the cute stamping on the lower half! 🙂

MojoMonday415Tag


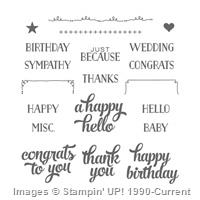
The pocket looked a little bare at first so I stamped one of the decorative images from  the Tin of Cards stamp set in Tangerine Tango ink on the Tangerine Tango rectangle for a cool tone-on-tone look. MojoMonday415View3


If I were to do this card over, I would probably make the card base Whisper White and the shaker card layer Melon Mambo. I’m feeling like this card could use a little more Melon Mambo. I’m still happy with it though. 🙂

Leave me a comment below and let me know your thoughts. I welcome constructive criticism!

Joyful stamping!

~Stephanie

Price: $5.25

Supply List

Built for Free Using:  My Stampin Blog

Stampin' Up!, Techniques, Tutorials

Embossing Paste with the Reverse Masking Technique

Hello all! I’m excited to share with you card #3 of my 4 day series on embossing paste. I think it is my favorite so far. Interestingly, it is the first embossing paste card I made, but for various reasons I decided to change the posting order.

This card uses another stencil from the Happy Patterns Decorative Masks pack.  Just like in my last post, I used white embossing paste and sprinkled Dazzling Diamonds on top before it dried.

IMG_3249

I love how the sponged/embossed circle really draws your eye to the fun “happy” cutout. I honestly love these word thinlits. I just had to add the sequins for a little more sparkle. 🙂

Other supplies used on this card: Melon Mambo cardstock, Basic Black cardstock, Whisper White cardstock, Melon Mambo ink, Crushed Curry ink, Memento Black ink, & Crazy About You stamp set.

In case you are new to the reverse masking technique, I’ve included a few pictures to give you an idea of how to go about this technique. ***Note: I didn’t think to do this until after I had assembled the card. Don’t be misled by the sponging/embossing paste already on my mask. 🙂

*First you will need to punch out an area from a larger piece of cardstock. It does not have to be a circle. This larger cardstock needs to be bigger than the piece you will put under it so as not to get anything (like sponging or embossing paste) in areas you want blank.

IMG_3275

*Second you will need to secure the mask over the cardstock you want to decorate. It is very helpful to secure the mask in place with washi tape (or another easily removable adhesive) so that it doesn’t slip around. You don’t want to get anything under the mask. One of my favorite parts of masking is taking off the mask and revealing the nice, crisp edge. 🙂

IMG_3277

Masking vs. Reverse Masking: When I started writing this post I had these two terms confused. I started wondering if I was describing the right technique, so I did some research and was very surprised by what I found. First, it is necessary to define the term “mask.” A mask is a cover or shield used to protect the surface beneath it from the mediums being applied.

With the masking technique you place the mask down, then spray or brush or paint  around the mask, & finally remove it to reveal an untouched area surrounded by color and/or texture. See below example I found on Pinterest.

Masking technique

Logically, reverse masking (the technique I used for this post’s embossing paste card) is using the larger piece of cardstock and applying color inside of the mask. Below is another card I made a long time ago that is an example of reverse masking.

IMG_3180

I had a lot of fun with this post and learned a lot. I’m so glad I now know the difference between these two closely related techniques! I hope this post was informative for you too.

Please leave me a comment below and let me which technique you like better: masking or reverse masking. I invite you to give one or both techniques a try. 🙂

Joyful stamping!

~Stephanie

Birthday Cards, Congratulations Cards, Stampin' Up!, Thank You Cards

Elegant or Edgy

Hello! I have two cards for you today that couldn’t be more different from each other. Even though they are two distinct styles, I had a lot of fun creating them both. The first is serene & rustic, while the second is bold & modern. After checking out the two cards, leave me a comment below and let me know which style you prefer. I love them both because I have a blast experimenting with all sort of styles of cards. 🙂


Elegant

Celebrating You Butterfly Thinlits Brick TIEF Card

Close Up Celebrating You Butterfly Thinlits Brick TIEF Card

The supplies used on this first card are the Crazy About You Stamp Set, Brick Wall Embossing Folder, Butterflies Thinlits Dies, Big Shot Machine, Banner Triple Punch, Rhinestone Basic Jewels, Sahara Sand Cardstock, Soft Sky Cardstock, Pink Pirouette Cardstock, Whisper White Cardstock, Glue Dots, Stampin’ Sponges (cut these into quarters), Crumb Cake Ink, & Sahara Sand ink. Both inks were sponged over the brick embossing to create the shabby chic look. Sentiment is stamped in Crumb Cake Ink.


Edgy

2015-2017 Thick Bakers Twine Thanks Card 

      Close Up Thick Baker's Twine Thanks Card

The supplies used for this second card are Blackberry Bliss Cardstock, Whisper White Cardstock, Metallic Sequin Assortment, Glue Dots, Stampin’ Dimensionals, Big Shot Machine, Hello You Thinlits Dies, and 2014-2016 In Color Thick Baker’s Twine. The last item is a retired Sale-A-Bration product from earlier this year.

Even though you can’t CASE (Copy And Share Everything) this card exactly, I really wanted to share this technique because you can still replicate the wrapping and stacking of the bakers twine with bakers twine from the current Stampin’ Up! Catalog. You can check out Stampin’ Up!’s current thick bakers twine offerings on p.158-159 of the Annual Catalog, or click over to my Online Store and entering “thick bakers twine” into the search box. I find the texture of all that thick bakers twine is really eye catching.


I hope you enjoyed these two cards. If there is a product or technique you have been wondering about, please leave a comment below and I will do my best to incorporate it into a card for this blog.

Joyful stamping!

~Stephanie